
The Two Factor plugin adds an extra layer of security to your BuddyBoss website by requiring members to complete a second verification step when signing in. Members can manage their authentication methods from the frontend Account Settings.
Before enabling the integration in BuddyBoss, you need to download, install, and activate the Two Factor plugin.
Install and Activate the Two-Factor Plugin
Before configuring the Two-Factor plugin, install and activate the Two-Factor plugin on your WordPress website.
Enable Two-Factor Authentication in BuddyBoss
Once the Two Factor plugin is activated:
- Navigate to WordPress Dashboard > BuddyBoss > Settings.
- Scroll down to BuddyBoss Integrations.
- Locate Two-Factor Authentication.
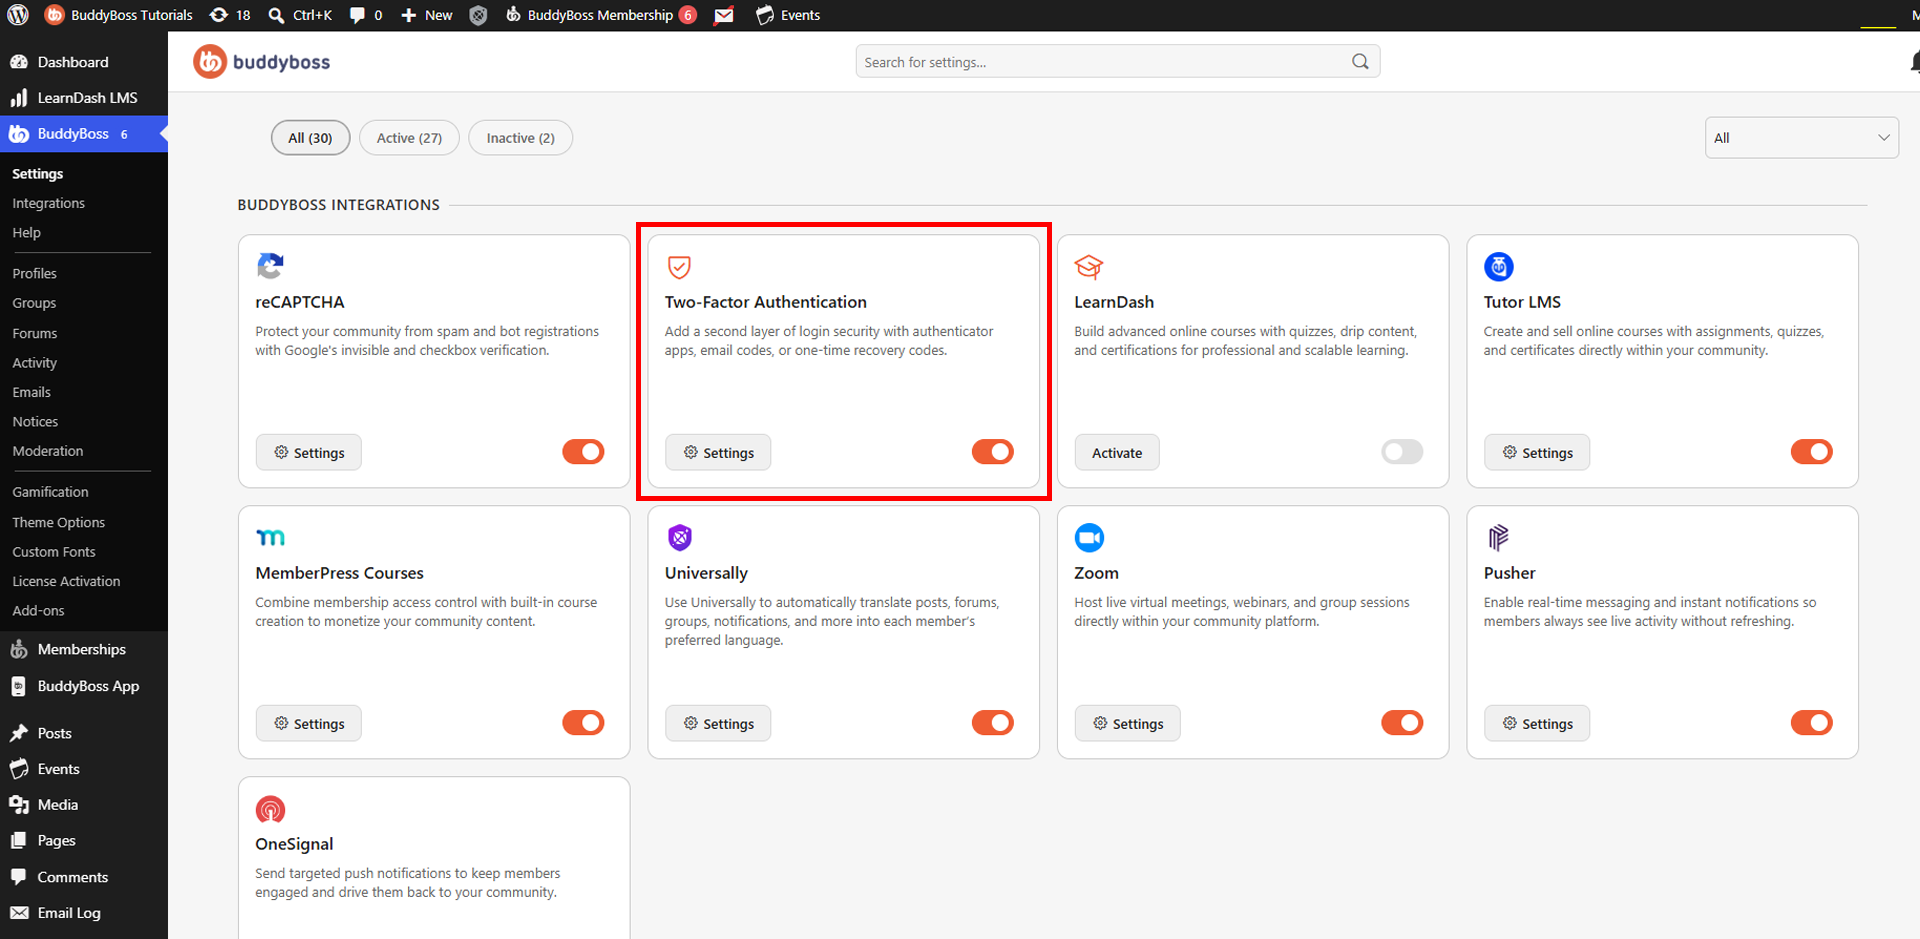
- Enable the integration.
- Click Settings.
The Two-Factor Settings page allows you to choose which authentication providers are available to your members. The available options include:
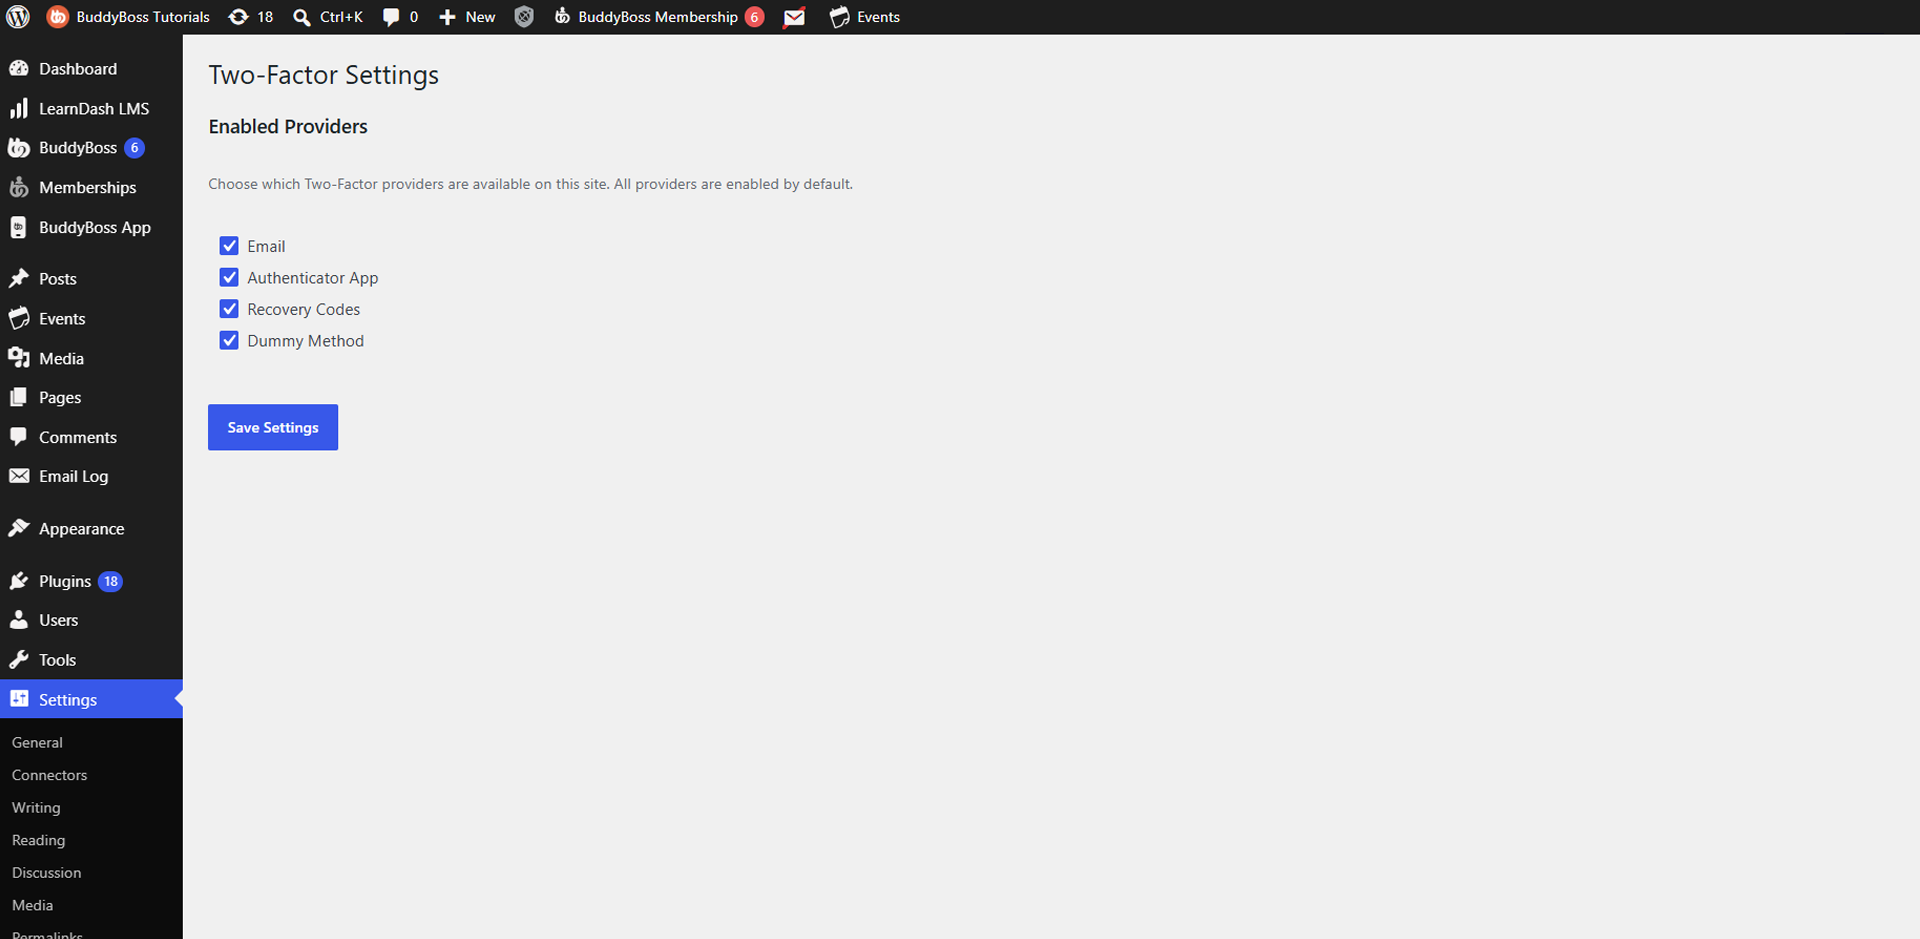
- Email – Sends an authentication code to the member’s email address.
- Authenticator App – Generates authentication codes using a compatible authenticator app.
- Recovery Codes – Provides single-use codes that members can use to regain access to their account if they lose access to their primary authentication method. This is an important backup method. When Recovery Codes are enabled by the site administrator, members are required to enable and generate their Recovery Codes before they can enable any other Two-Factor authentication method. Members should store these codes in a secure location, as each recovery code can only be used once.
- Dummy Method – Provides a testing method for two-factor authentication. The Dummy Method is intended for testing and should not be used as an authentication method on a live site.
Select the providers you want to make available, then click Save Settings.
Important: Make sure Recovery Codes are not disabled from the Two-Factor Settings page. Recovery Codes provide members with a backup method for accessing their account if they lose access to their primary authentication method.
Manage Two-Factor Authentication from the Frontend
Once Two-Factor Authentication is enabled, members can manage their authentication methods directly from the website frontend.
- Log in to your account on the website.
- Open Account Settings.
- Select Security.
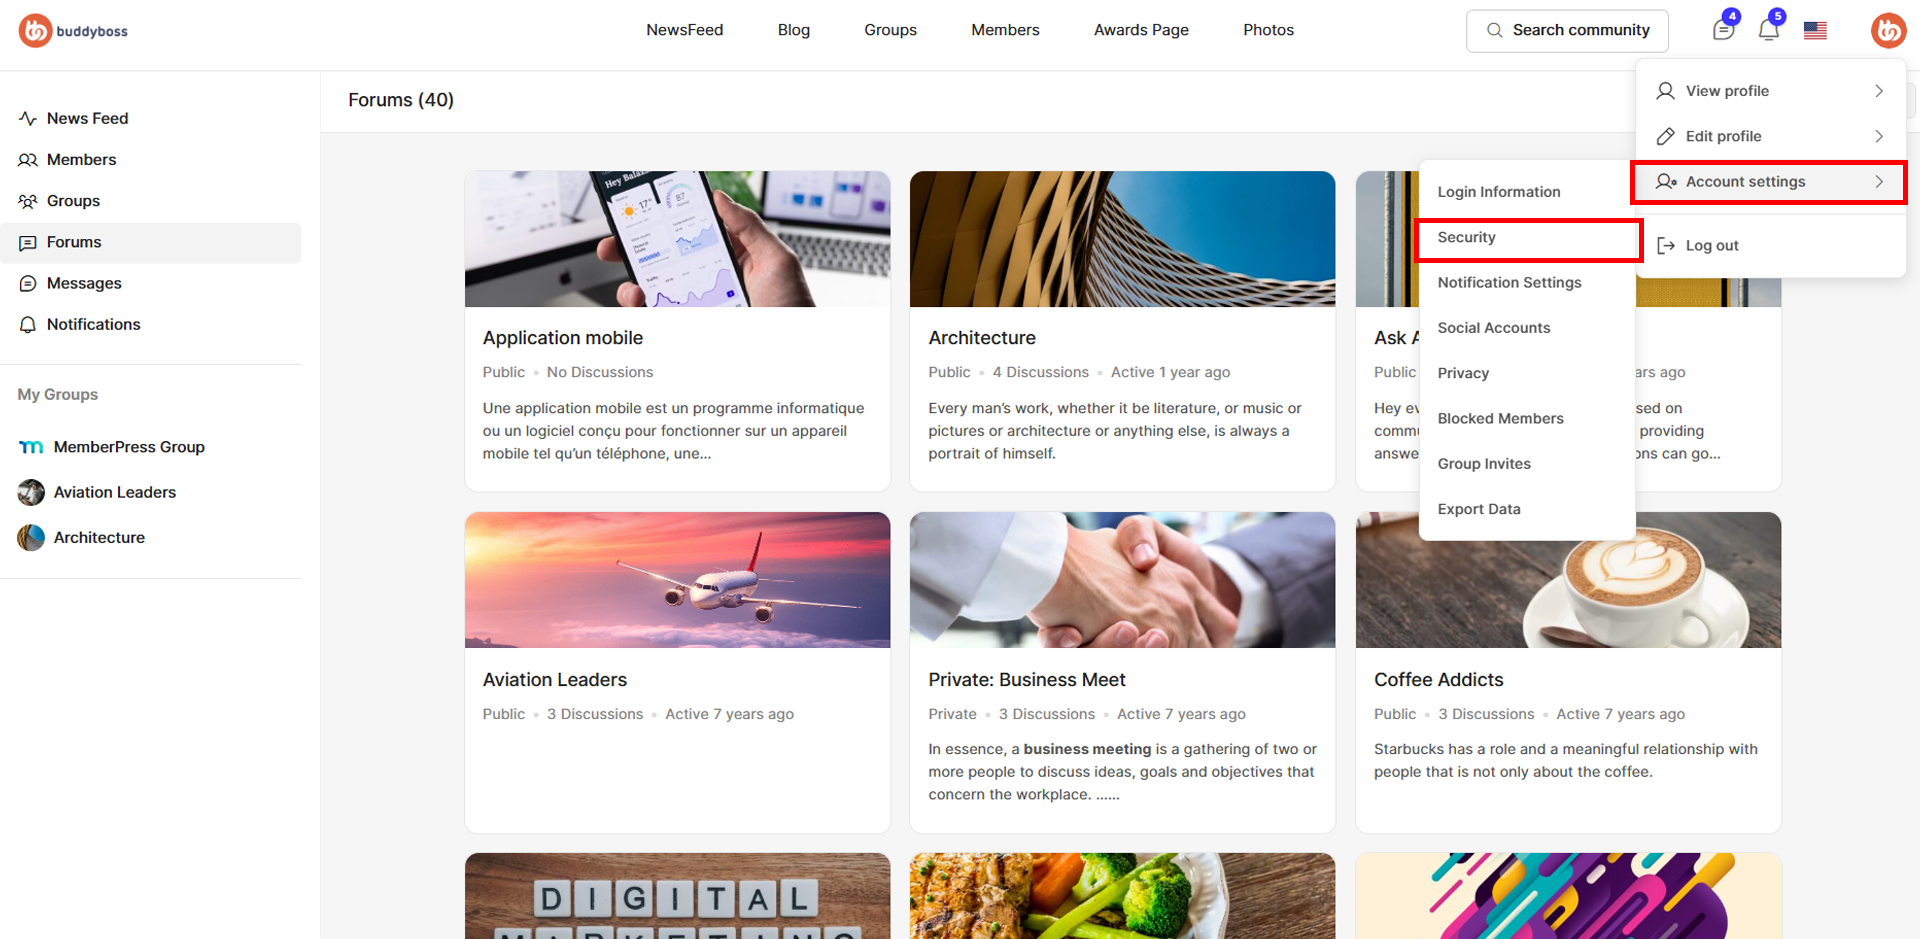
- Review the available authentication methods and their current status.
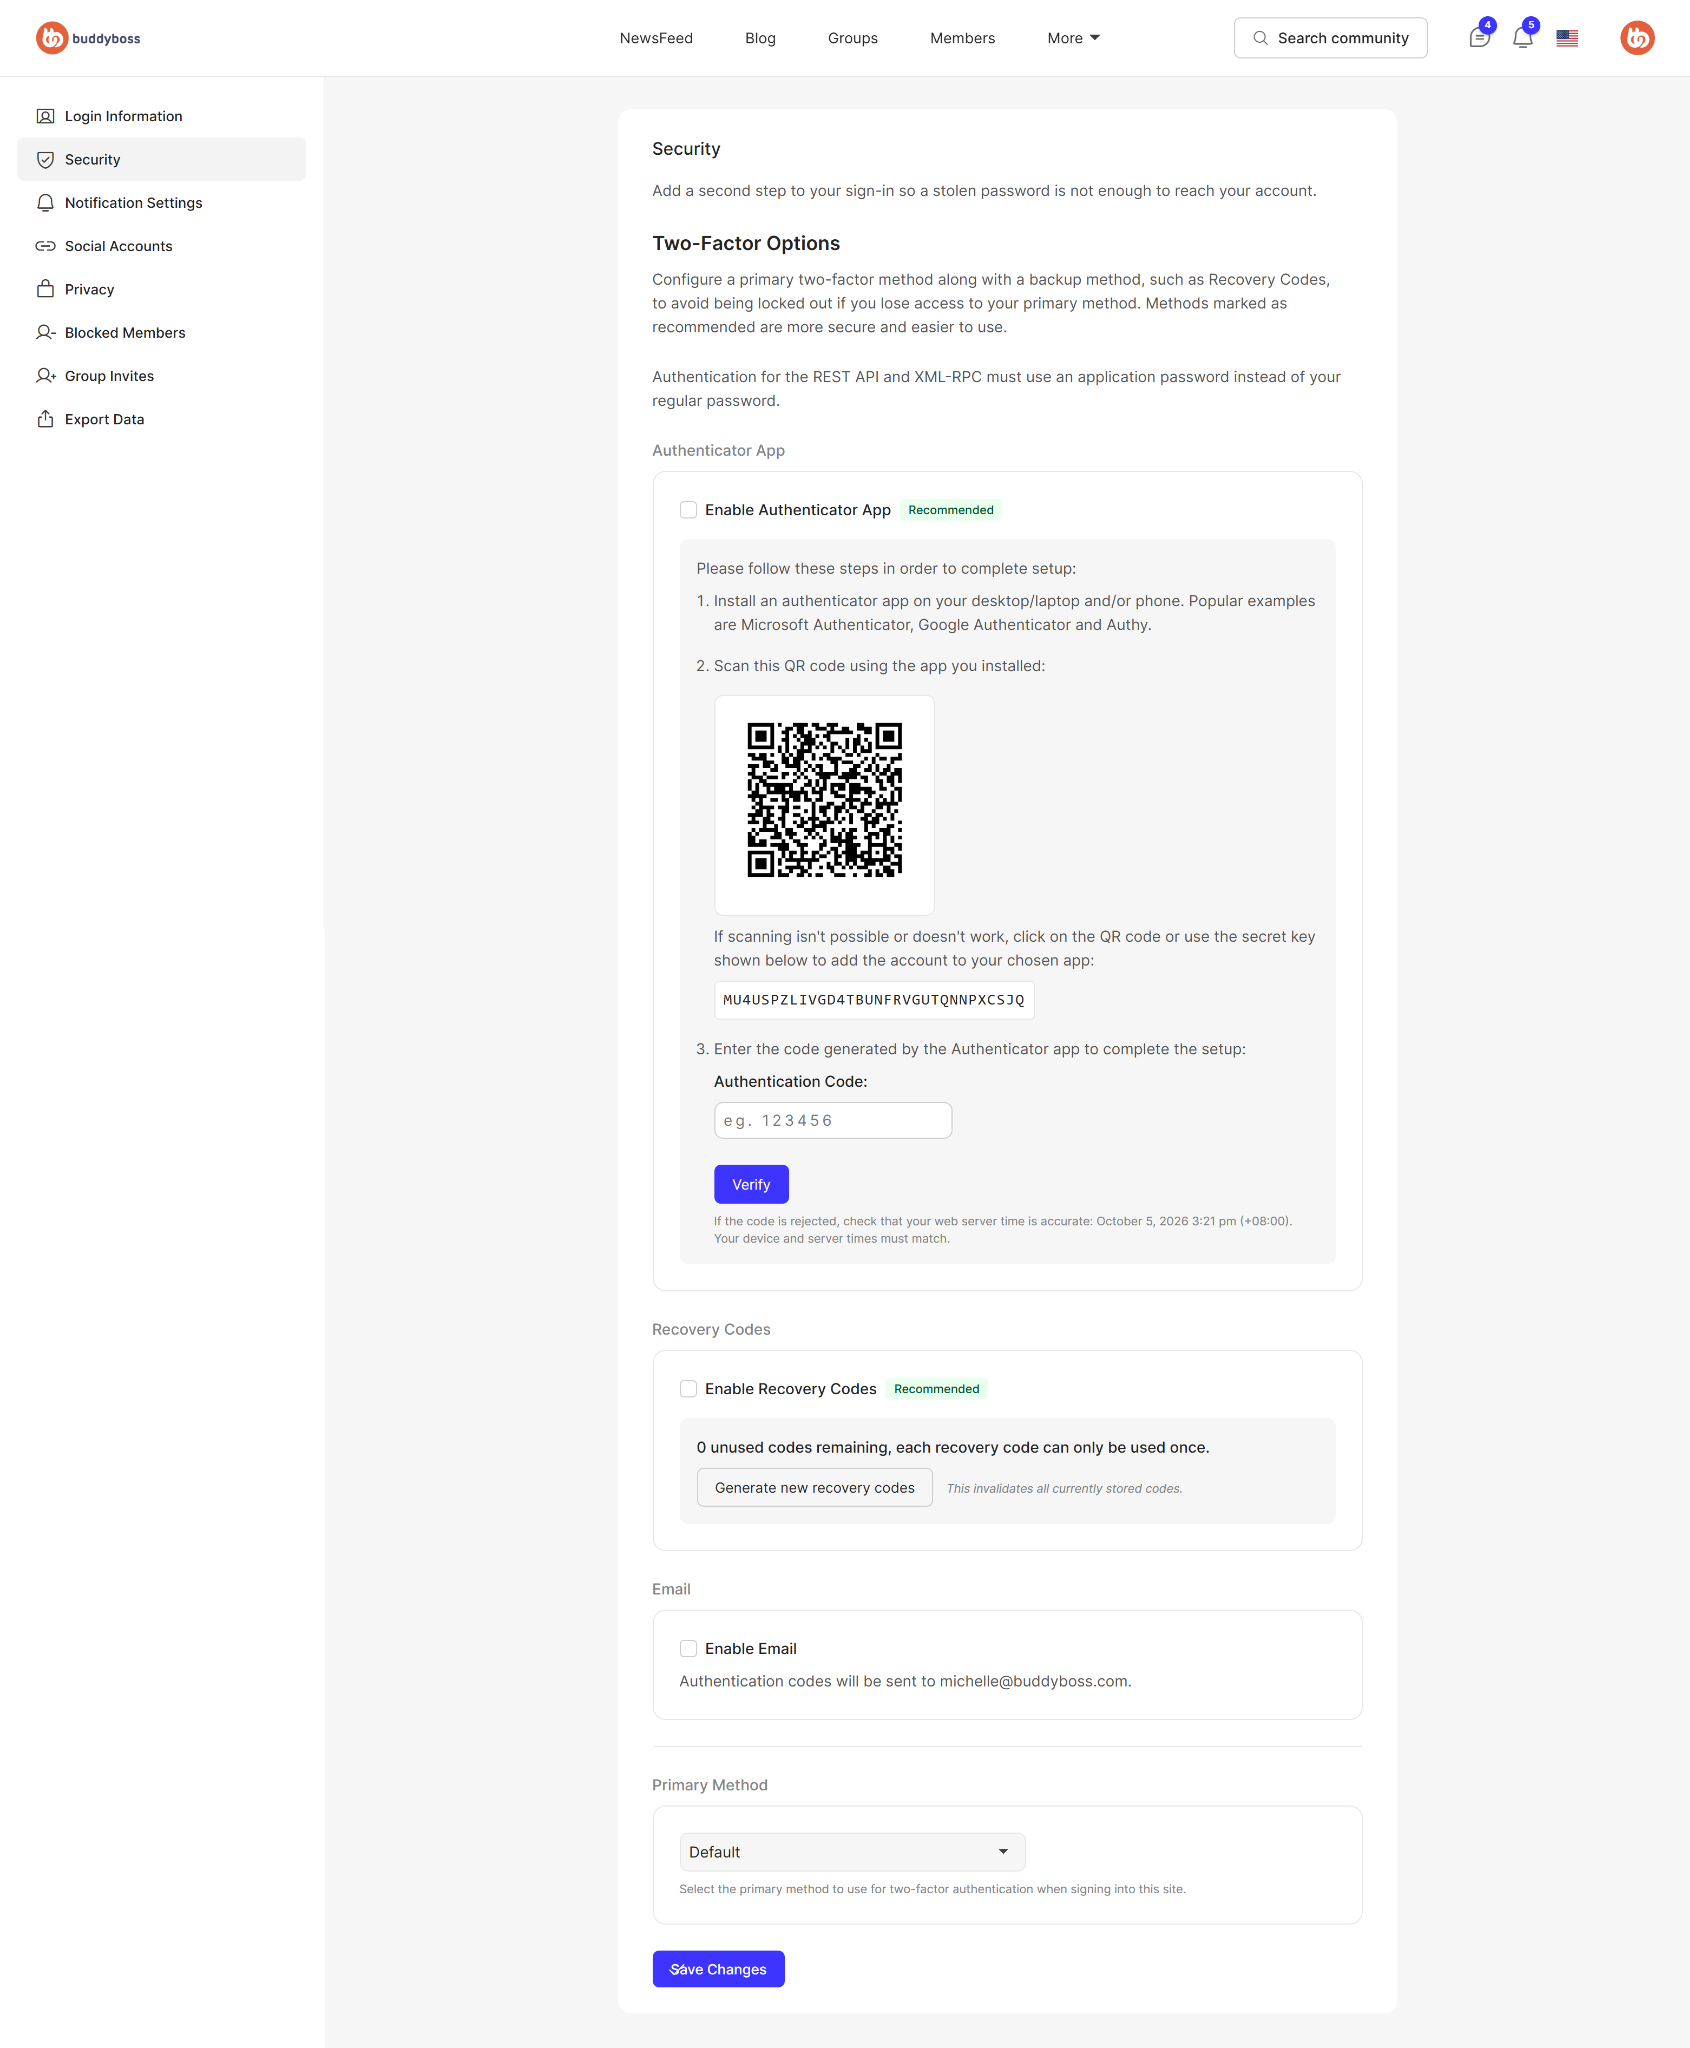
From the Security settings, members can enable or disable available methods, view their remaining recovery codes, and select the authentication method they prefer to use when signing in.
Manage Two-Factor Authentication from the Frontend
Once Two-Factor Authentication is enabled by the site administrator, members can configure their authentication methods directly from the website frontend.
- Log in to your account on the website.
- Go to Account Settings > Security.
- Under Two-Factor Options, configure the authentication methods you want to use.
The available options depend on which providers the site administrator has enabled.
Set Up an Authenticator App
The Authenticator App method generates authentication codes using an authenticator application on your phone, desktop, or laptop.
- Under Authenticator App, select Enable Authenticator App.
- Install a compatible authenticator app, such as Microsoft Authenticator, Google Authenticator, or Authy.
- Scan the displayed QR code using your authenticator app.
- If you cannot scan the QR code, use the displayed secret key to add the account manually.
- Enter the authentication code generated by your authenticator app in the Authentication Code field.
- Click Verify.
Once verified, the Authenticator App can be used as a two-factor authentication method when signing in.
Configure Recovery Codes
Recovery Codes provide a backup method for accessing your account if you lose access to your primary authentication method.
- Under Recovery Codes, select Enable Recovery Codes.
- Click Generate new recovery codes.
- Store the generated codes somewhere secure.
Each recovery code can only be used once. The Security settings display how many unused recovery codes remain.
Note: Generating new recovery codes invalidates any previously generated recovery codes.
Enable Email Authentication
Email authentication allows you to receive authentication codes at the email address associated with your account.
Under Email, select Enable Email. Authentication codes will be sent to the email address displayed in your Security settings.
Select Your Primary Authentication Method
After configuring your authentication methods:
- Scroll to Primary Method.
- Open the dropdown and select the authentication method you want to use as your primary method when signing in.
- Save your changes.
Note:
It is recommended to configure a primary two-factor authentication method together with a backup method, such as Recovery Codes,
If members have already configured Two-Factor Authentication for their accounts, do not disable the Two-Factor Authentication integration from the BuddyBoss settings. Keep the integration enabled so members can continue using and managing their configured authentication methods.
Related Article: How Two-Factor Plugin Works in the BuddyBoss App