In this tutorial I will teach you how to set up automated database backups for WordPress.
It is extremely important that you back up your database on a regular schedule. What if your server crashes? Or you forget to pay your hosting bill? Or your site gets hacked? Or you mess something up? All of your data could be permanently lost, which would be a shame considering how easy it is to prevent the problem. With automated backups, you can restore your entire site from one of your database backups and be back up and running as if nothing ever happened.
Installing a database backup plugin
There are lots of methods to set up WordPress database backups, and I’ll focus on the plugin that I have personally used for many years. The plugin is called WP-DBManager. I recommend this plugin because it has proven to be dependable, allows for continuous backups to your server and lets you email the backups to yourself.
1. Install the WP-DBManager plugin.
2. Activate the plugin.
3. Upon activation, you will immediately get an error message alerting you that “Your backup folder MIGHT be visible to the public”. We will fix this in the next step.

4. Log into your website via FTP and locate /wp-content/plugins/wp-dbmanager/htaccess.txt. This is the file that needs to be moved manually.

5. Move the file htaccess.txt into the newly created backup folder located at /wp-content/backup-db/. Then rename the file to .htaccess. You many need to turn on “hidden files” in your FTP client to see .htaccess after renaming it. This should resolve the error message.

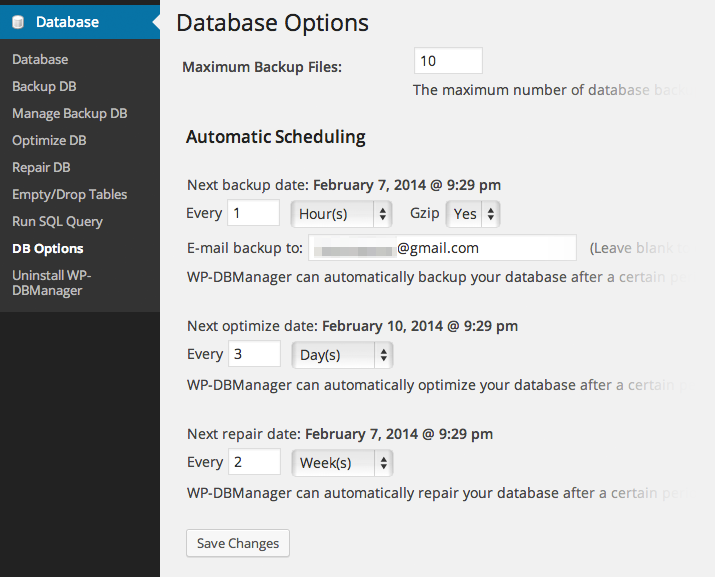
6. You should now see a new menu in your WordPress dashboard titled “Database”. Open it and navigate to “DB Options”. From here you can configure how many database files to keep, how often to back up, optimize and repair your database, and if you would like the database emailed to you. Configure your desired options and click “Save”.
I personally back up my sites every hour, because on a BuddyPress site there is constantly new activity being added to the database. I set the Gzip option to “Yes” which compresses your backups so they take up less space on the server. For Maximum Backup Files, I recommend at least 10, but you can set it to as many as you can realistically save to your server without causing storage problems.

7. The final step is to confirm that everything is actually working. Do not skip this step! Go back to your site’s file system via FTP and make sure that you see backup files in /wp-content/backup-db/. If you see a file backed up there, you’re all set. Next time you have a database problem, you can safely come back to this folder and grab an old copy (possibly from earlier that day!) to restore your site from.


