Introduction
The default WordPress login screen can feel generic and out of place on a branded site. BuddyBoss lets you swap it out for a fully customizable login/register interface—no extra plugins required. Follow these steps to enable and configure your custom page.
Enable the Custom Login/Register Screen
- In your WordPress admin, go to BuddyBoss Dashboard > Theme Options > Login & Registration.
- Toggle Custom Login/Register Screen to On.
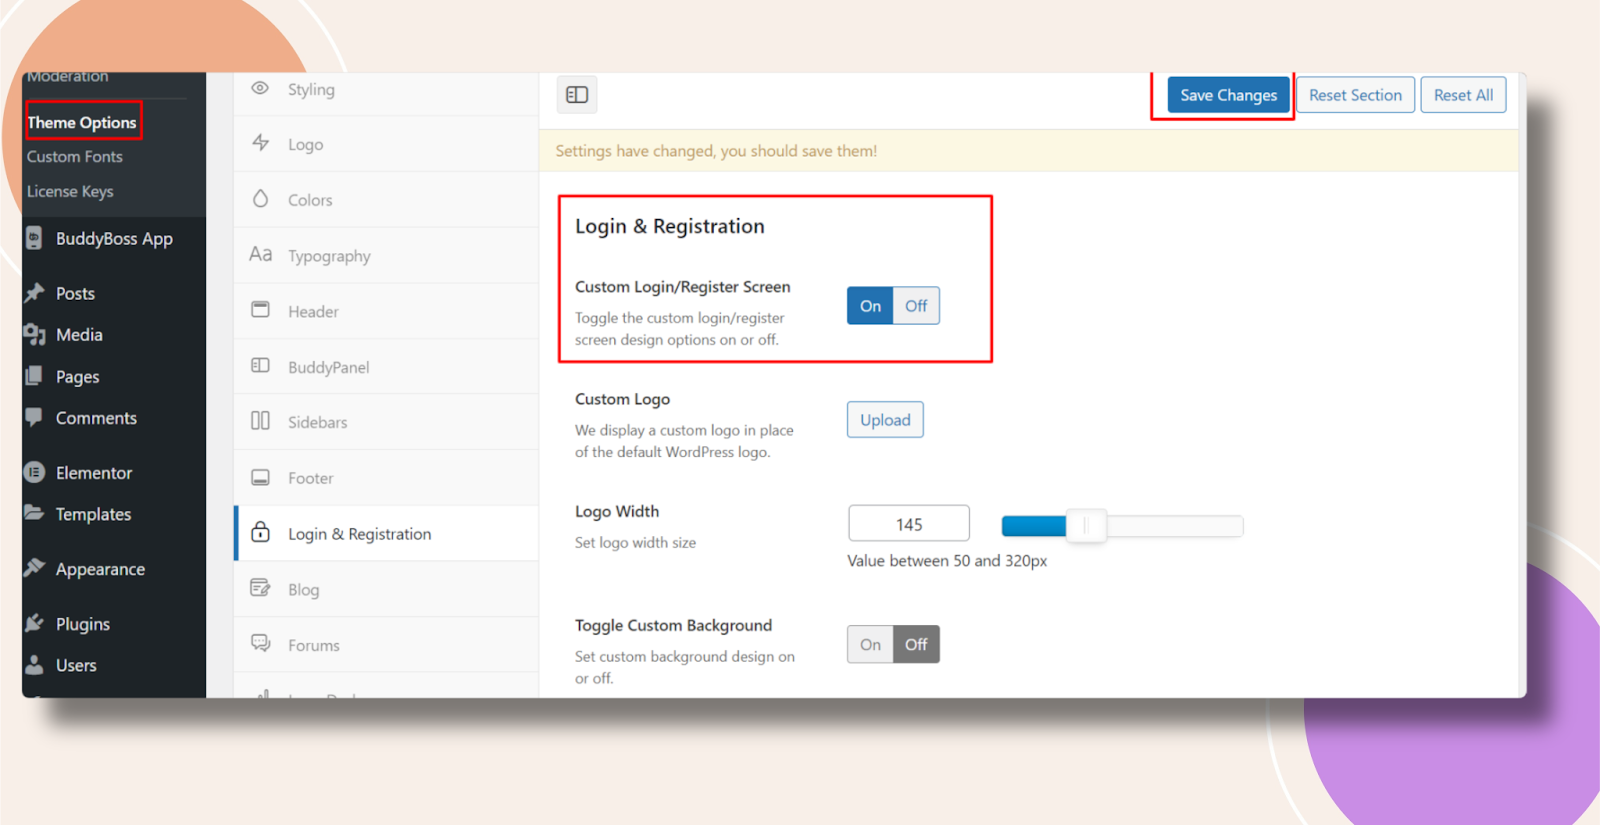
- Click Save Changes.
Once enabled, you can edit the login and registration layouts, add your branding, and adjust form fields directly in the Customizer or via the provided settings.
Troubleshooting and FAQs
Q: I don’t see the custom screen option—what should I check?
A: Ensure you’re running BuddyBoss Theme v2.0+ and have the latest BuddyBoss Platform plugin activated. Clear any caching layers and reload the Theme Options page.
Q: My custom layout isn’t appearing—why?
A: If you’re using a caching plugin or server cache, purge it after saving changes. Also verify no redirects or custom login plugins are overriding the default flow.