
The Zoom Meetings and Webinars in BuddyBoss integration allows you to create and manage Zoom meetings and webinars directly from the WordPress Block Editor. By adding the required permissions to your existing Server-to-Server OAuth App, BuddyBoss can access the Zoom functionality needed to manage these sessions.
You can create new meetings and webinars or add existing sessions to WordPress pages and posts using the Zoom Meeting and Zoom Webinar blocks. The same Server-to-Server OAuth App used for your main BuddyBoss Zoom integration is used for this functionality, so you do not need to create a separate Zoom app.
Before You Begin
Make sure you have already completed the Set Up Zoom Integration in BuddyBoss process and that your Server-to-Server OAuth App is activated and connected to your BuddyBoss website.
Your Zoom connection should already be configured under:
WordPress Dashboard > BuddyBoss > Settings > Integrations > Zoom > Settings
The Server-to-Server OAuth App should already include the required User scopes used by the main BuddyBoss Zoom integration.
Add the Meeting and Webinar Scopes
To create and manage meetings and webinars from BuddyBoss, add the required permissions to the same Server-to-Server OAuth App you created for the main Zoom integration.
- Sign in to the Zoom App Marketplace.
- Open the Server-to-Server OAuth App connected to your BuddyBoss website.
- Navigate to Scopes.
- Click + Add Scopes.
- Add the following meeting and webinar scopes:
- Create a meeting for a user — meeting:write:meeting:admin
- Create a webinar for a user — webinar:write:webinar:admin
- Delete a meeting — meeting:delete:meeting:admin
- Delete a webinar — webinar:delete:webinar:admin
- Update a meeting — meeting:update:meeting:admin
- Update a webinar — webinar:update:webinar:admin
- View a past meeting’s instances — meeting:read:list_past_instances:admin
- View a past webinar’s instances — webinar:read:list_past_instances:admin
- View a webinar — webinar:read:webinar:admin
- View meeting detail reports — report:read:meeting:admin
- Click Done after adding the required scopes.
- Save or update the Zoom app if prompted.
These permissions allow BuddyBoss to create, update, delete, and retrieve supported Zoom meeting and webinar information through your connected Zoom account.
Configure Zoom In-Browser Meetings
After adding the required Zoom scopes, configure Zoom In-Browser Meetings in BuddyBoss.
This allows members to attend supported Zoom meetings and webinars directly on your website.
- In your WordPress Dashboard, navigate to BuddyBoss > Settings > Integrations > Zoom > Settings.
- Scroll down to Zoom In-Browser Meetings.
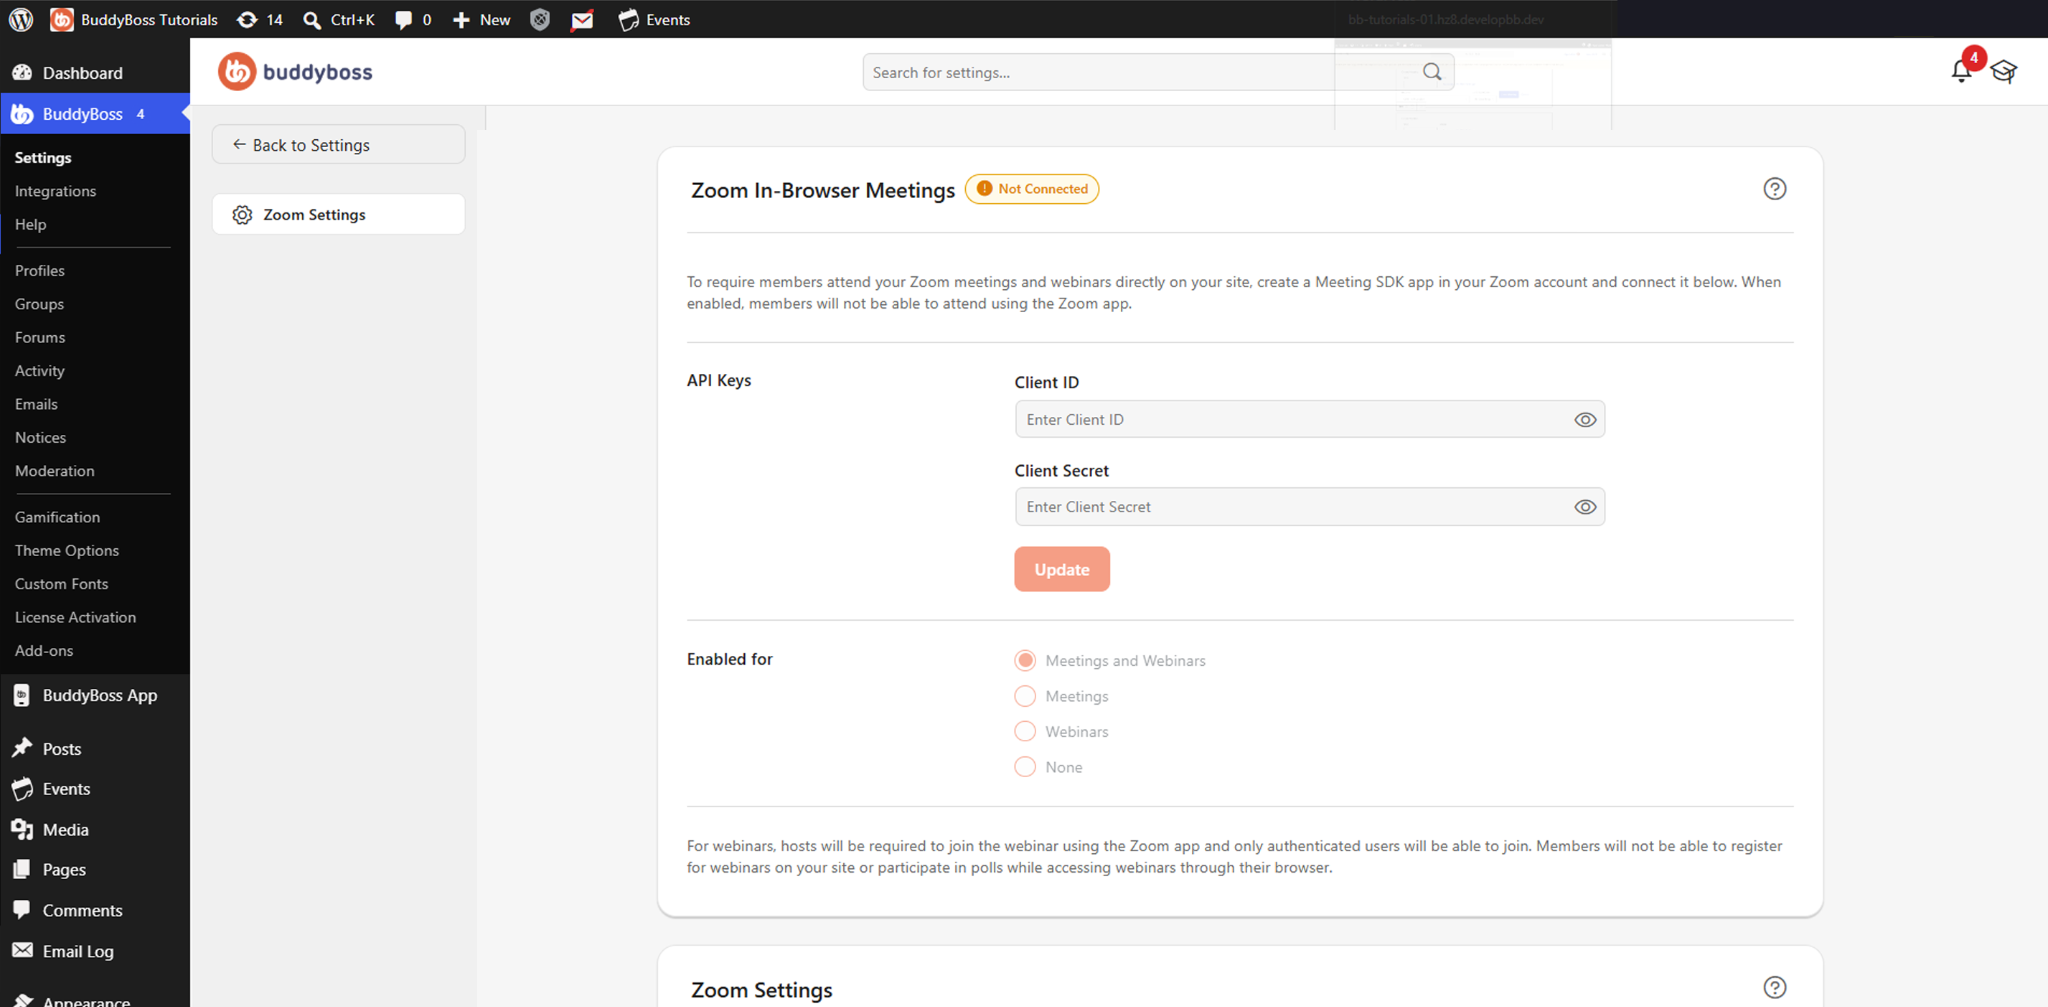
- Under API Keys, enter the Client ID.
- Enter the Client Secret.
- Connect the Zoom Meeting SDK. Once successfully connected, the status displays Connected.
- Under Enabled for, select where you want to enable in-browser access:
- Meetings and Webinars – Enables in-browser access for both.
- Meetings – Enables in-browser access for meetings only.
- Webinars – Enables in-browser access for webinars only.
- None – Disables in-browser access.
Once the connection and Enabled for settings are configured, you can proceed to create or add Zoom meetings and webinars using the WordPress Block Editor.
Add a Zoom Meeting to a Page or Post
Once the required scopes have been added, you can insert the Zoom Meeting block into a WordPress page or post.
- In your WordPress Dashboard, navigate to Pages > Add New Page or Posts > Add New Post.
- Open the Block Inserter.
- Search for /Zoom Meeting.
- Select the Zoom Meeting block.
Create a New Zoom Meeting
To create a meeting directly from the Block Editor:
- Click Create Meeting.
- Enter the meeting Title.
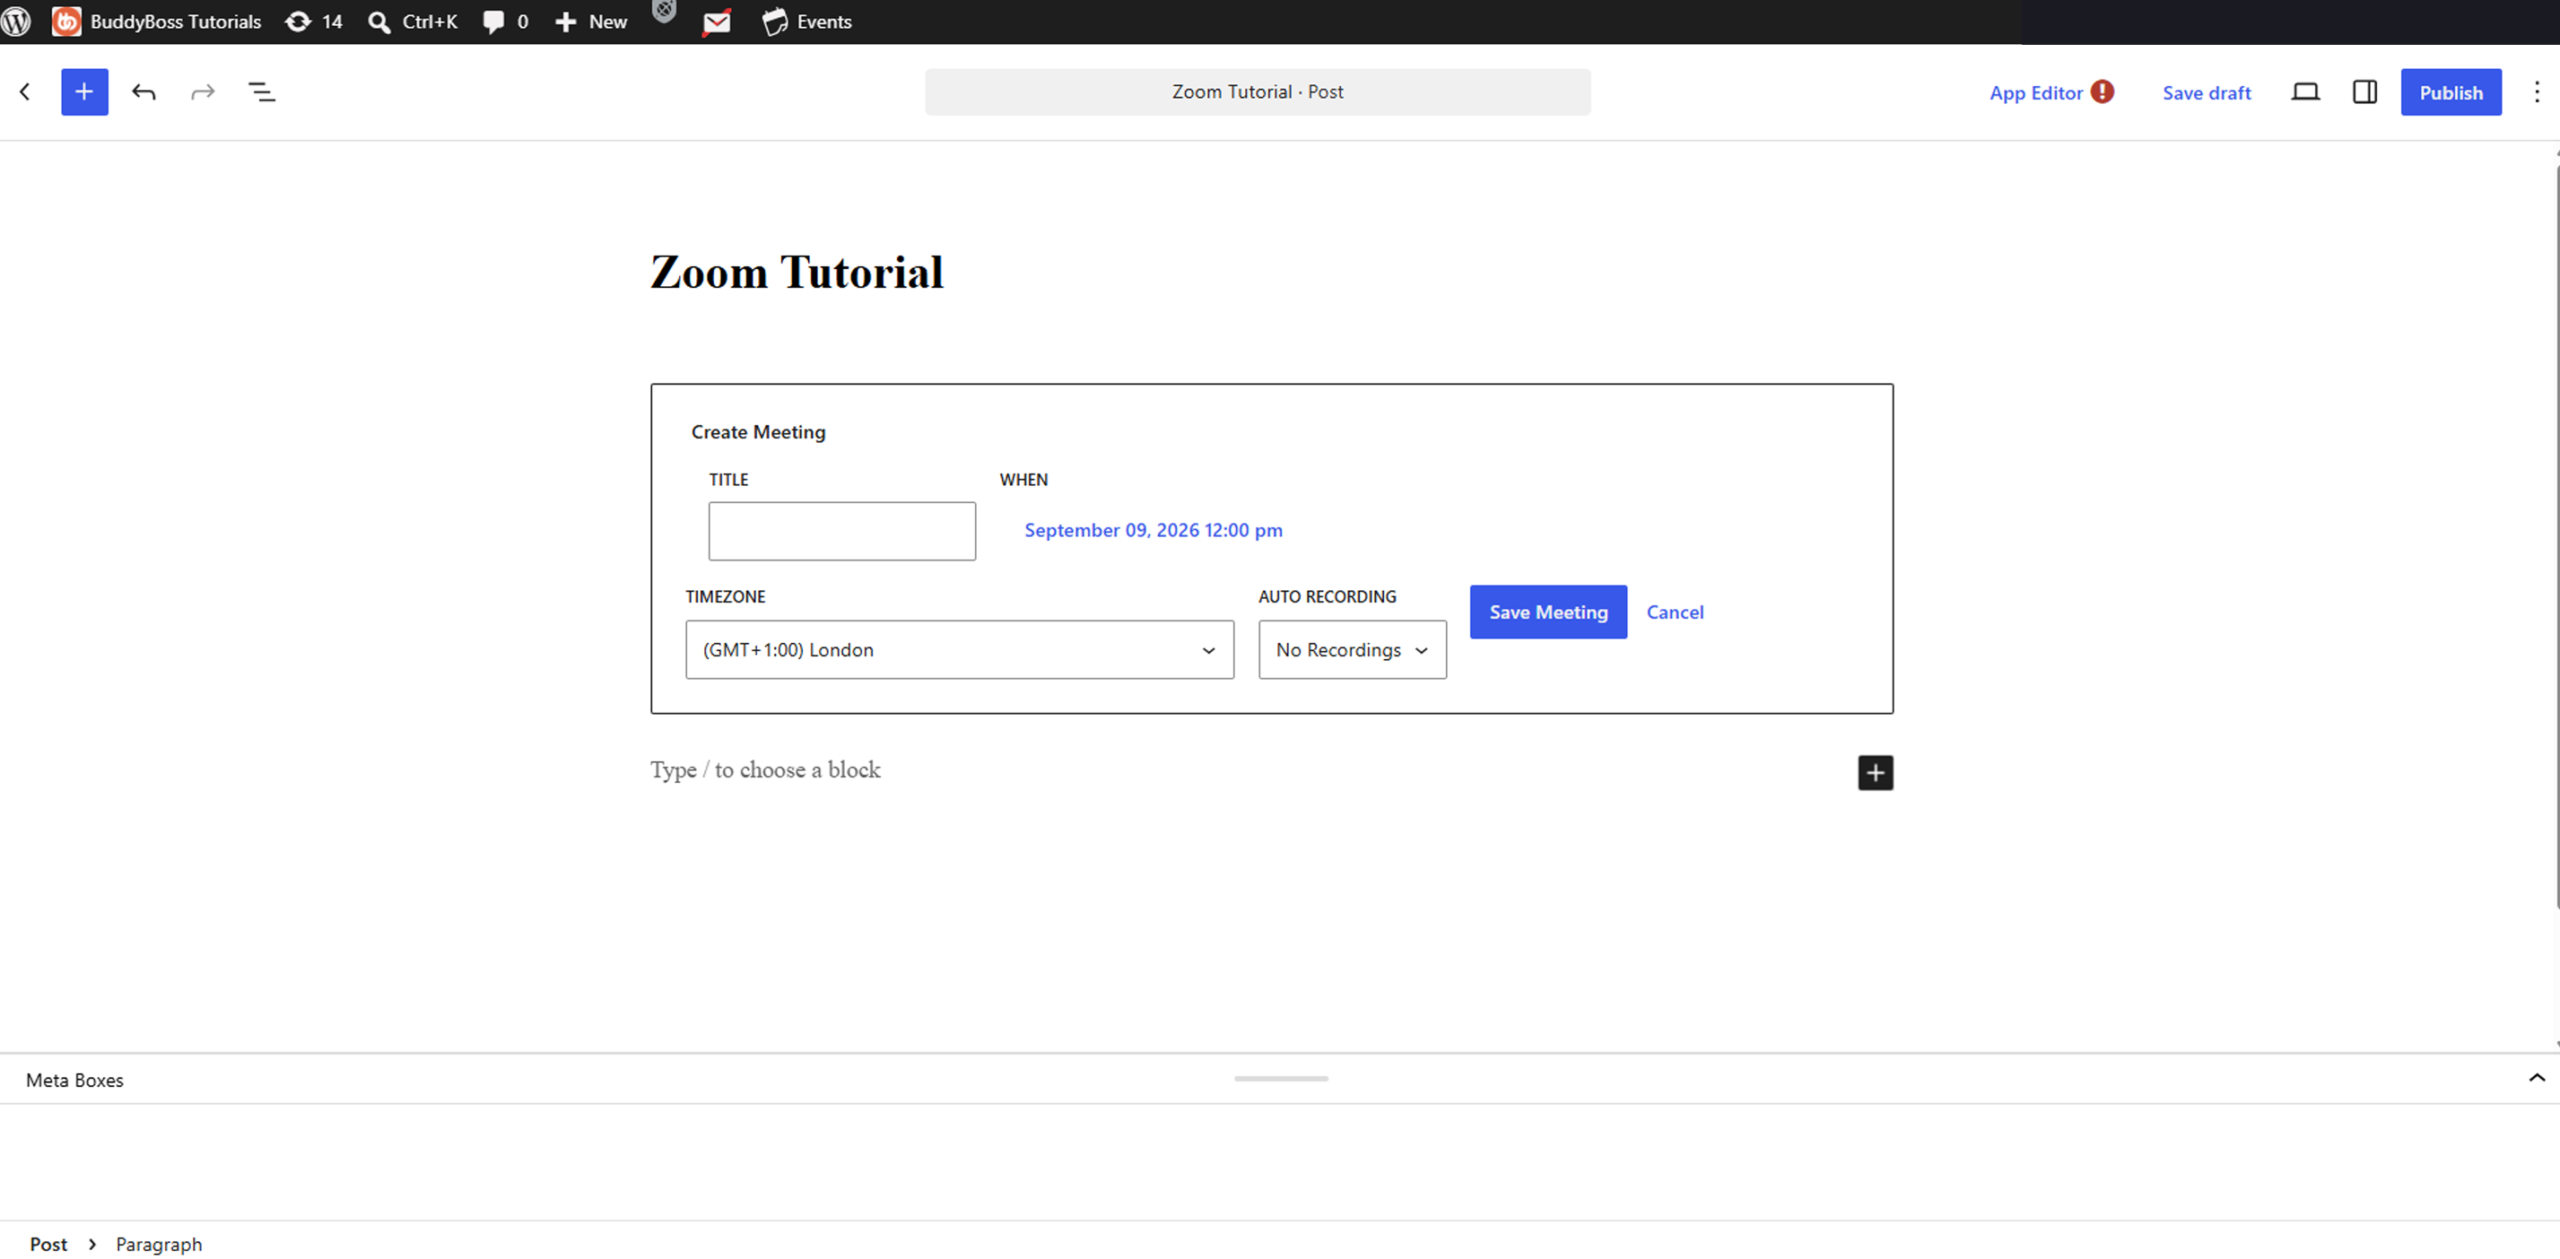
- Configure When the meeting will take place.
- Select the appropriate Timezone.
- Under Auto Recording, select your preferred recording option.
- Click Save Meeting.
The meeting is created through the Zoom account connected to your BuddyBoss website.
If the meeting has already been created in Zoom, select Add Existing Meeting instead.
Add a Zoom Webinar to a Page or Post
You can also insert a Zoom webinar using the Zoom Webinar block.
- Open an existing WordPress page or post, or create a new one.
- Open the Block Inserter.
- Search for /Zoom Webinar.
- Select the Zoom Webinar block.
Create a New Zoom Webinar
- Click Create Webinar.
- Enter the webinar Title.
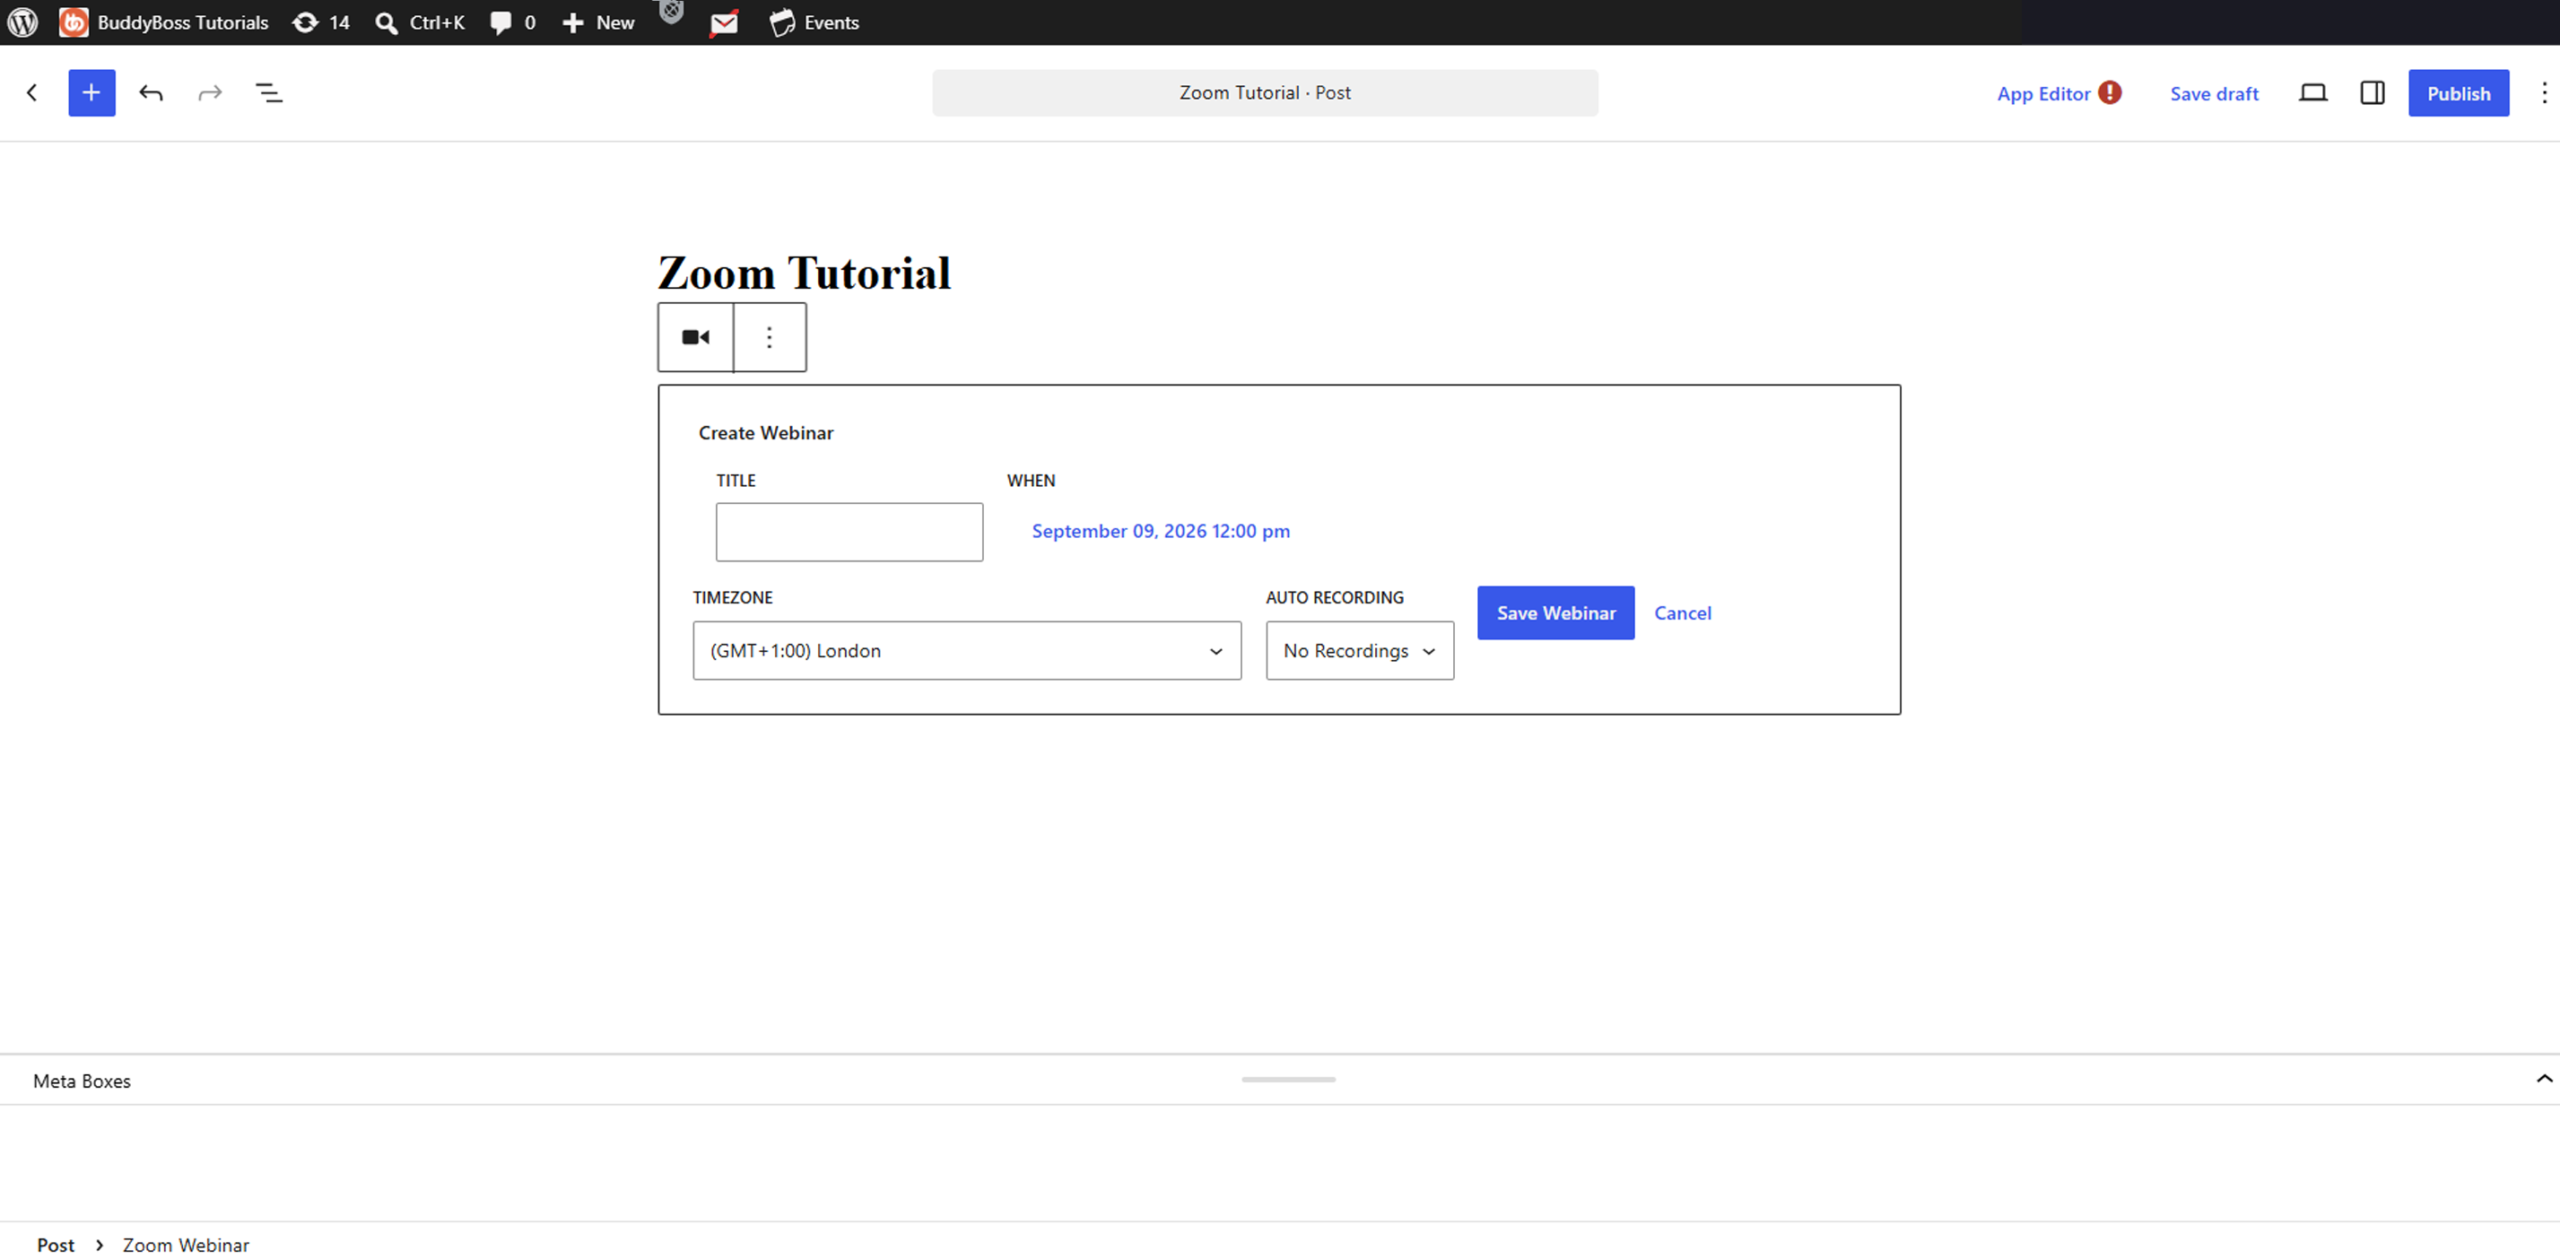
- Configure When the webinar will take place.
- Select the appropriate Timezone.
- Under Auto Recording, select your preferred recording option.
- Click Save Webinar.
If the webinar already exists in your Zoom account, select Add Existing Webinar instead.