The Zoom integration in BuddyBoss allows you to connect your Zoom account to your BuddyBoss website so you can create and manage Zoom meetings and webinars through supported BuddyBoss features. BuddyBoss currently uses a Zoom Server-to-Server OAuth App for the Zoom Gutenberg Blocks connection.
Note: You need the appropriate permissions in your Zoom account to create and activate a Server-to-Server OAuth app.
Before You Begin
Before setting up the Zoom integration, make sure the BuddyBoss Zoom plugin is installed and activated on your WordPress website. The plugin must be active before you can enable and configure the Zoom integration in BuddyBoss.
Important: An Admin account is required to create applications on the Zoom Marketplace.
Create a Server-to-Server OAuth App
- Go to the Zoom App Marketplace and sign in.
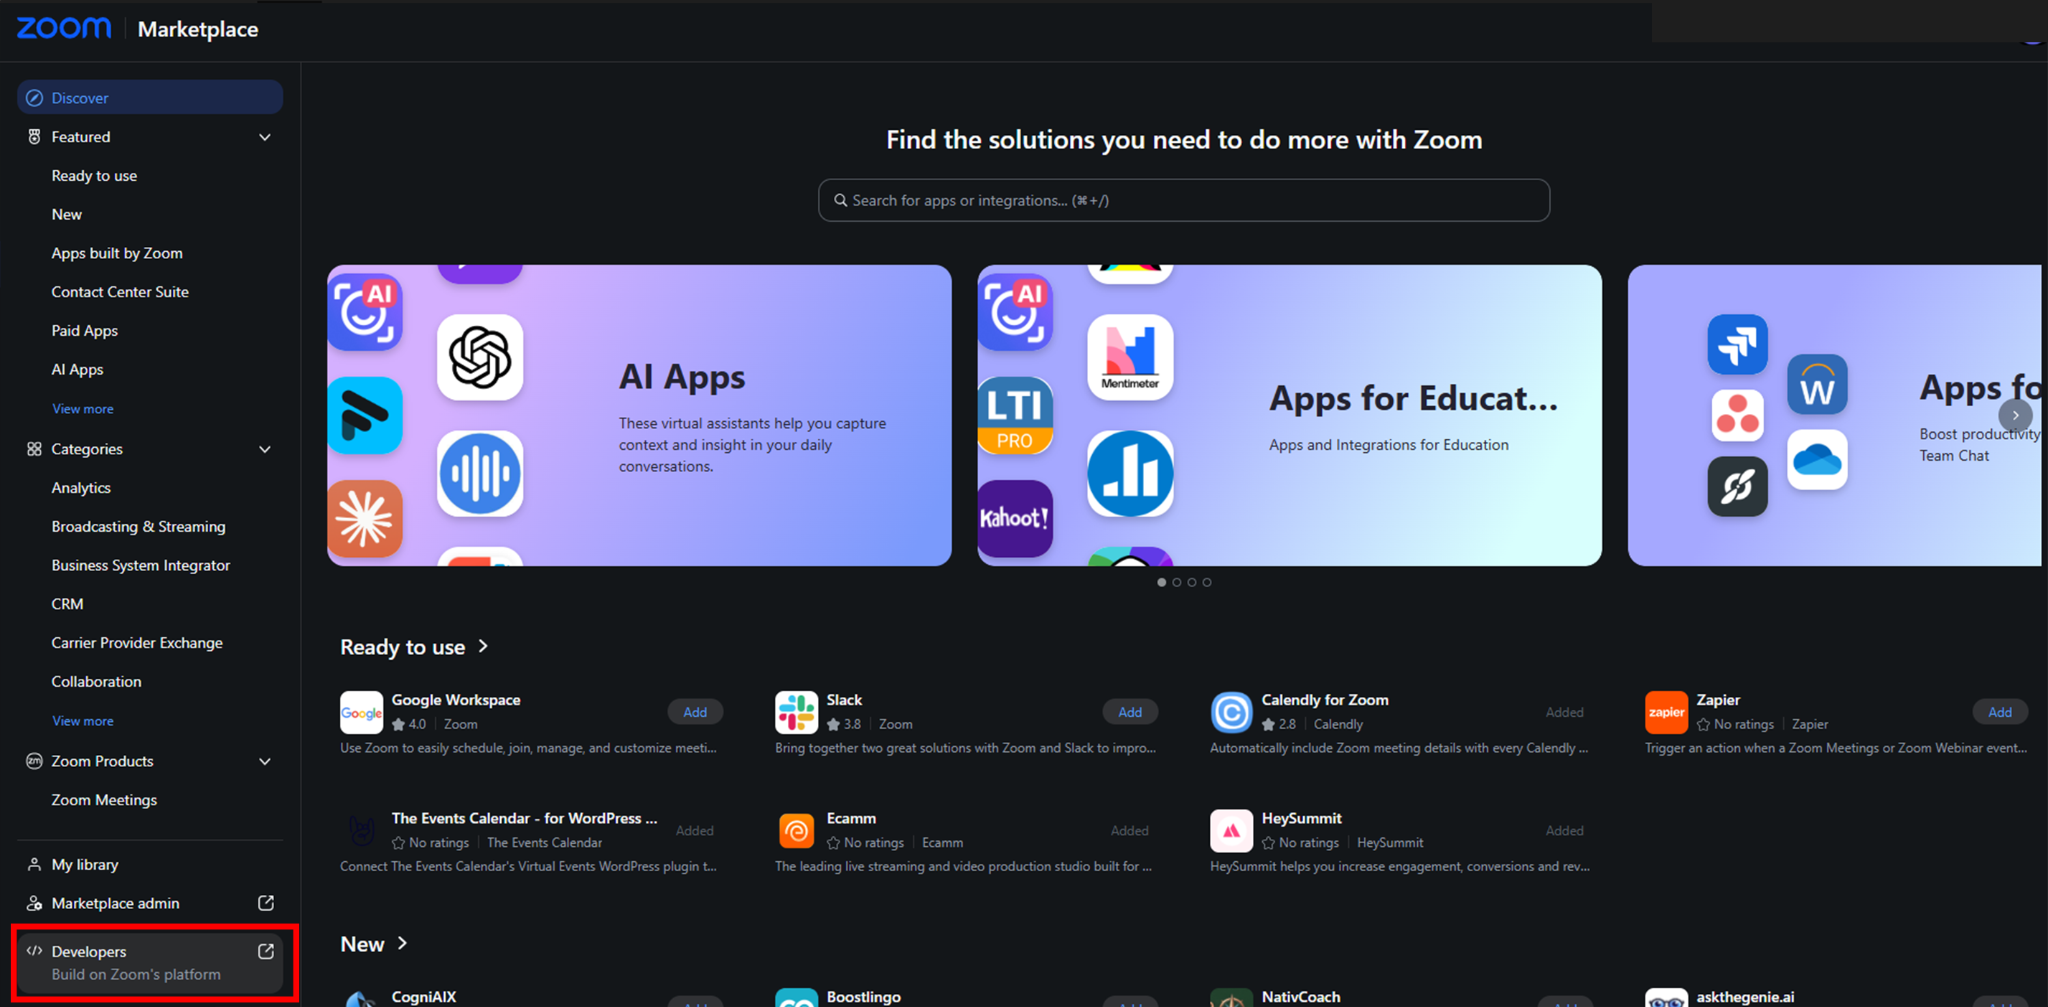
- Click Developers.
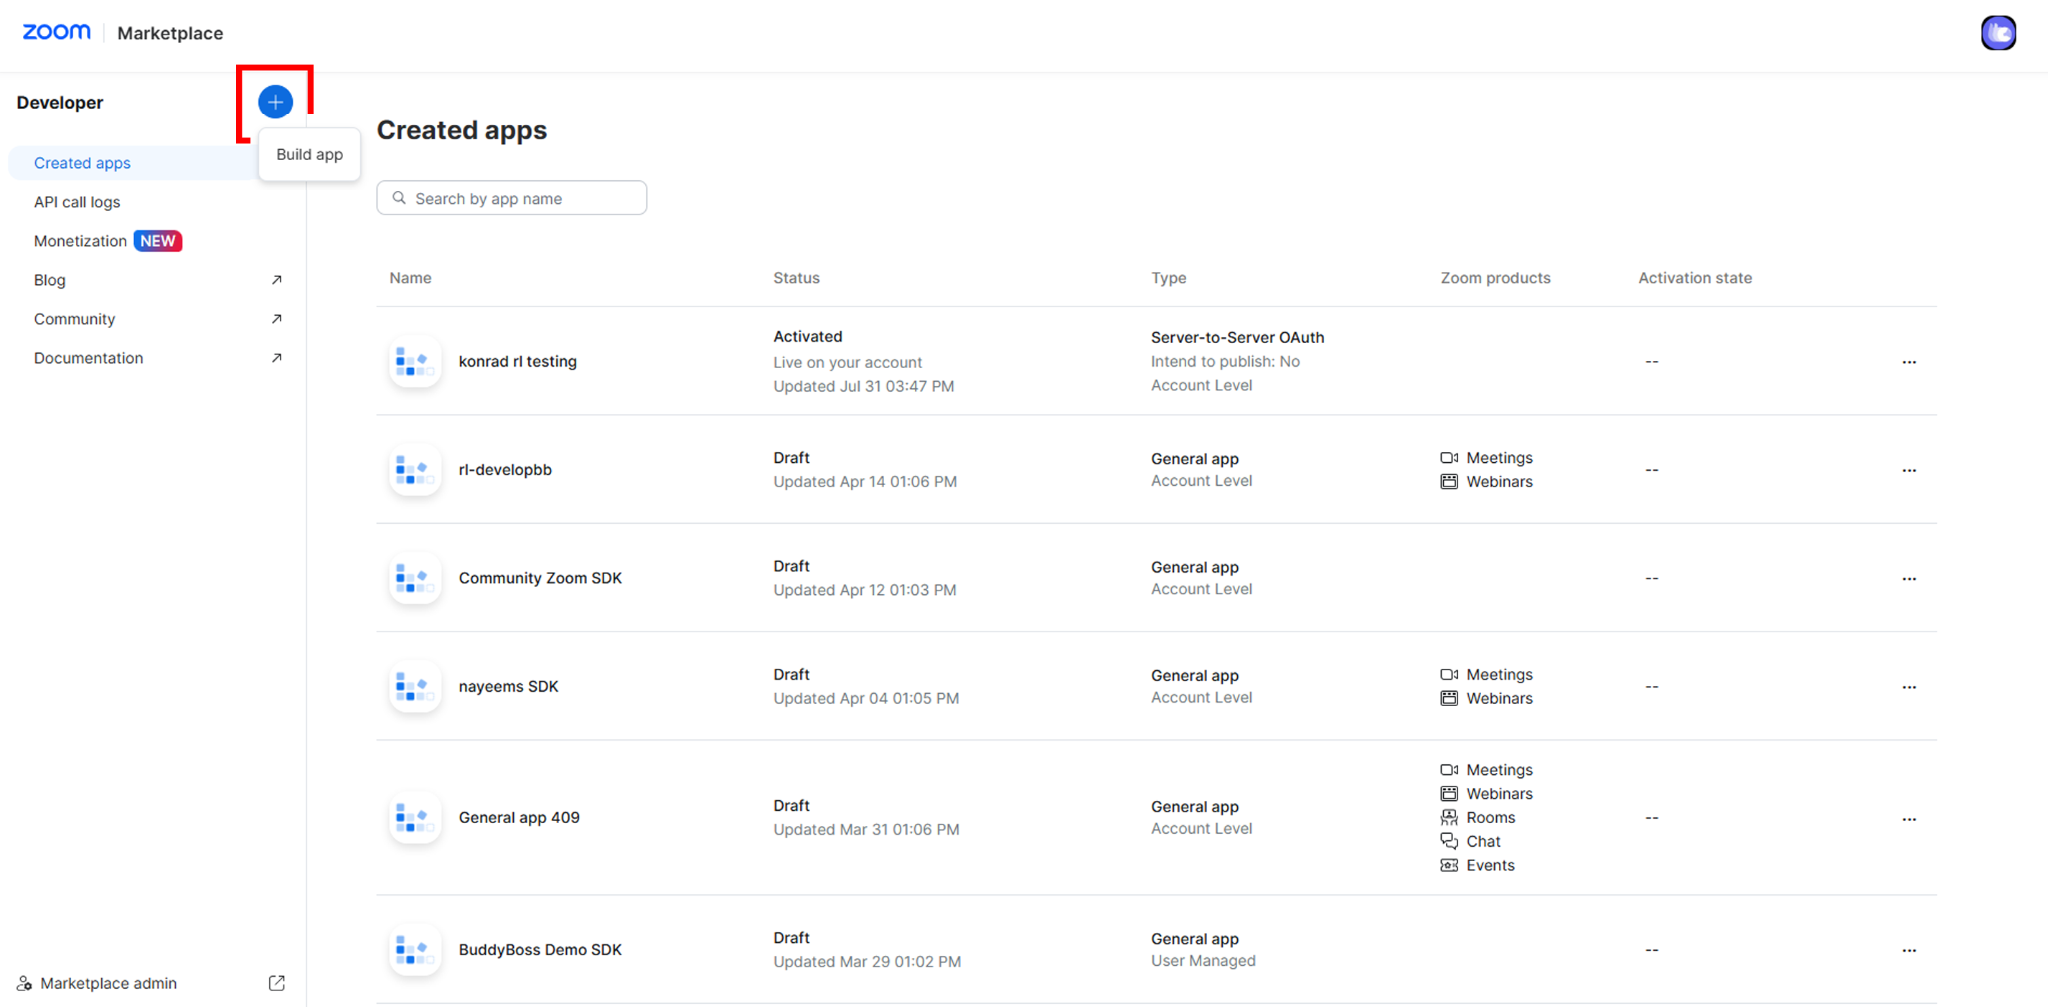
- Select Build App.
- Locate Server-to-Server OAuth.
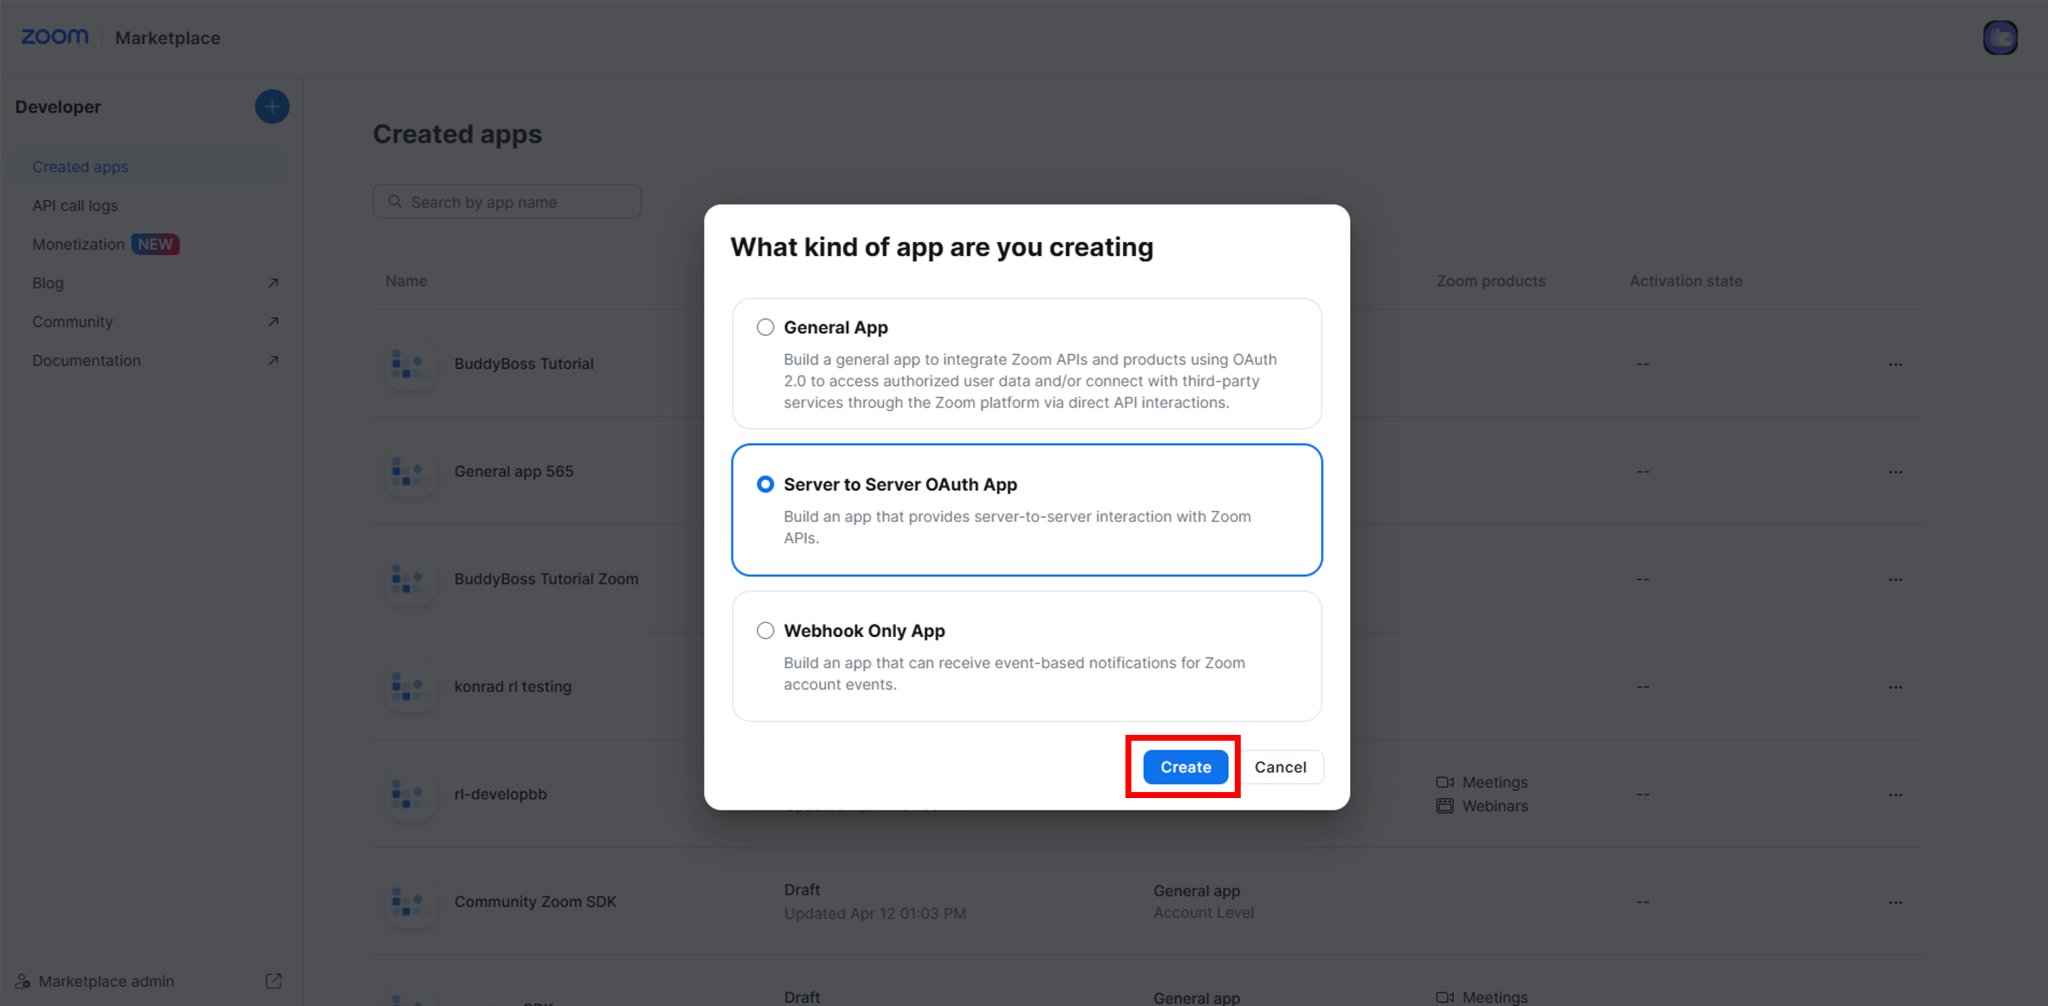
- Click Create.
- Enter an App Name, such as BuddyBoss Zoom Integration.
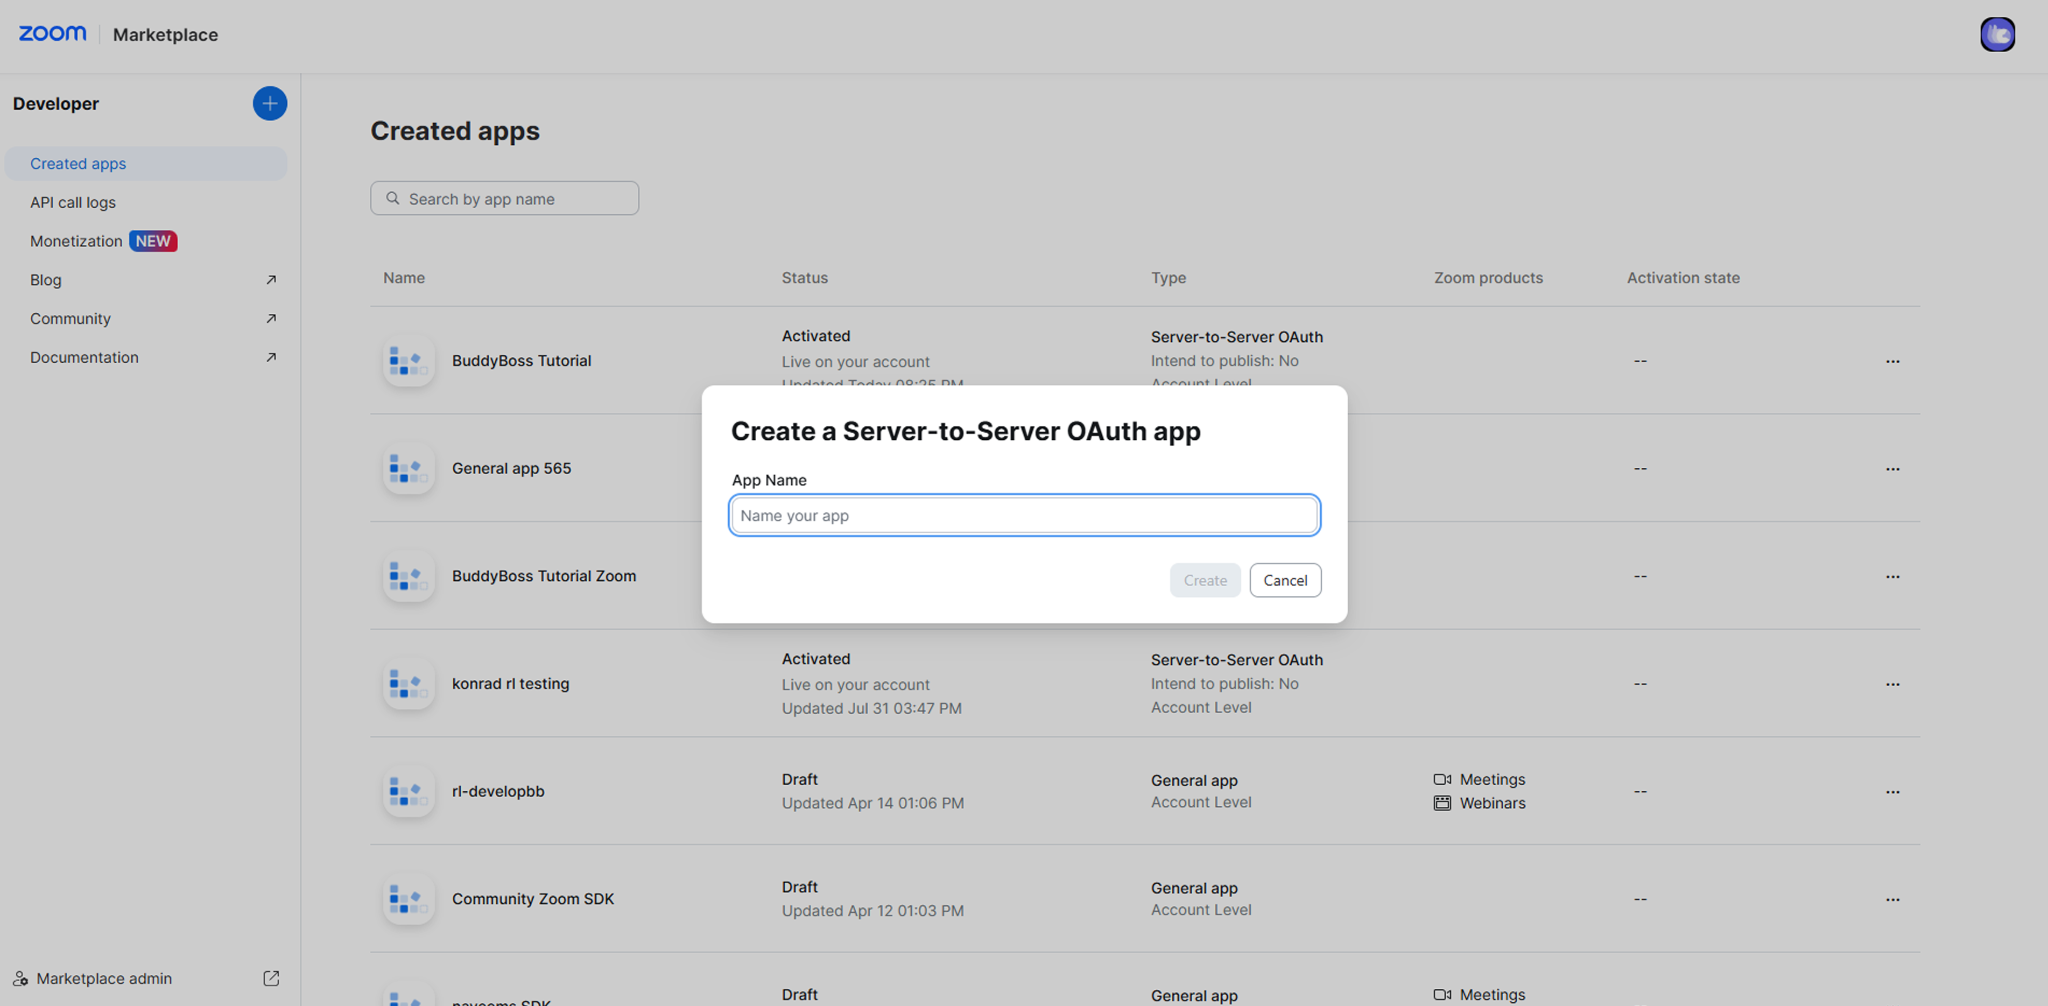
- Click Create.
Server-to-Server OAuth is designed for server-to-server authentication without requiring each user to complete an individual OAuth authorization flow.
App Credentials
The App Credentials section contains the credentials BuddyBoss uses to authenticate with your Zoom account.
Copy and securely save the following credentials:
- Account ID
- Client ID
- Client Secret
You will enter these credentials in your BuddyBoss Zoom settings after completing and activating the Zoom app.
Important: Keep your Client Secret secure and do not share it publicly.
Click Continue to proceed.
Configure the App Information
The Information section contains the basic information about your Zoom app.
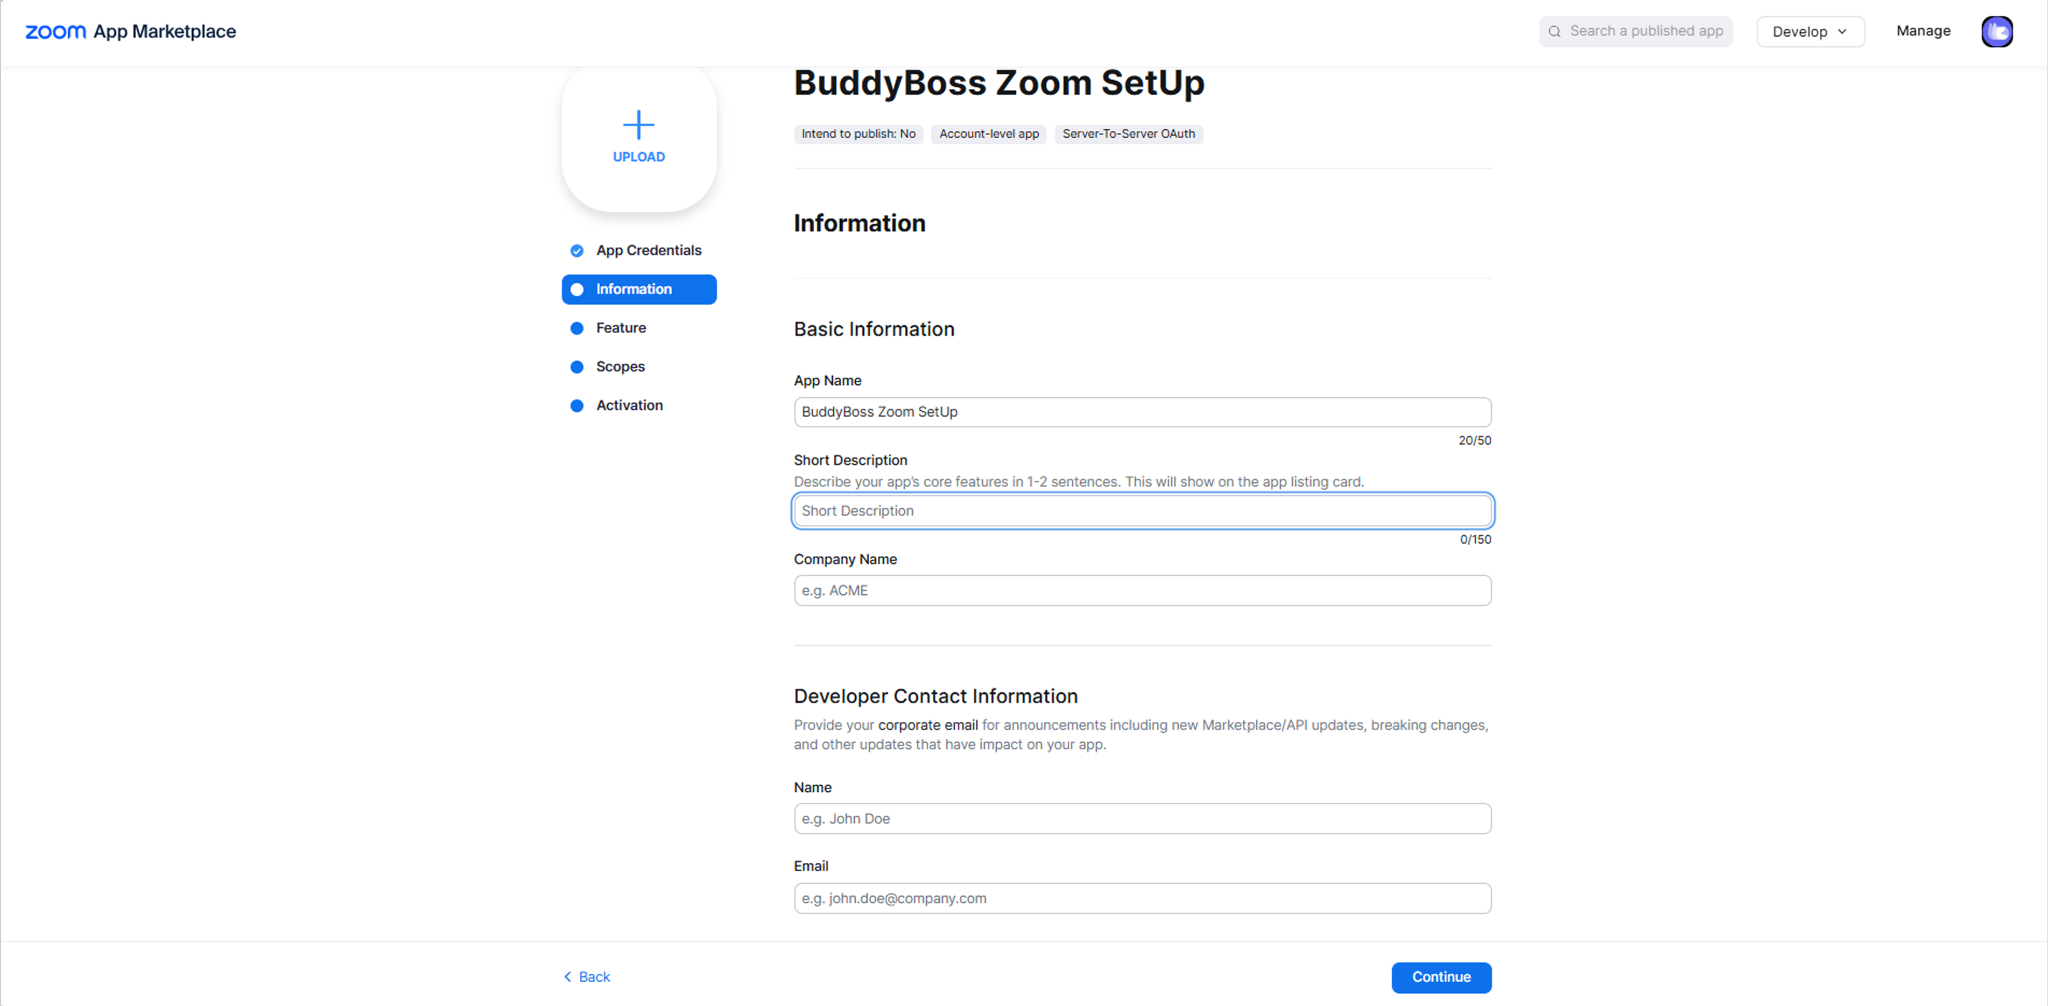
- Under Basic Information, confirm or update the App Name.
- Enter a Short Description for the app.
- Enter your Company Name.
- Under Developer Contact Information, enter the developer or administrator Name.
- Enter the developer or administrator Email.
- Click Continue.
Get the Secret Token
The Feature section provides the Secret Token used to verify event notifications sent by Zoom.
- Under Token, locate Secret Token.
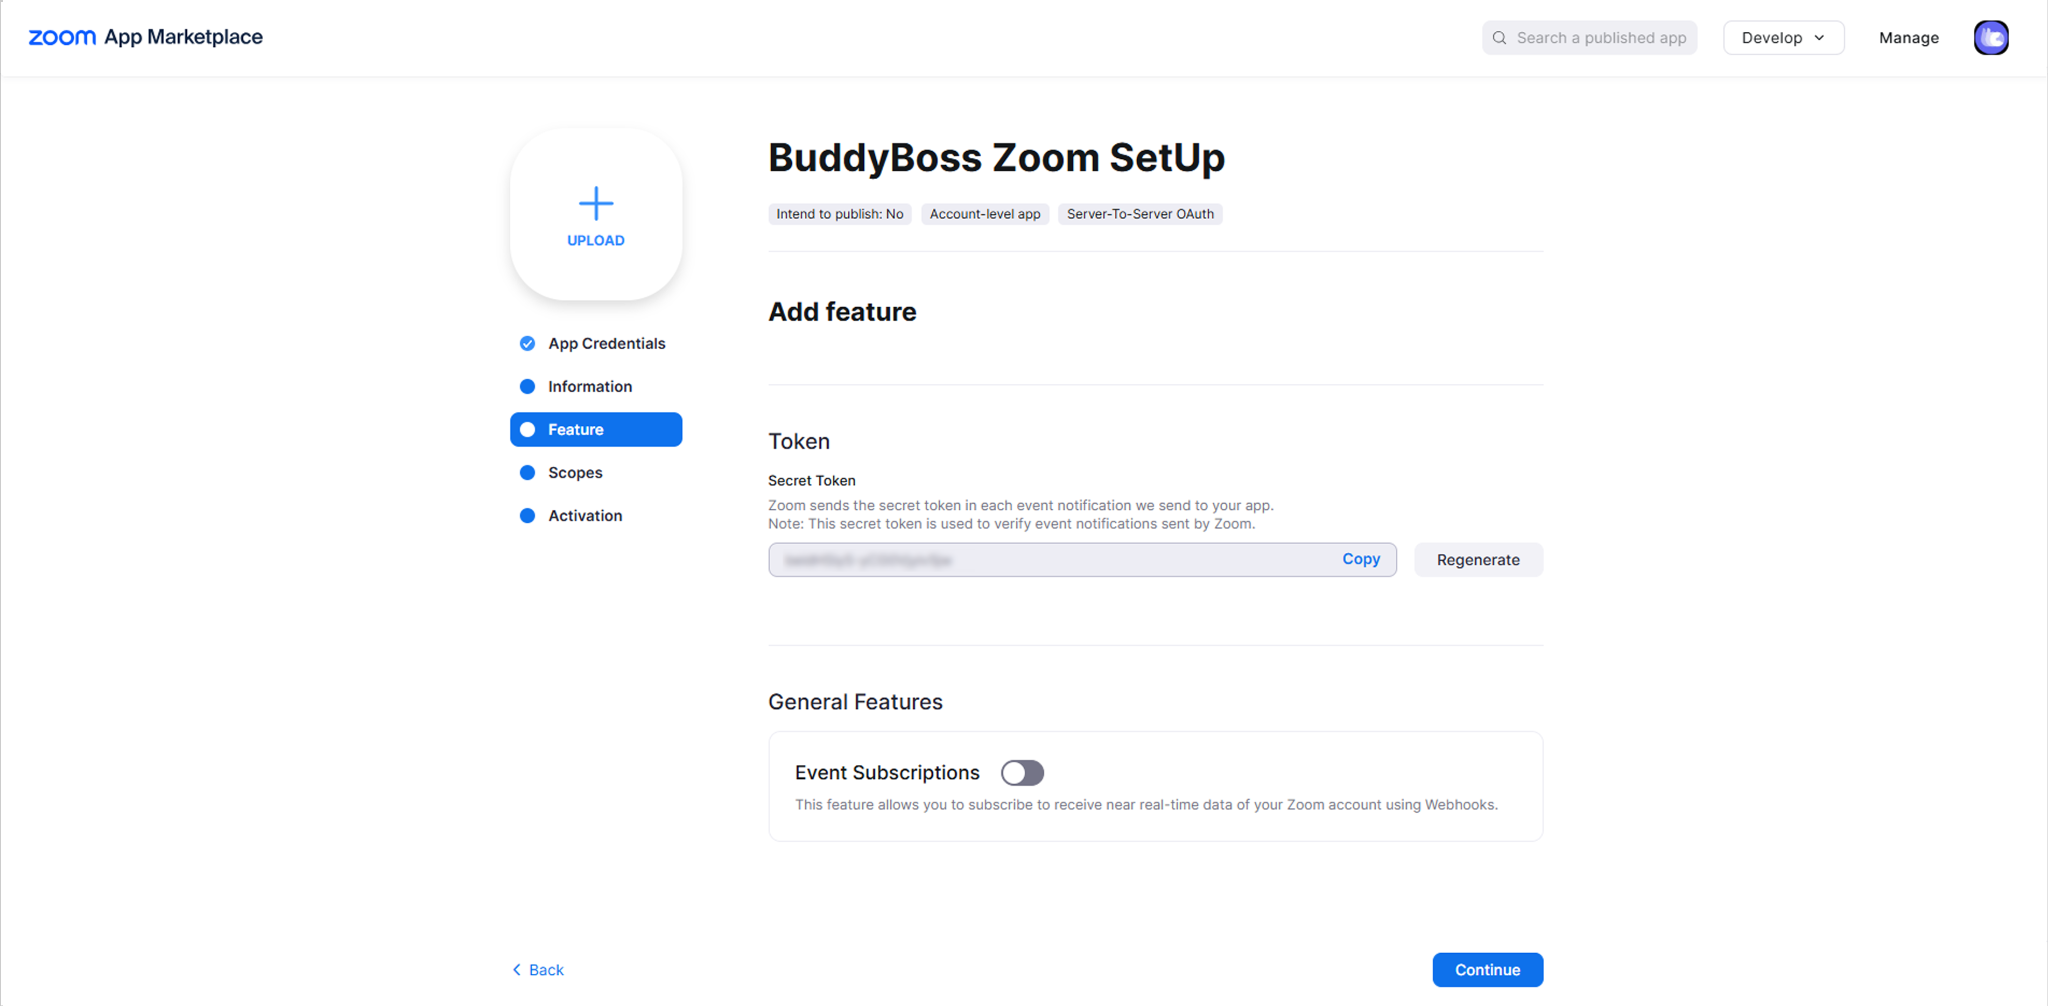
- Click Copy.
- Securely save the Secret Token with the Account ID, Client ID, and Client Secret you copied earlier.
You will enter the Secret Token in BuddyBoss after activating the Zoom app.
Important: Keep the Secret Token secure and do not share it publicly.
Configure the App Scopes
Scopes determine which Zoom APIs and account information BuddyBoss can access.
- Navigate to Scopes.
- Click + Add Scopes.
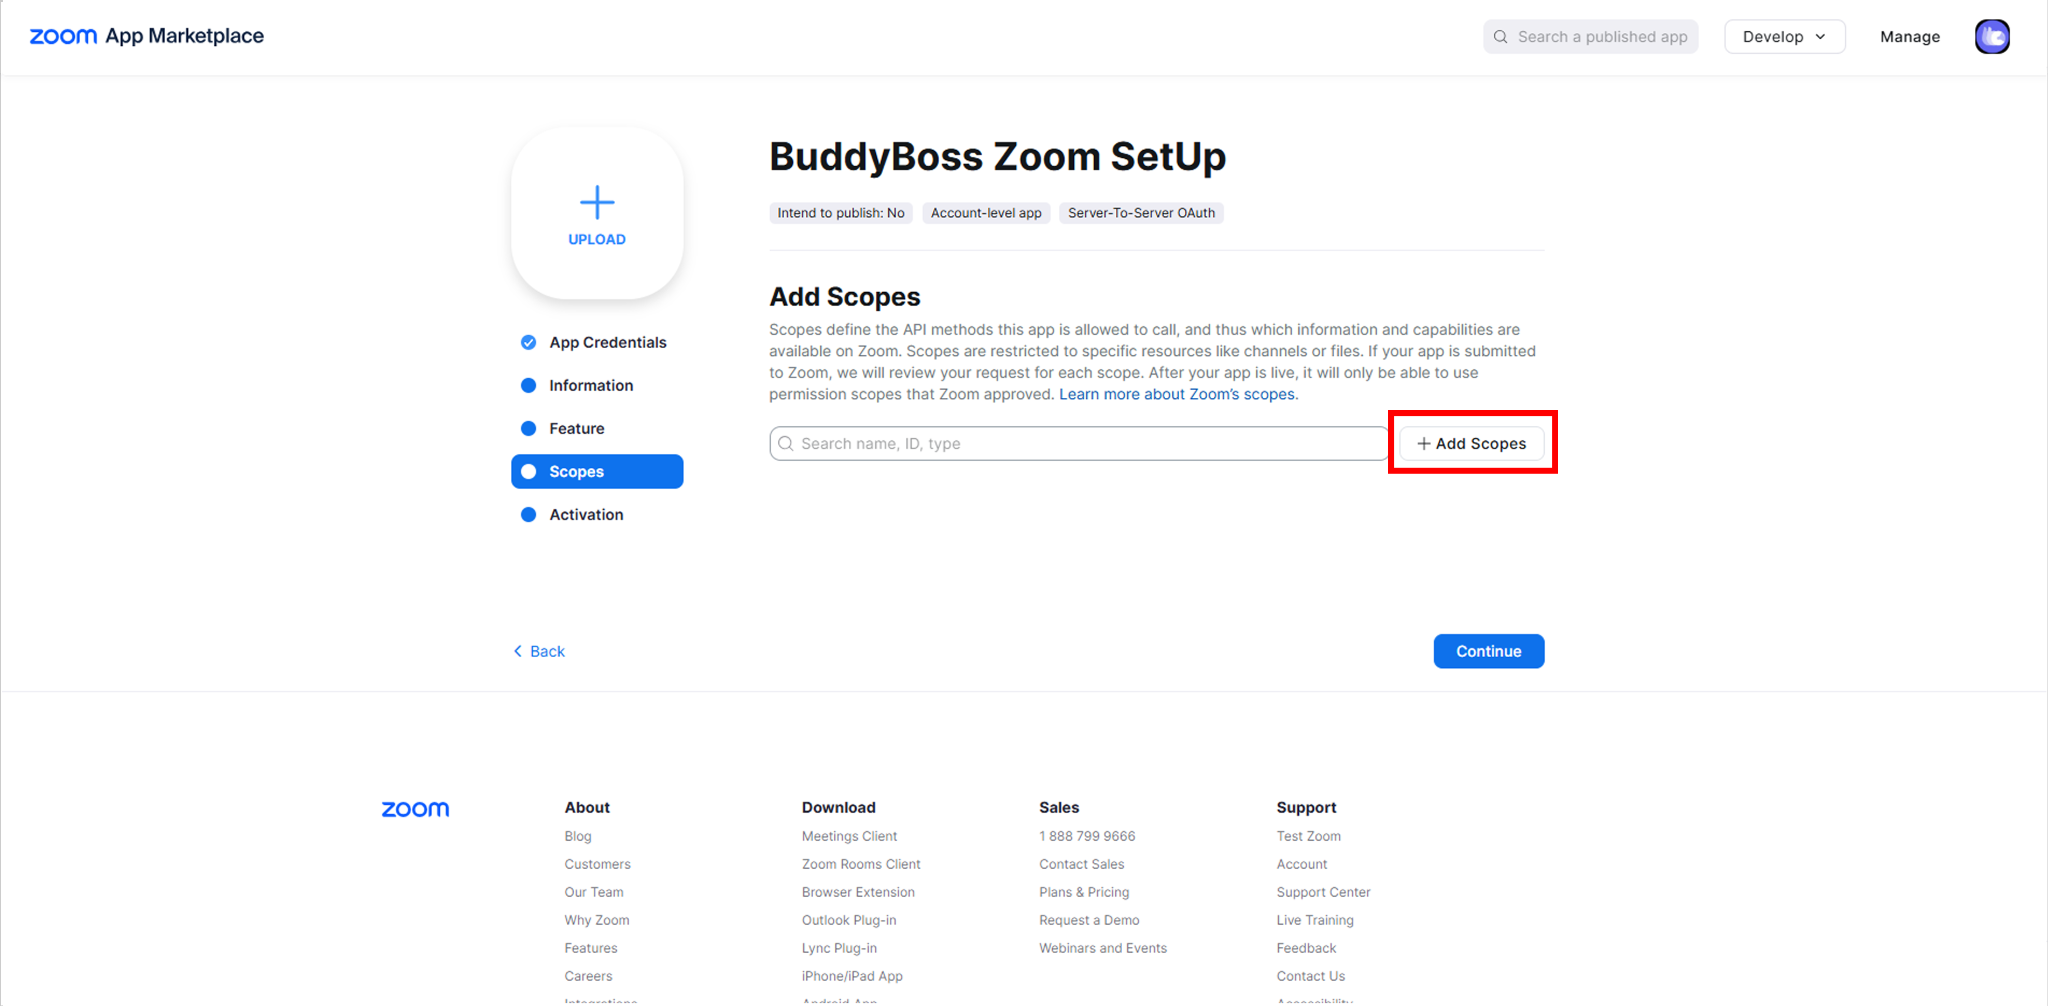
- Select User from the available products.
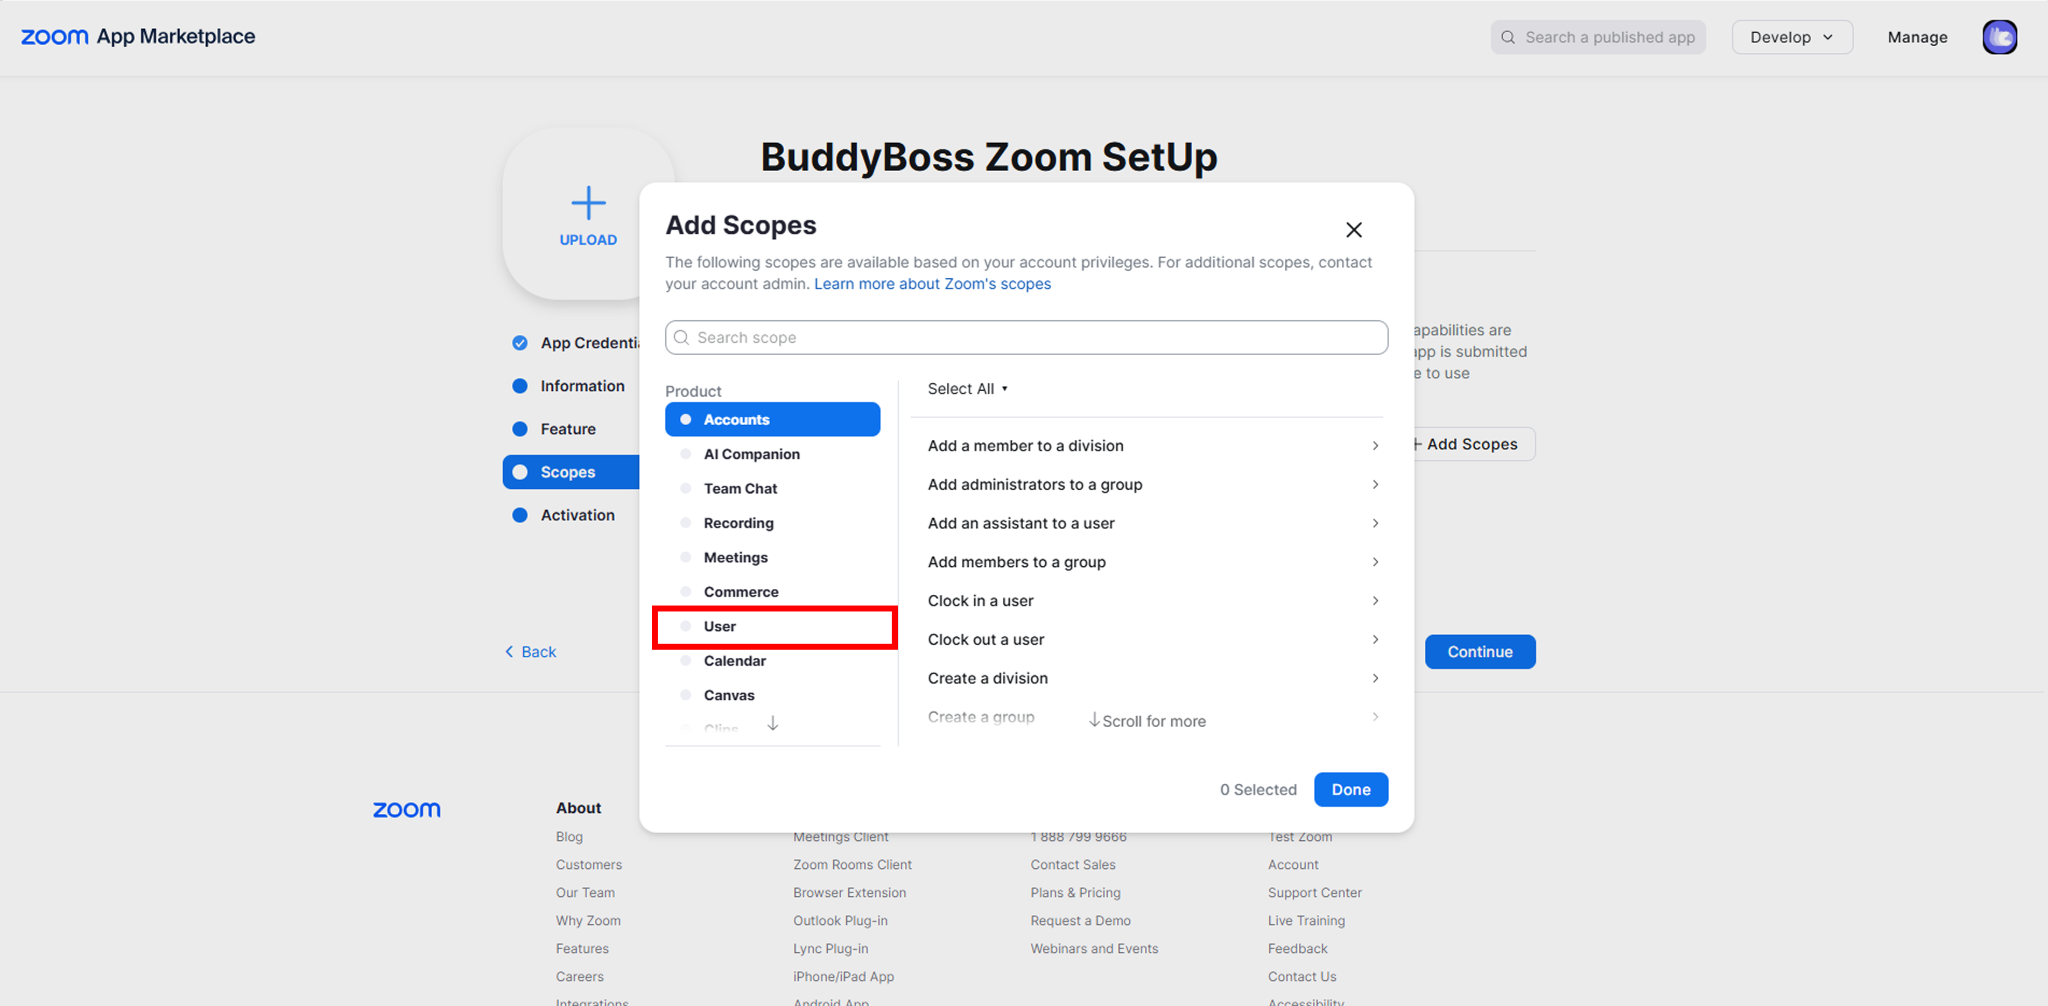
- Add the following scopes:
- Create a user — user:write:user:admin
- Delete a user — user:delete:user:admin
- Update a user — user:update:user:admin
- View a user — user:read:user:admin
- View a user’s settings — user:read:settings:admin
- View a user’s settings — user:read:settings:master
- View users — user:read:list_users:master
- View users — user:read:list_users:admin
- Click Done.
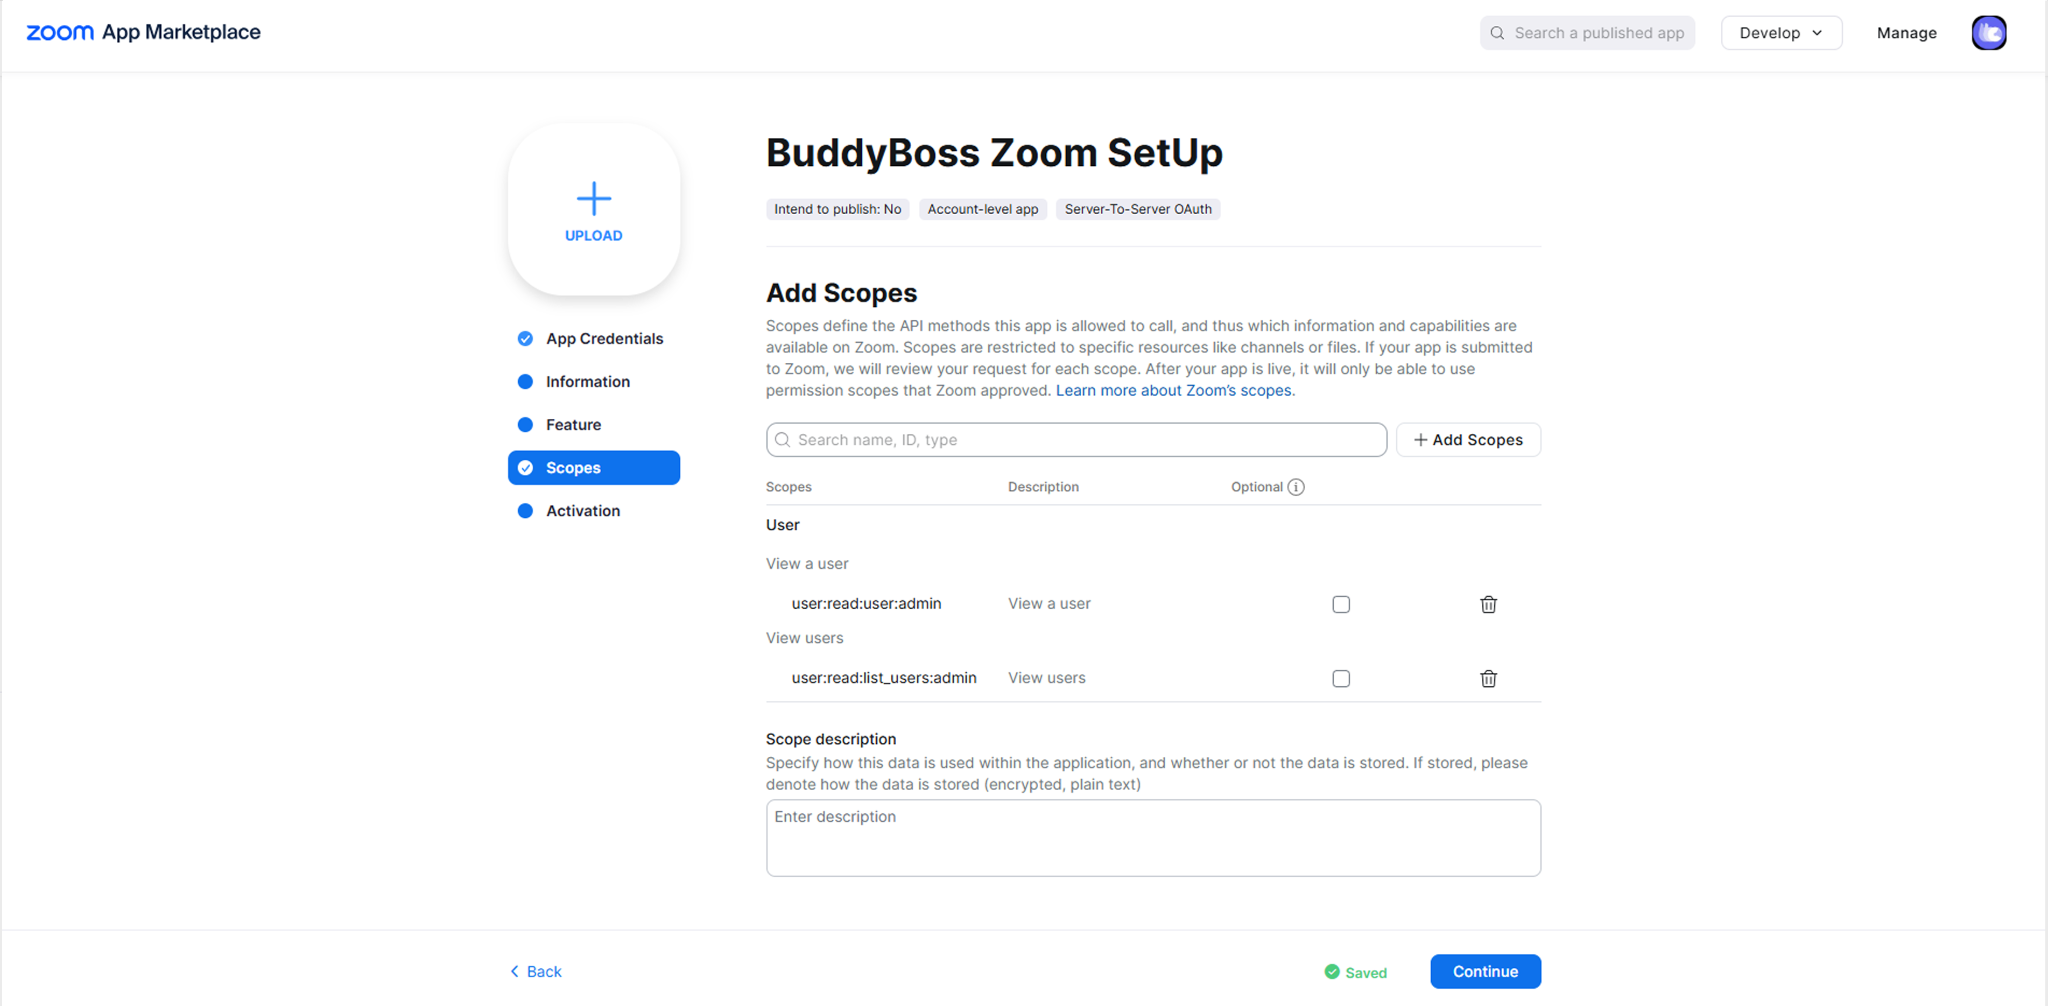
These User scopes allow BuddyBoss to retrieve the users associated with your Zoom account. This is required for BuddyBoss to populate the Account Email field when you connect your Zoom account.
Once the required scopes have been added, click Continue.
Activate the Zoom App
The Zoom app must be activated before you connect it to BuddyBoss.
- Confirm that Zoom displays Your app is ready for activation.
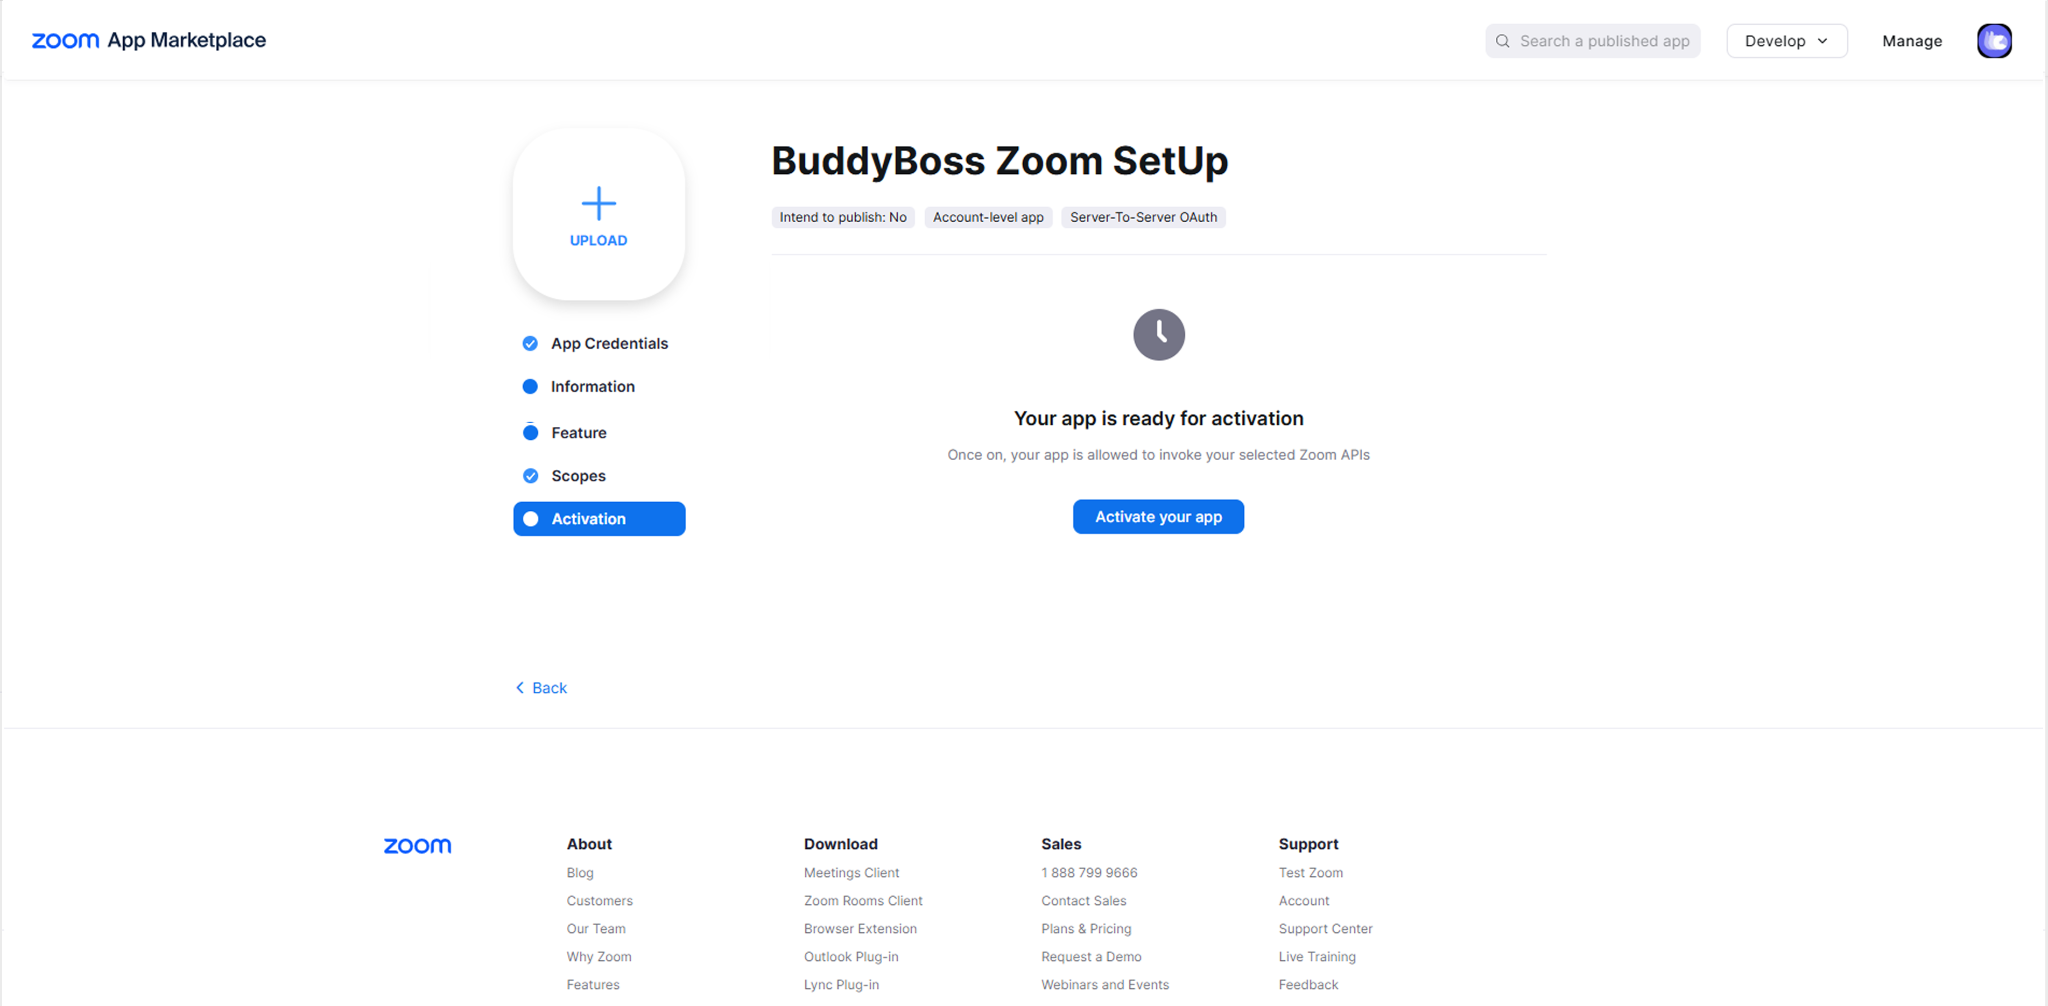
- Click Activate your app.
- Confirm that the app is successfully activated.
Once activated, the app can use the Zoom APIs permitted by the scopes you configured.
Note: The items in the left navigation do not all need to display checkmarks. If Zoom allows you to activate the app and the app displays as Activated, you can continue with the BuddyBoss configuration.
Enable Zoom in BuddyBoss
After activating the Zoom app, return to your WordPress website and enable the Zoom integration.
- Log in to your WordPress Dashboard.
- Navigate to BuddyBoss > Settings.
- Scroll to the Integrations section.
- Locate Zoom and enable the integration.
- Click Settings.
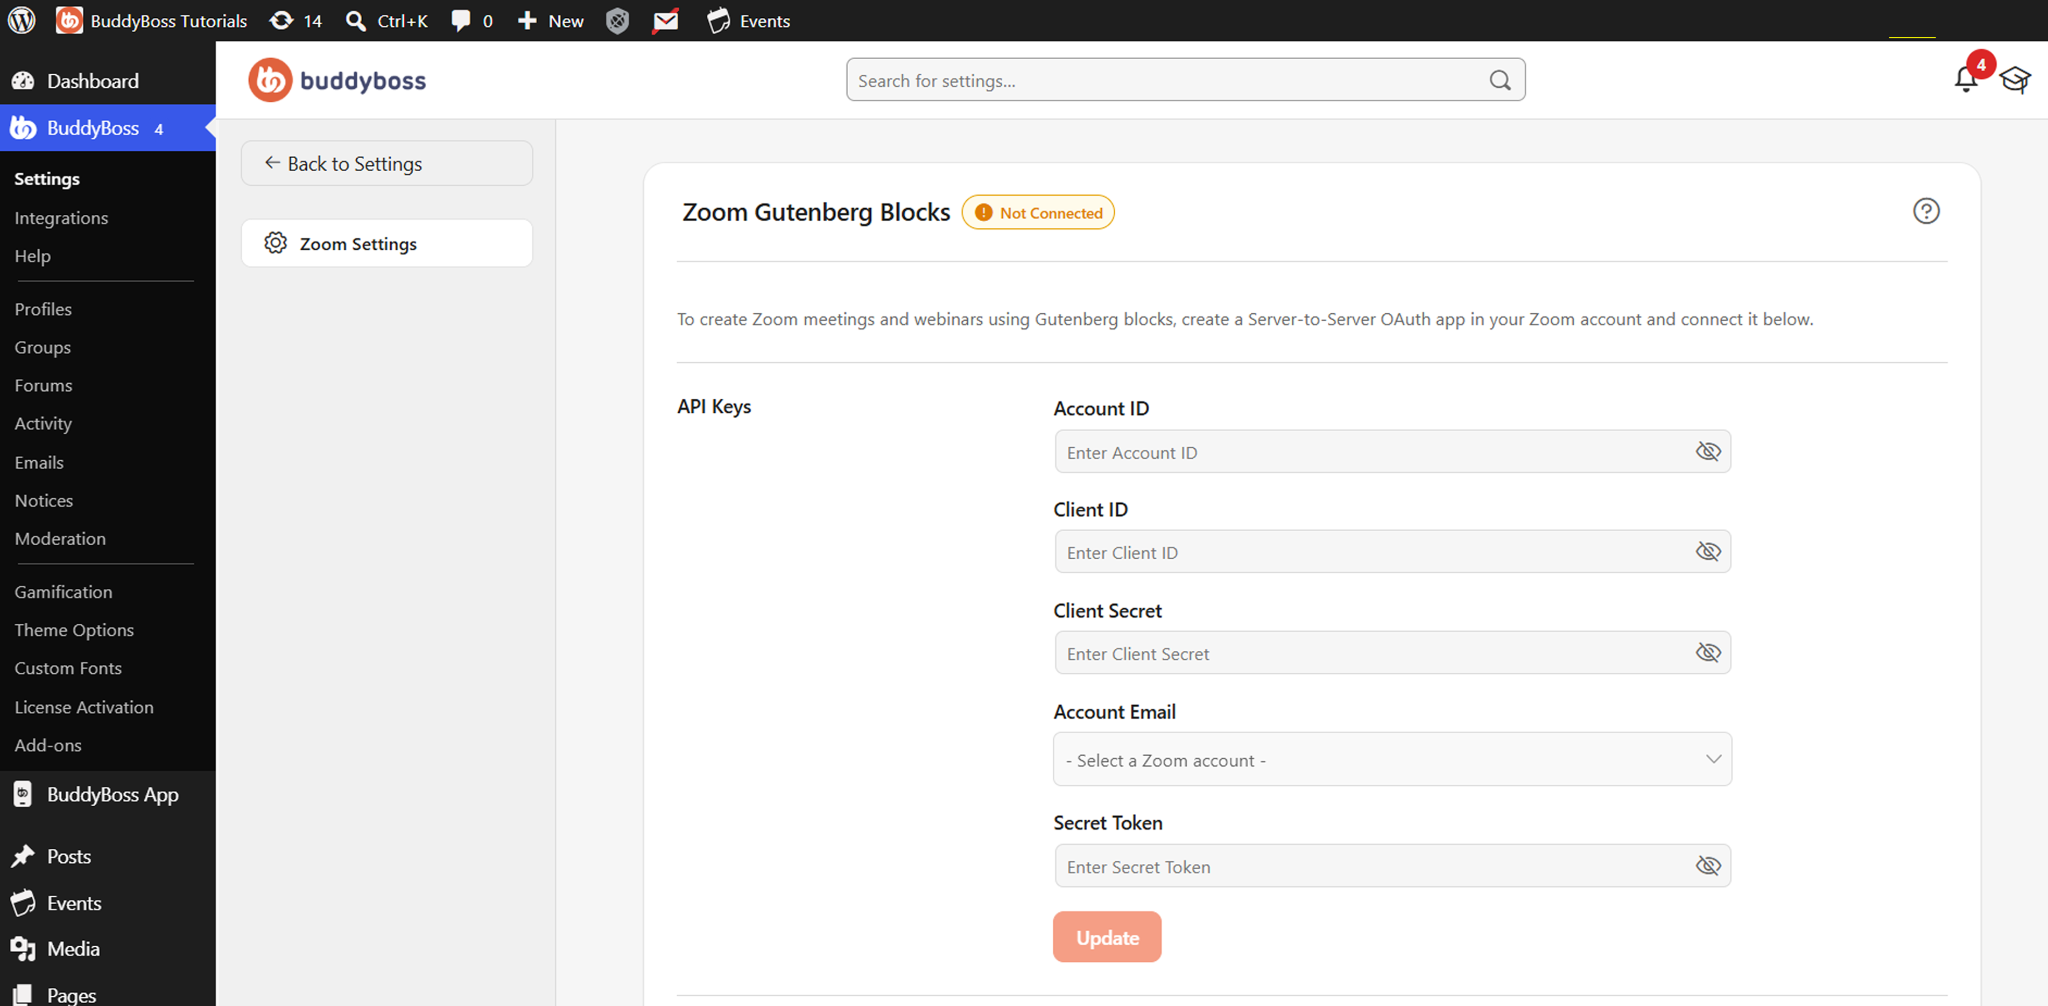
- Enter the Account ID you copied from the Zoom app.
- Enter the Client ID.
- Enter the Client Secret. After entering this, the Account Email will autopopulate.
Note: If you receive the error No Zoom account found. Please verify your credentials. In the account email section, confirm that:
- The Server-to-Server OAuth app is Activated.
- The Account ID, Client ID, and Client Secret were copied from the same Zoom app.
- The View users (user:read:list_users:admin) scope has been added.
- The View a user (user:read:user:admin) scope has been added.
- The credentials entered in BuddyBoss are correct.
- Enter the Secret Token.
- Click Update.
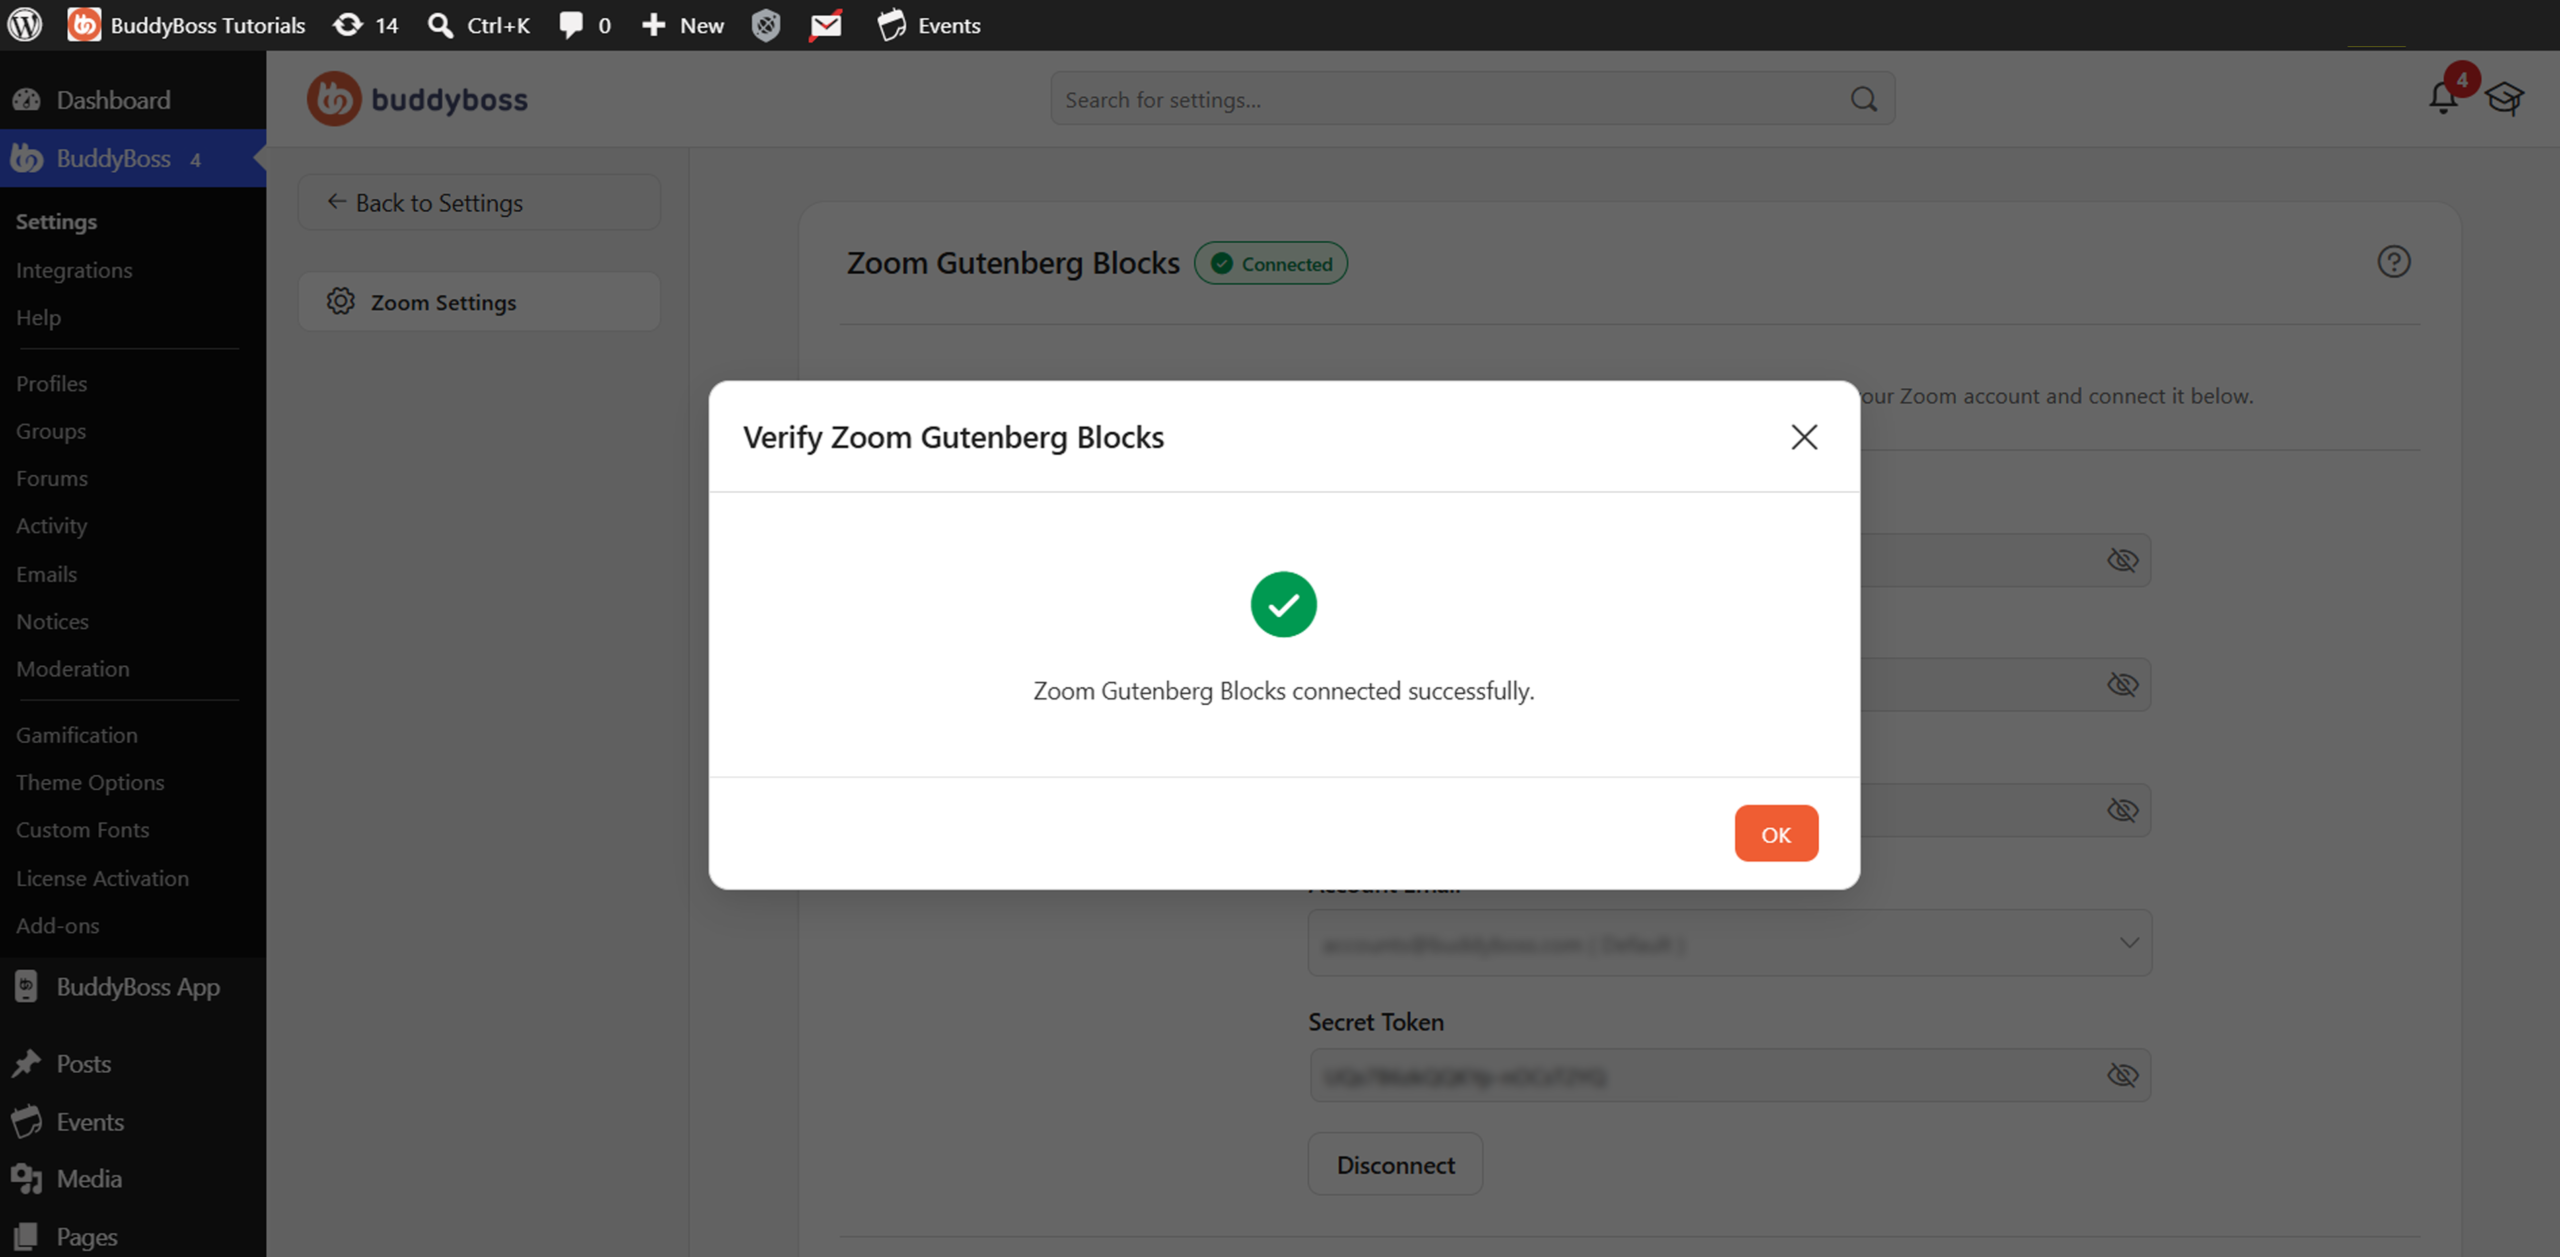
Once connected, you will see the message “Zoom Gutenberg Blocks connected Successfully”