
Last updated: Mar 12, 2026 • ~2 min read
The reCAPTCHA Settings connect your site with Google reCAPTCHA to protect forms and authentication processes from spam and automated bots. You select a reCAPTCHA version and enter your Google API credentials to activate protection. This manual walks you through choosing a version, generating API keys, and connecting your site.
Tutorial Video
Choosing a reCAPTCHA Version
BuddyBoss supports three reCAPTCHA options. reCAPTCHA v3 is selected by default and is the recommended option – it works silently in the background, analyzing user behavior and assigning a risk score without interrupting the experience. reCAPTCHA v2 (Checkbox) uses the familiar “I’m not a robot” checkbox and image challenges. reCAPTCHA v2 (Invisible Badge) triggers invisibly without a visible checkbox. You can jump directly to each version’s setup:
Generating API Keys
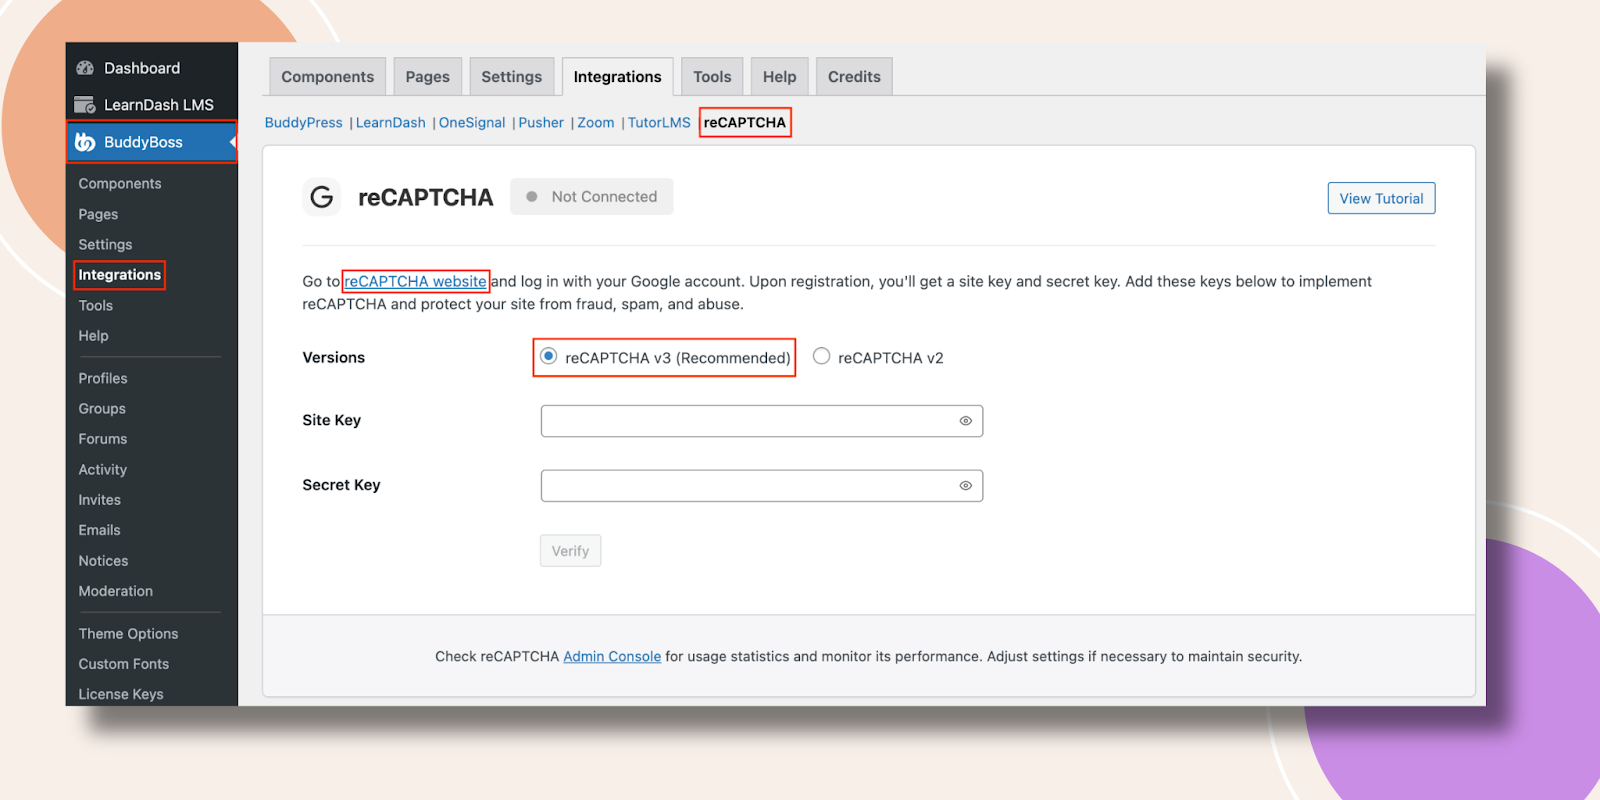
Navigate to BuddyBoss > Settings > reCAPTCHA. reCAPTCHA v3 is automatically selected. Click the reCAPTCHA website link to open the Google reCAPTCHA Admin Console.
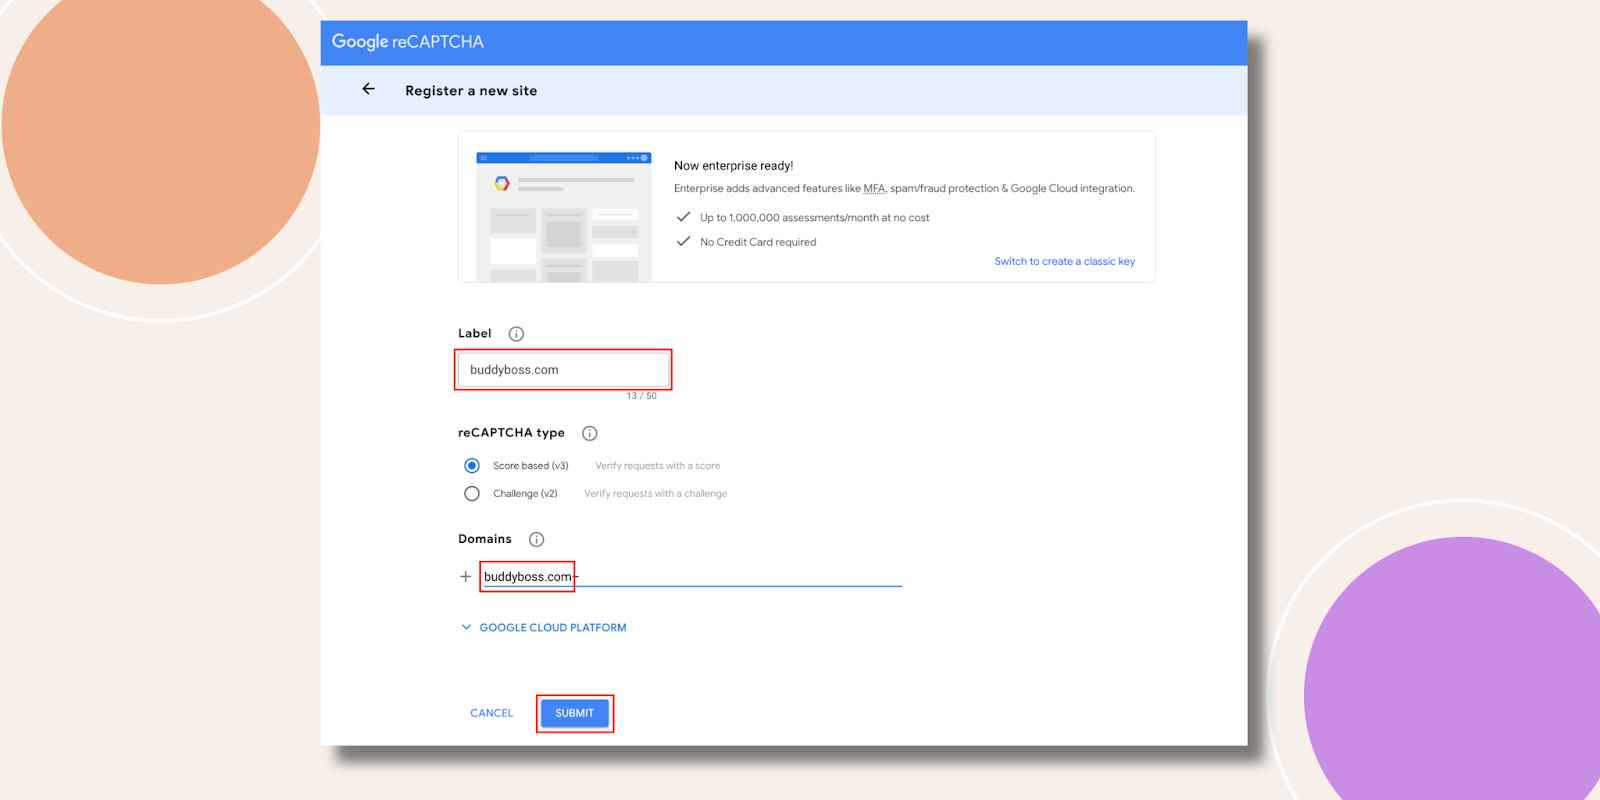
In the Label field, enter a name to identify the site in the future. Select Score based (v3), add your domain in the Domains field, then click Submit.
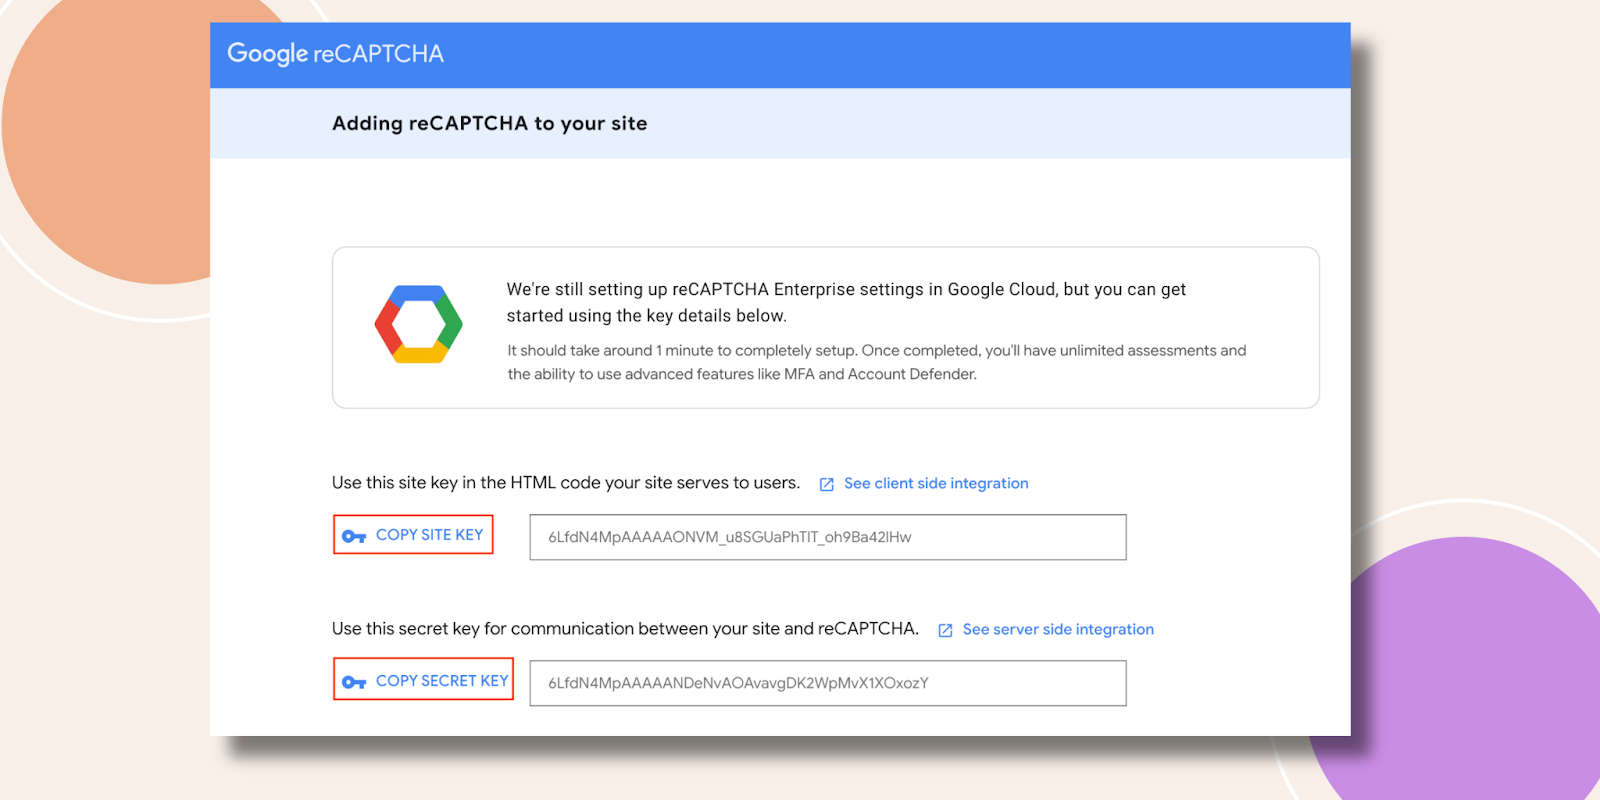
Google displays your generated keys. Click Copy Site Key and Copy Secret Key.
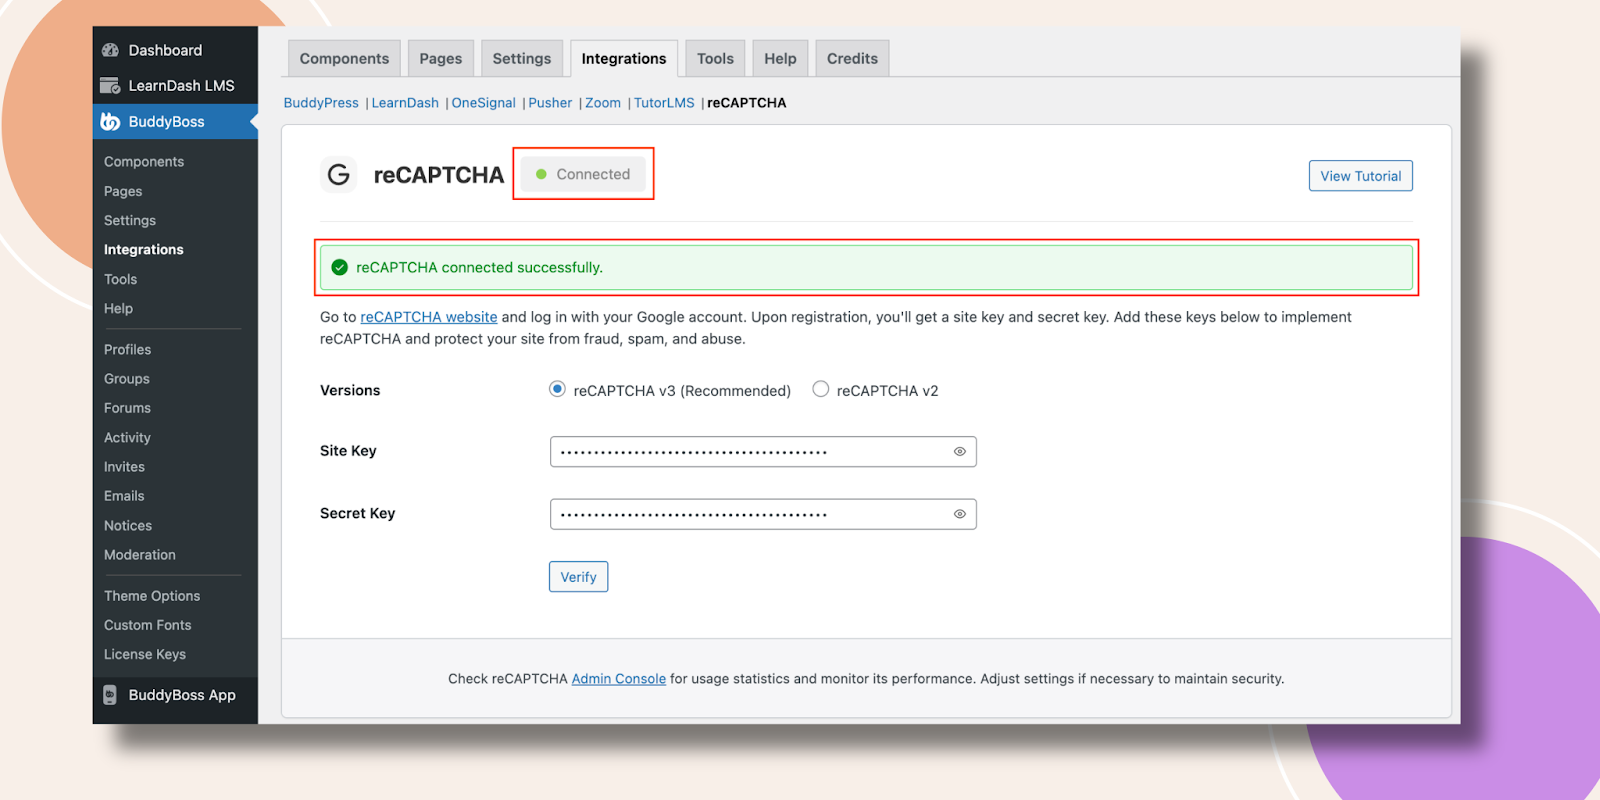
Go back to your WordPress Dashboard, go to BuddyBoss > Settings > reCAPTCHA, and paste the keys into the Site Key and Secret Key fields. Click Verify.
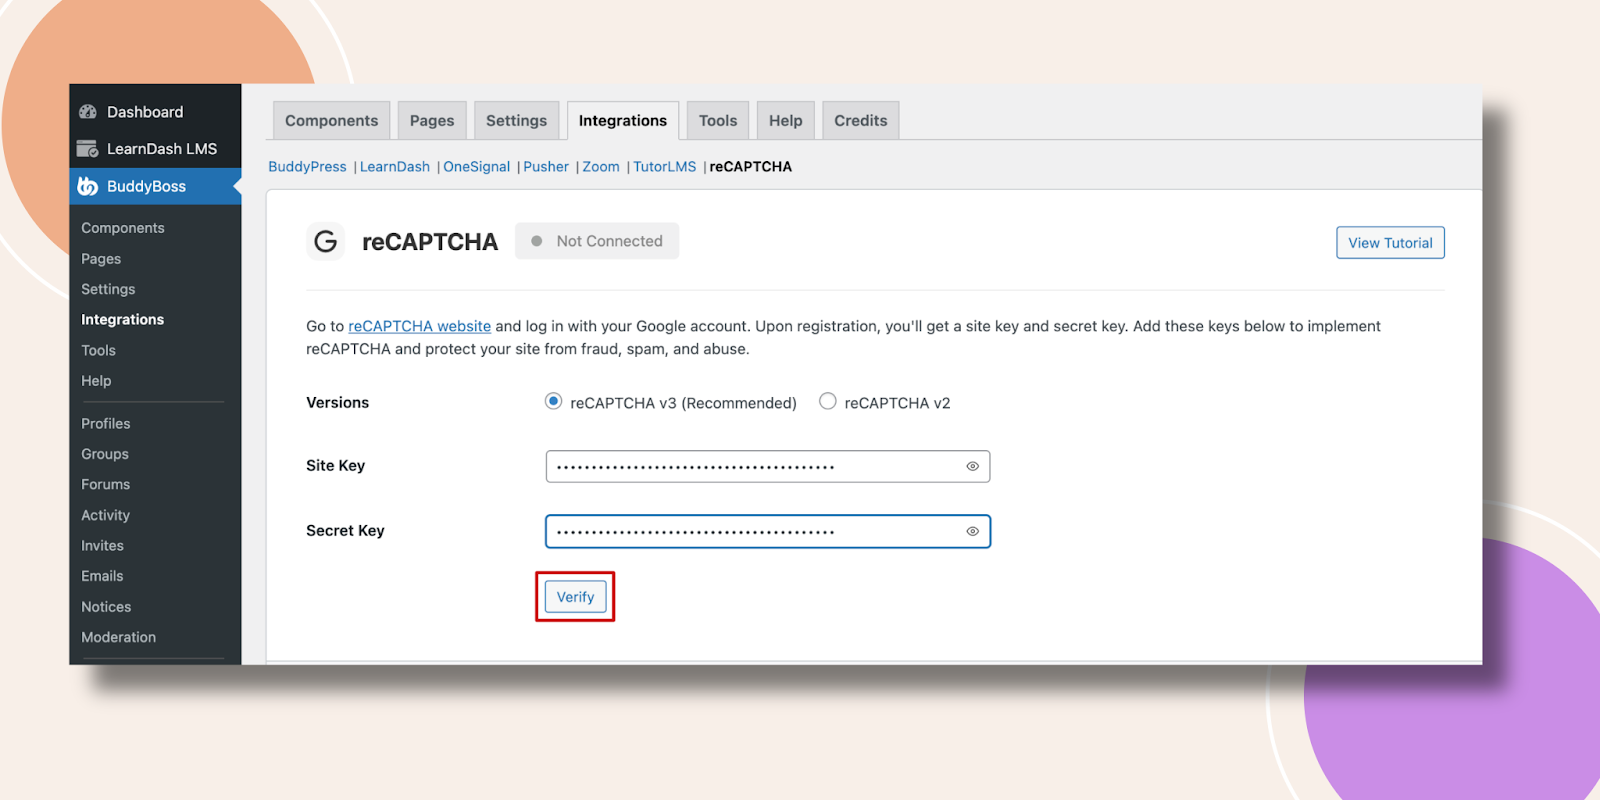
The system will verify the keys and load.
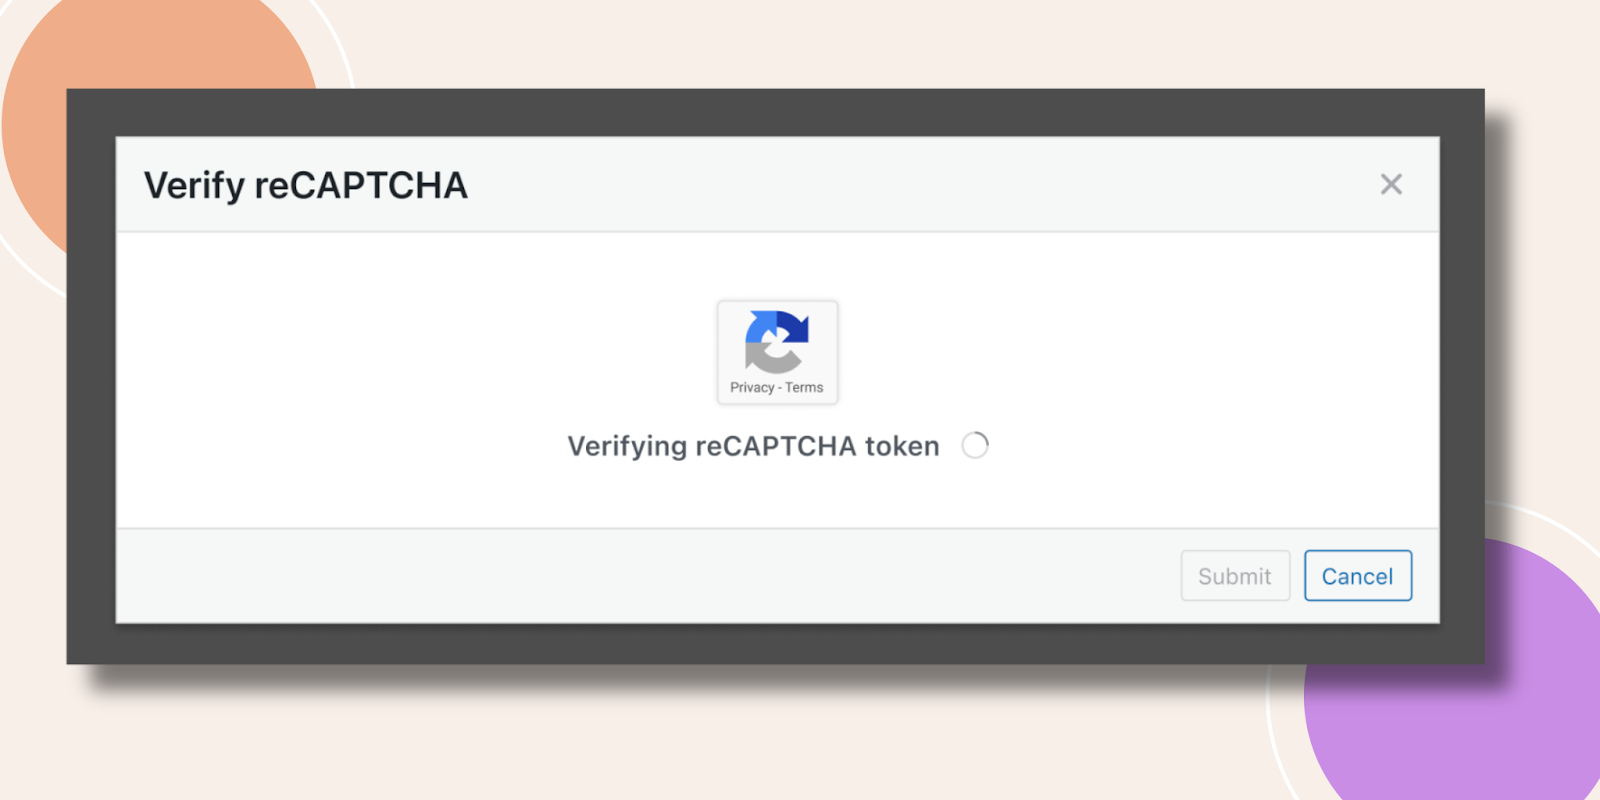
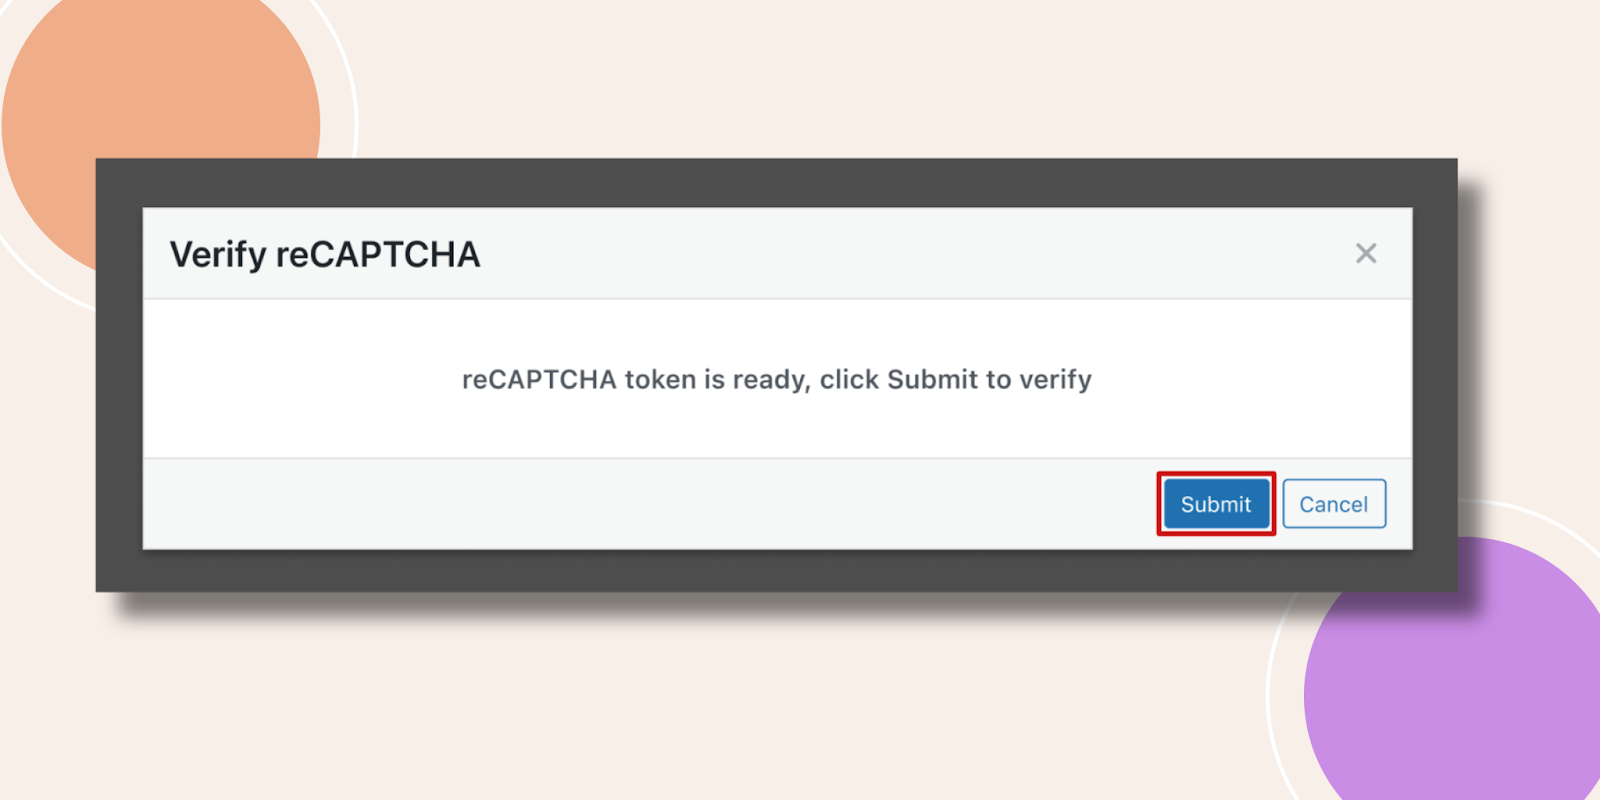
Click Submit.
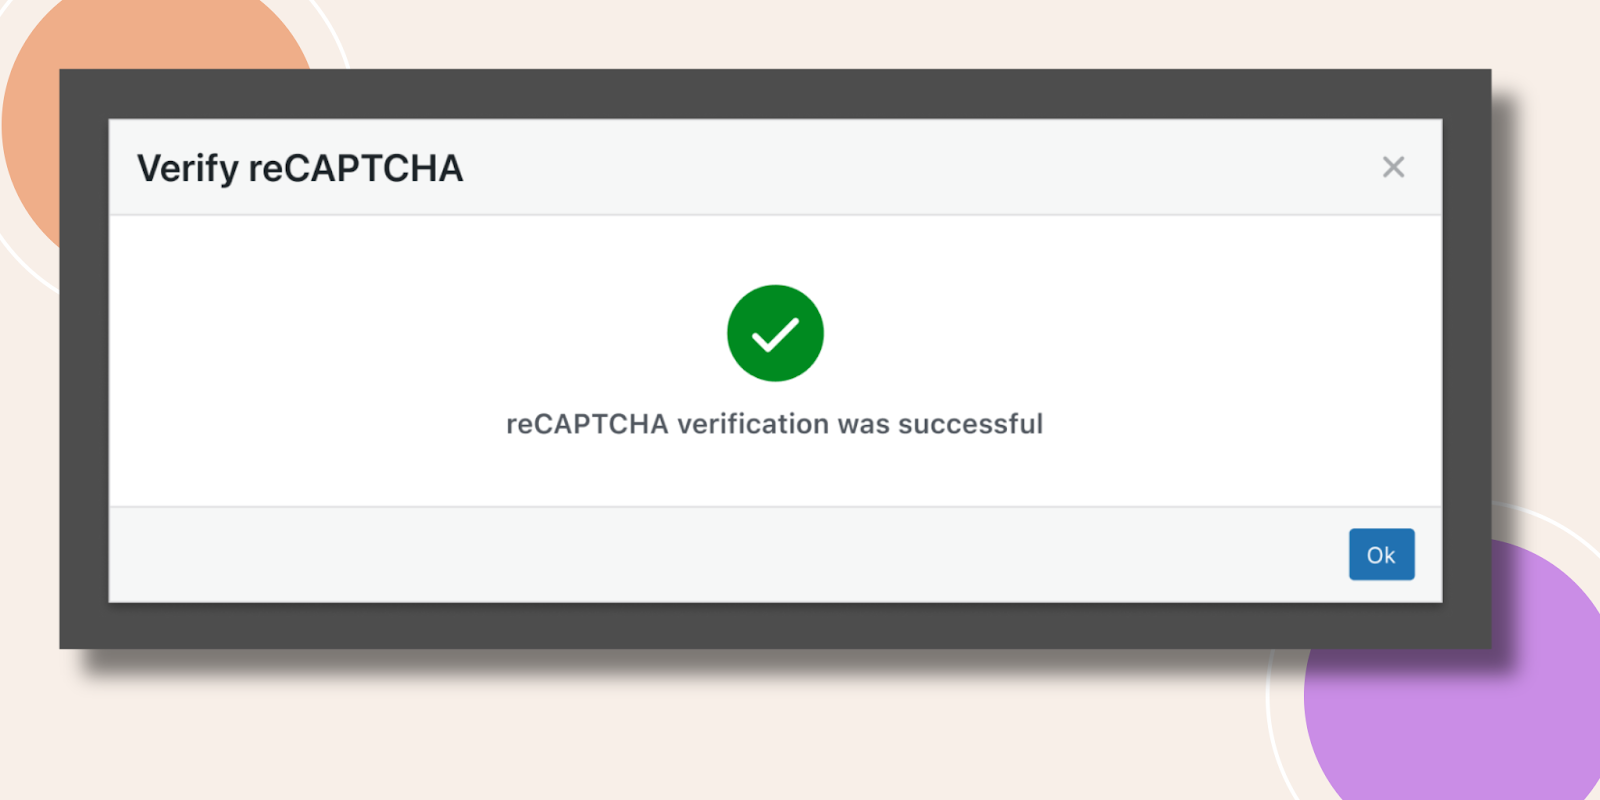
If your tokens are correct you will see a success message. Click OK.
Your reCAPTCHA is now connected.
reCAPTCHA Settings
Navigate to your WordPress Dashboard, go to BuddyBoss > Settings > reCAPTCHA. The connection status at the top shows Not Connected until valid API keys are saved. Configure the following settings and click Save Changes when done.
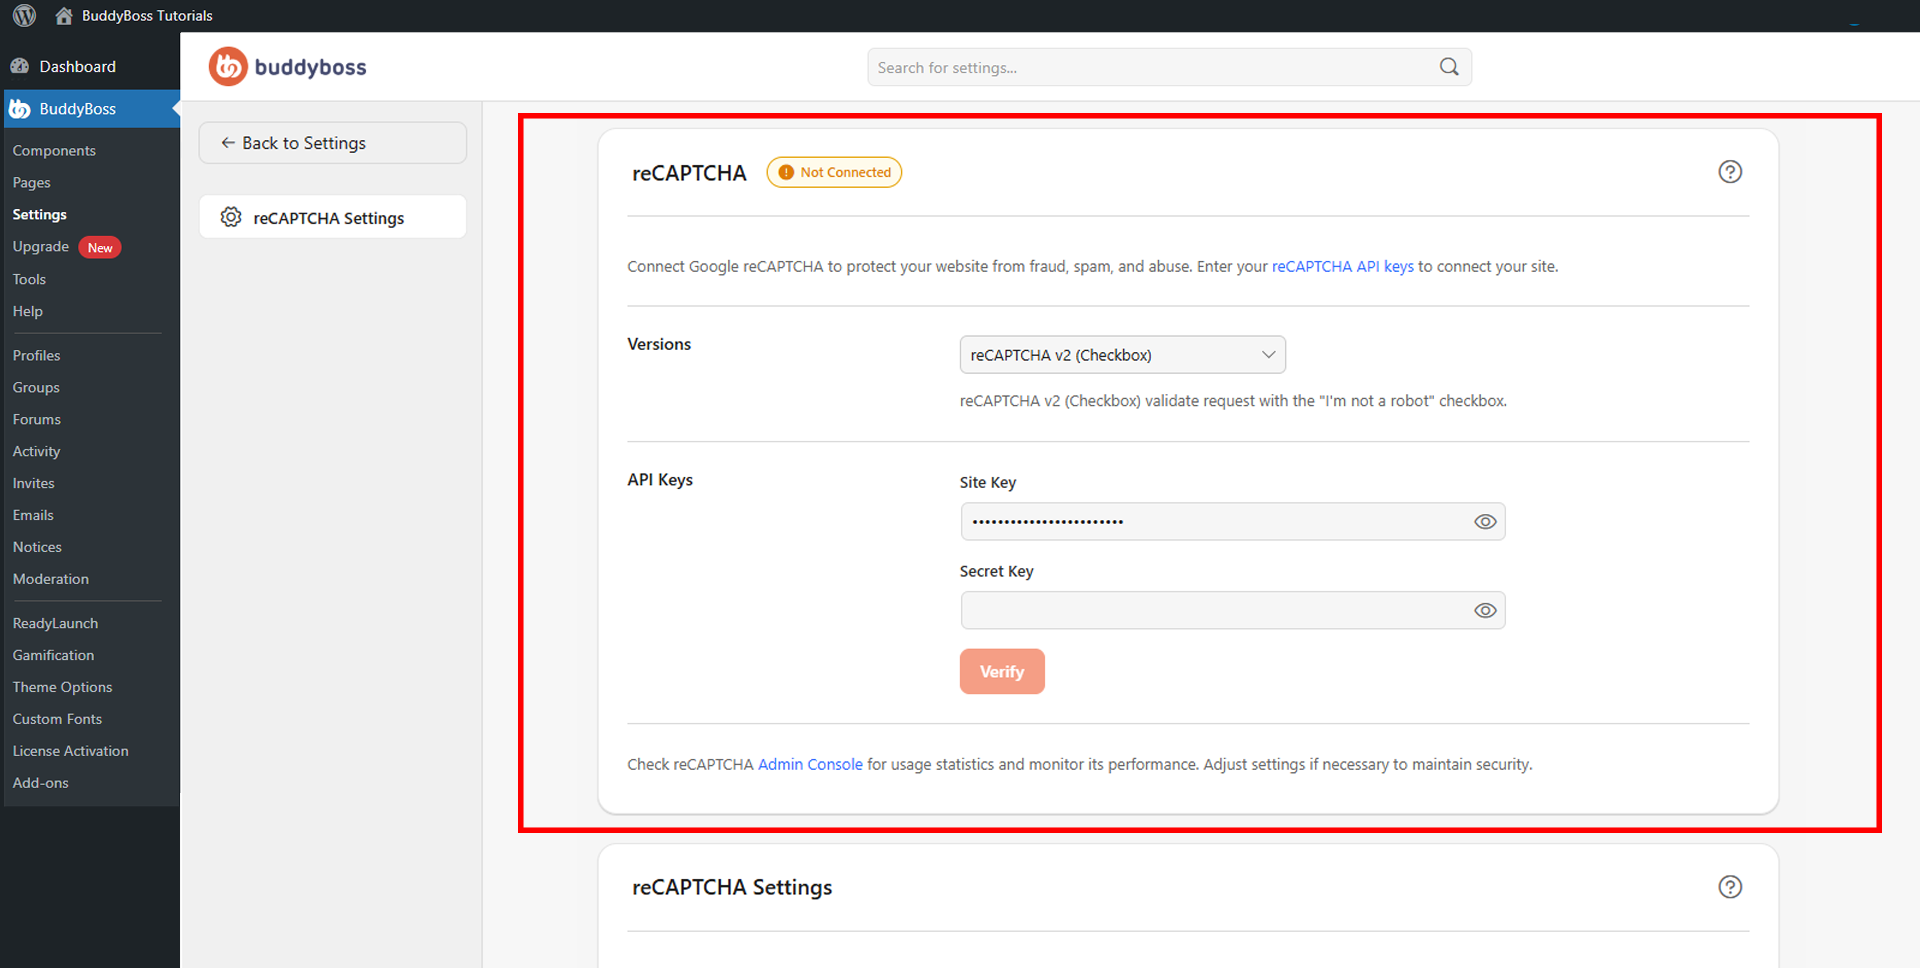
- Version: Select your preferred reCAPTCHA version from the dropdown.
- Site Key: Enter the Site Key from your Google reCAPTCHA account. Use the visibility icon to reveal or hide the key while entering.
- Secret Key: Enter the Secret Key from the same Google reCAPTCHA account. Use the visibility icon to reveal or hide it while entering.
To generate your API keys, click the reCAPTCHA API keys link in the settings panel to open the Google reCAPTCHA Admin Console, register your domain, and copy both keys. The Admin Console link at the bottom of the page lets you review usage statistics and monitor performance.
© 2026 BuddyBoss LLC. All Rights Reserved. | buddyboss.com