
Introduction
Google Firebase Cloud Messaging (FCM) powers push notifications for the BuddyBoss App on both iOS and Android devices. By integrating Firebase with your BuddyBoss App, you enable real-time notifications that keep your members informed and engaged.
This guide walks you through creating a Firebase project, enabling the Firebase Cloud Messaging API, generating a service account key, registering your iOS and Android apps, and connecting Firebase to your BuddyBoss App.
Tutorial Video
Create a Firebase Project
To create a new Firebase project:
- Log in to the Google Firebase Console.
- Click Go to Console.
- Click Create a Project.
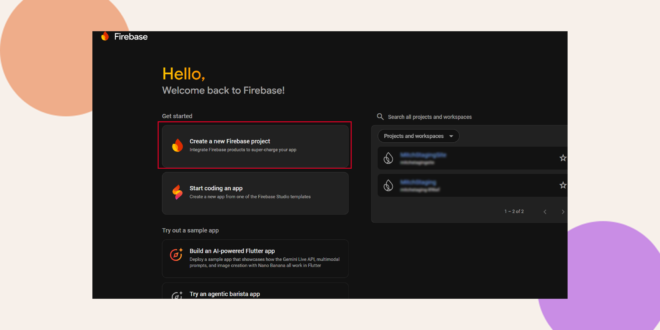
- Enter a Project Name.
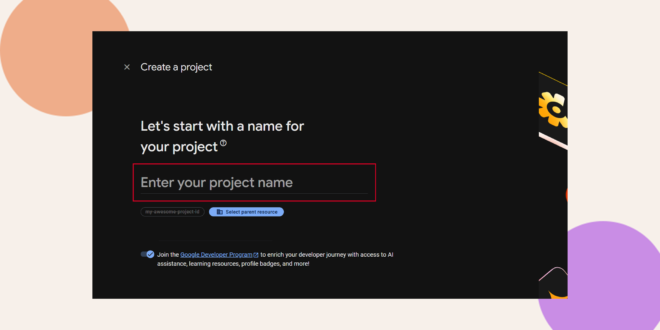
- Click Continue.
- (Optional) Enable Google Analytics for your project.
- Select an existing Google Analytics account or use the default account.
- Click Create Project.
- Wait for the project setup to complete.
- Click Continue to open your new Firebase project.
Enable Firebase Cloud Messaging API
Before BuddyBoss can send push notifications, the Firebase Cloud Messaging API must be enabled.
To verify or enable the API:
- Open your Firebase project.
- Click the Settings Menu
 .
.
- Select Project Settings.
- Open the Cloud Messaging tab.
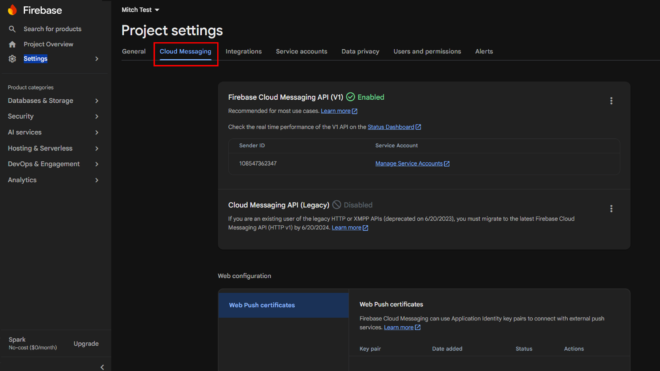
- Confirm that Firebase Cloud Messaging API shows an Enabled status.
If the API is not enabled:
- Click the ⋮ menu beside Firebase Cloud Messaging API.
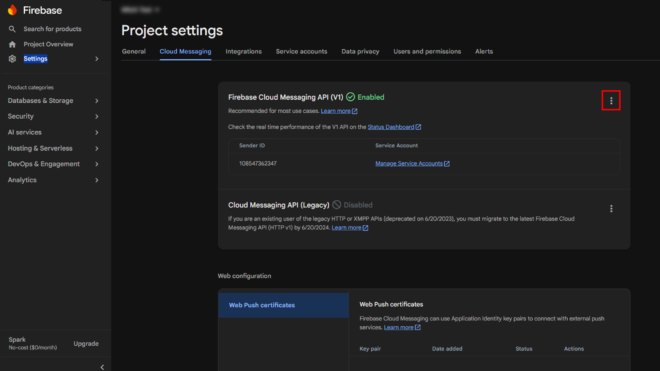
- Select Manage API in Google Cloud Console.
- On the Google Cloud page, click Enable.
- Confirm that the API status changes to Enabled.
Generate a Firebase Service Account Key
The service account key allows BuddyBoss to communicate securely with Firebase.
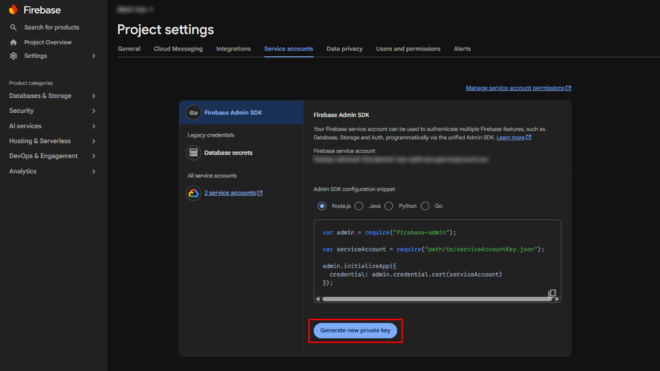
To generate the key:
- Navigate to Settings > General.
- Select the Service Accounts tab.
- Scroll to Firebase Admin SDK.
- Click Generate New Private Key.
- Click Generate Key in the confirmation dialog.
- Save the downloaded JSON file securely.
Important: The private key can only be downloaded once. Store it in a secure location.
Register Your App
Registering your application connects your BuddyBoss App to Firebase for iOS push notifications.
In the Firebase Project Overview, click Add App.
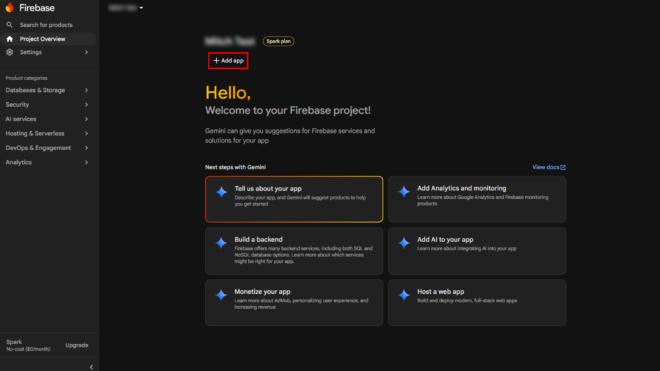
Register Your iOS App
To register your iOS app:
- Select the iOS platform.
- In your WordPress Dashboard, go to BuddyBoss App > Configure > iOS Settings.
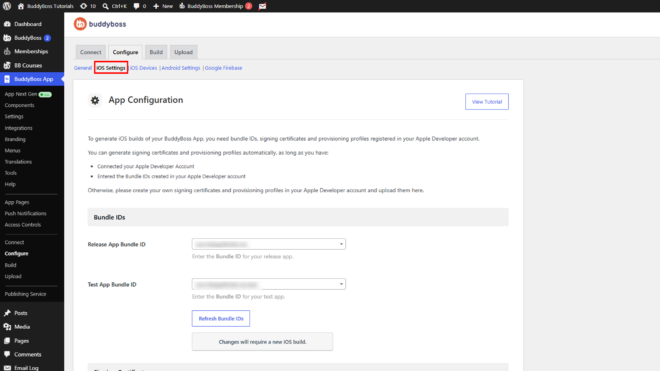
- Copy the Bundle ID.
- Return to Firebase and paste the Bundle ID.
- (Optional) Enter an App Nickname.
- (Optional) Enter your App Store ID.
- Click Register App.
- Download the GoogleService-Info.plist file.
- Continue through the remaining setup steps.
- Click Continue to Console.
Register Your Android App
To register your Android app:
- Select the Android platform.
- In your WordPress Dashboard, go to BuddyBoss App > Configure > Android Settings.
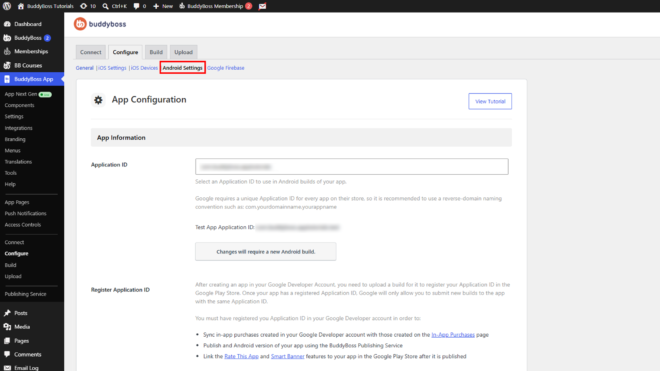
- Copy the Application ID.
- Return to Firebase and paste the Application ID.
- (Optional) Enter an App Nickname.
- Click Register App.
- Download the google-services.json file.
- Continue through the remaining setup steps.
- Click Done.
Connect Firebase to BuddyBoss App
After downloading the Firebase configuration files, upload them to your BuddyBoss App.
To connect Firebase:
- In your WordPress Dashboard, go to BuddyBoss App > Configure > Google Firebase.
- Locate the Firebase Cloud Messaging API V1 section.
- Upload the Service Account Key using the downloaded JSON file.
- Upload the GoogleService-Info.plist file under the iOS Configuration File section.
- Upload the google-services.json file under the Android Configuration File section.
- (Optional) Upload the configuration files for your test applications if applicable.
- Click Save Settings.
Note: BuddyBoss App uses Firebase Cloud Messaging API V1, which replaces the legacy Cloud Messaging API.
Verify the Configuration
After saving your settings, verify that Firebase has been configured correctly.
In BuddyBoss
Navigate to BuddyBoss App > Configure > Google Firebase and confirm that:
- The Service Account Key has been uploaded.
- The iOS configuration file is displayed.
- The Android configuration file is displayed.
- The settings have been saved successfully.
In Firebase Console
Verify that:
- Both your iOS and Android applications appear in the Firebase project.
- Firebase Cloud Messaging API is enabled.
- No configuration errors are displayed.
Once these steps are complete, your BuddyBoss App is ready to send push notifications to your members on both iOS and Android devices.