
Introduction
A Google Play Developer Account is required before you can publish Android apps on the Google Play Store. During the registration process, you’ll create your developer profile, verify your identity, provide contact information, agree to Google’s terms, and pay a one-time registration fee.
This guide walks you through each step to create your Google Play Developer Account.
Before You Begin
Before starting, make sure you have:
- A Google Account.
- A valid government-issued ID for identity verification.
- A phone number and email address for verification.
- A valid payment method for the one-time USD $25 registration fee.
- Your legal name and address.
Access Google Play Console
- Visit the Google Play Console.
- Sign in with the Google account you want to use as your developer account.
- Click Create developer account.
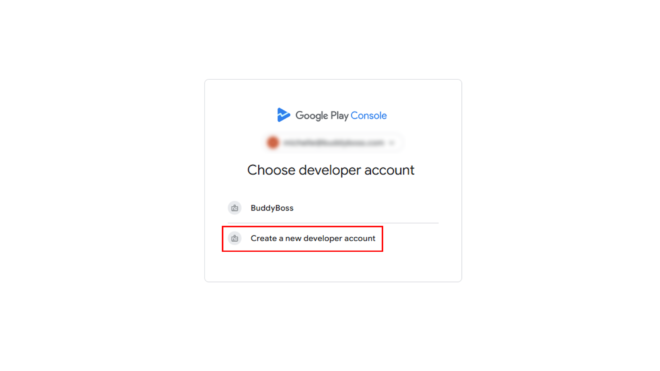
Choose an Account Type
Google will ask who you are creating the developer account for.
Choose one of the following:
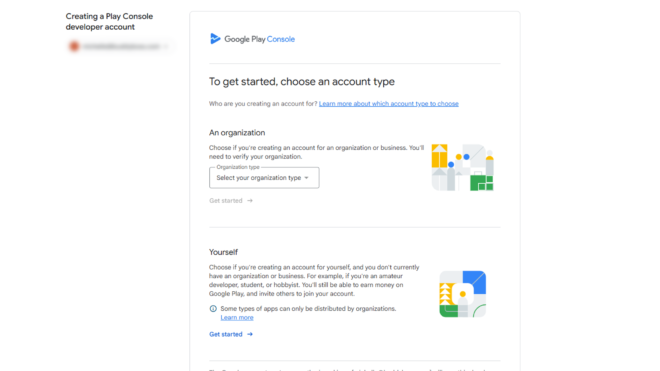
- An organization – Recommended if you’re publishing apps on behalf of a business, company, or nonprofit.
- Yourself – Choose this if you’re publishing apps as an individual.
Click Get started for your preferred account type.
Review the Requirements
Google displays the information you’ll need during registration, including:
- A developer profile email address.
- A contact email address and phone number.
- A payment method for the one-time registration fee.
- Identity verification before publishing apps.
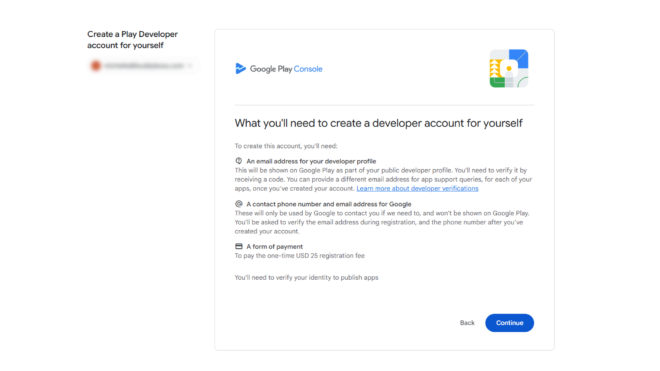
Click Continue.
Confirm Identity Information
Google explains that some of the information you provide will be used to meet Android developer verification requirements.
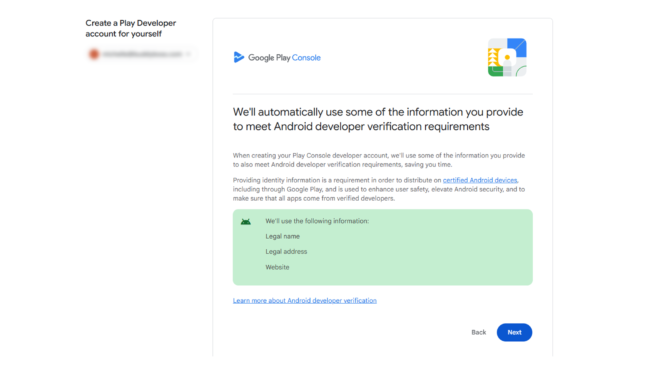
Review the information and click Next.
Choose a Developer Name
Enter the Developer Name that will appear publicly on Google Play.
This name represents your developer profile and your published apps. It can be changed later if needed.
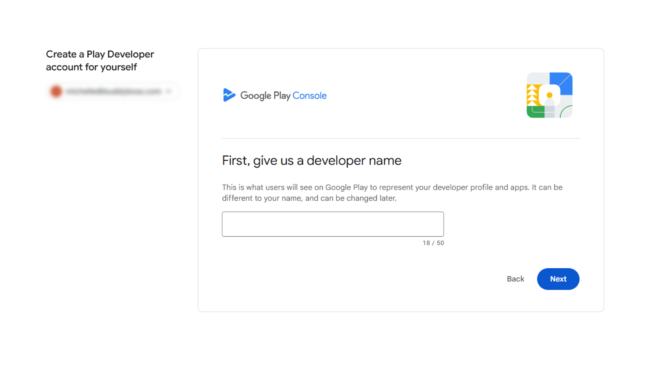
Click Next.
Create or Select a Payments Profile
A Google Payments Profile is required to verify your identity.
- Click Create or select payments profile.
- If you don’t already have one, create a new payments profile.
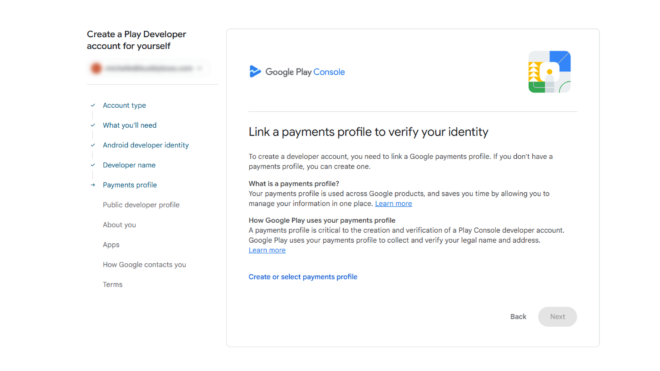
Provide the required information, including:
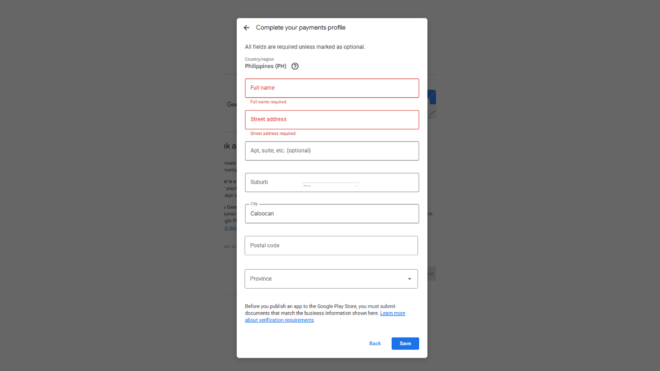
- Full legal name.
- Street address.
- City.
- Province or State.
- Postal code.
- Country or region.
Click Save.
Configure Your Public Developer Profile
Provide the email address that will appear on your public Google Play developer profile.
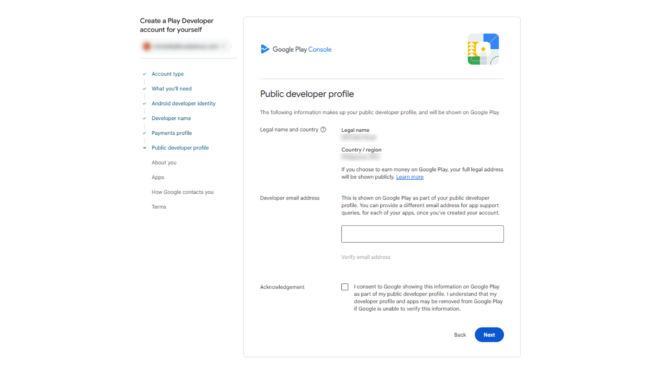
- Enter your Developer Email Address.
- Verify the email address if prompted.
- Read the acknowledgement.
- Select the consent checkbox.
- Click Next.
Tell Google About You
Google asks for additional information about your developer experience.
Complete the following:
- Describe any previous Android or Google Play development experience (optional).
- Indicate whether you’ve used another Google account to access Play Console within the last six months.
- Enter your website URL, or select I don’t have a website.
Click Next.
Provide Information About Your Apps
Google collects basic information about the apps you plan to publish.
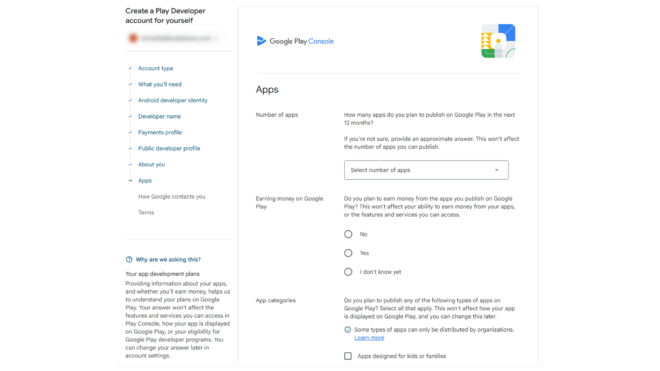
Complete the following:
Number of Apps
Select approximately how many apps you expect to publish during the next 12 months.
Google Play Earnings
Choose whether you plan to earn money from your apps:
- Yes
- No
- I don’t know yet
App Categories
Select any categories that apply to the apps you plan to publish, such as:
- Apps designed for kids or families
- Government apps
- News apps
- Banking apps
- Medical or telehealth apps
- Financial services
- Cryptocurrency apps
- Gambling apps
If none apply, select None of the above.
Click Next.
Provide Contact Information
Enter the contact details Google will use if they need to reach you.
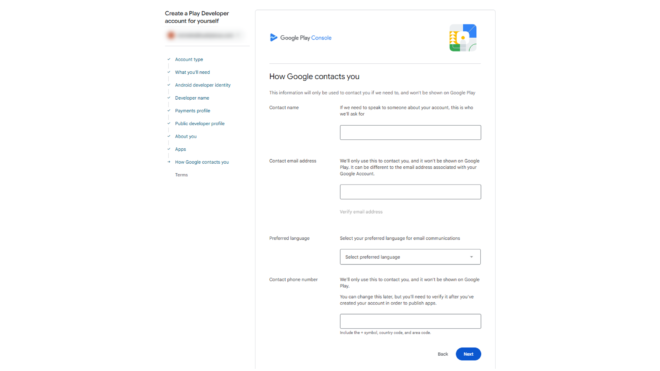
Provide the following:
- Contact name.
- Contact email address.
- Preferred language.
- Contact phone number.
Click Next.
Review and Accept the Terms
Read and accept the required agreements.
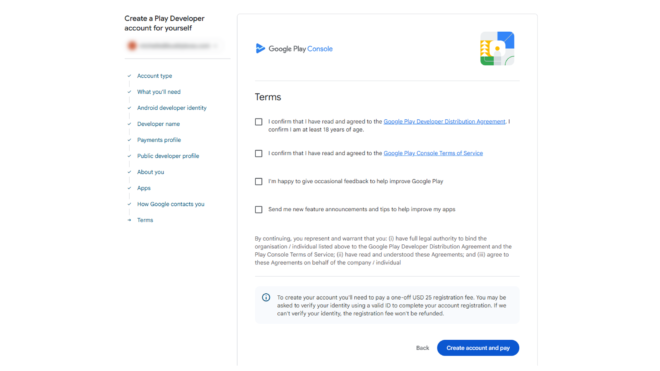
Required acknowledgments include:
- Google Play Developer Distribution Agreement.
- Google Play Console Terms of Service.
- Confirmation that you are at least 18 years old.
You may also choose whether to receive product updates and occasional feedback requests.
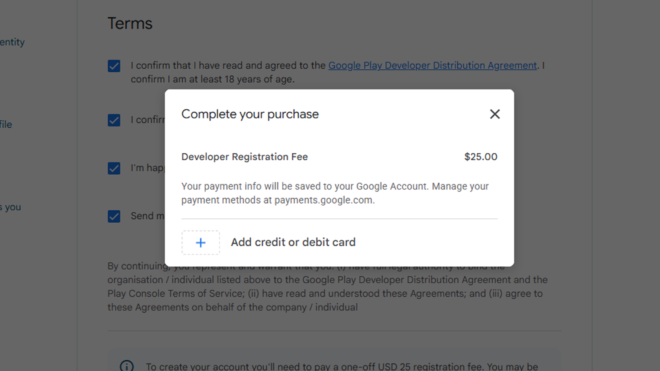
Pay the Registration Fee
Click Create account and pay.
Complete the payment of the one-time USD $25 developer registration fee using your preferred payment method.
Complete Identity Verification
After payment, Google may ask you to verify your identity.
Depending on your account type and country, you may be required to:
- Upload a government-issued ID.
- Complete identity verification.
- Verify your email address.
- Verify your phone number.
Your developer account will be activated after Google completes the verification process.
Verify Your Account
Once registration is complete:
- Sign in to the Google Play Console.
- Confirm that your developer account is active.
- You can now create your first Android application and begin preparing it for publication on Google Play.