
REQUIRES: PRO PLAN OR HIGHER • Last updated: Mar 12, 2026 • ~3 min read
The Discussion Tags section allows administrators to create and manage tags used in forum discussions. Tags help categorize discussions by topic, making it easier for members to search, filter, and discover relevant conversations. This manual walks you through adding tags and managing existing ones.
Tutorial Video
Accessing Discussion Tags
Navigate to your WordPress Dashboard, go to BuddyBoss > Settings > Forum Discussions > Discussion Tags.
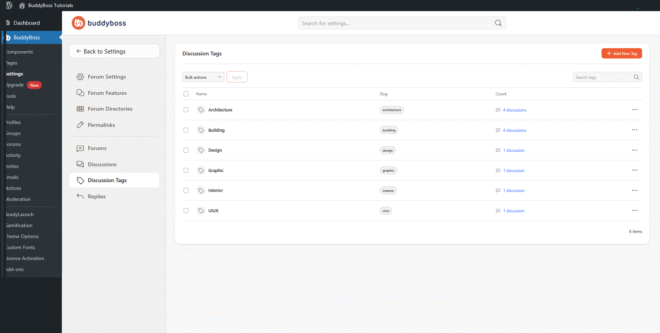
The panel lists all existing tags with their name, slug, and discussion count. Use the Search tags field to find a specific tag, or the Bulk Actions dropdown to manage multiple tags at once.
Adding a New Tag
Click Add New Tag to open the tag creation form. Fill in the available fields, then click Save to add the tag to your list:
- Name: How the tag appears across your site and inside discussions.
- Slug: The URL-friendly version of the tag name, using lowercase letters and hyphens (e.g., architecture).
- Description: An optional short note to help administrators understand the purpose of the tag.
Managing Existing Tags
Each tag has a three-dot menu with three quick actions:
- View: Opens the tag archive page to preview discussions assigned to that tag.
- Edit: Modify the tag’s name, slug, or description.
- Delete: Permanently removes the tag. Deleting a tag removes the categorization but does not delete the discussions associated with it.
© 2026 BuddyBoss LLC. All Rights Reserved. | buddyboss.com