
The Bookmarking feature in the BuddyBoss App allows members to save WordPress posts and access them later from a dedicated Bookmarks screen. To display bookmarked posts in the BuddyBoss App, you need to enable Bookmarking and add the Bookmarks core app screen to your app navigation.
Once configured, members can bookmark supported WordPress posts from the post listing or individual post screen. Saved posts appear on the Bookmarks screen and can be removed whenever they are no longer needed.
Enable Bookmarking
- In your WordPress Dashboard, navigate to BuddyBoss App > Settings > Blog Posts.
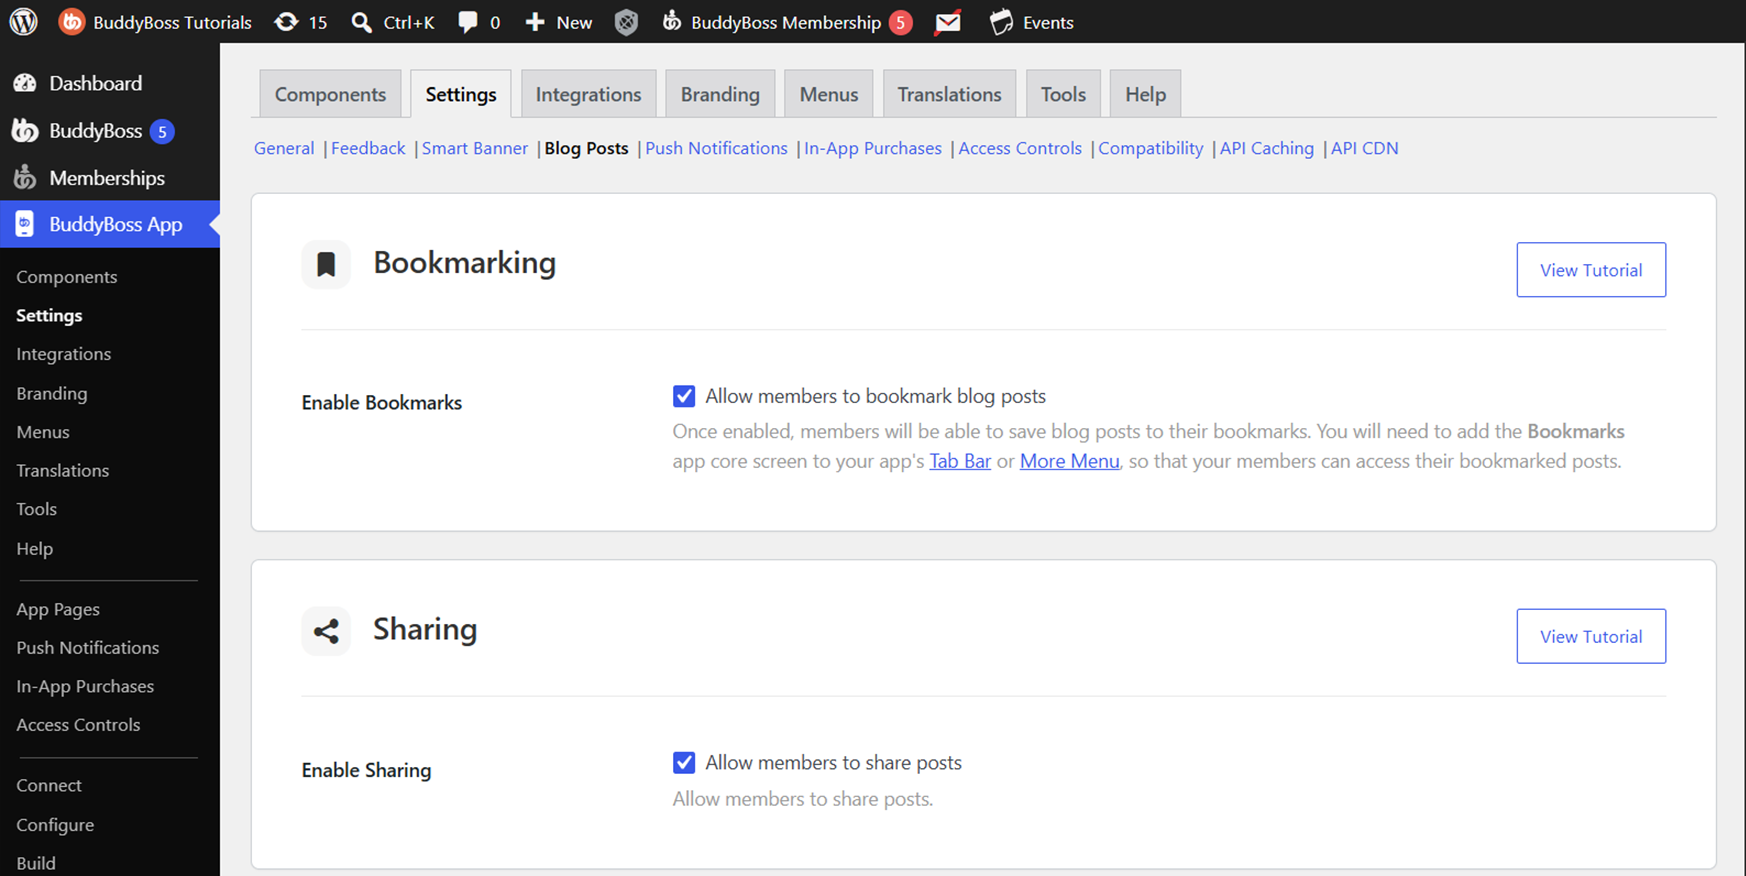
- Locate the Bookmarking option.
- Enable Bookmarking to allow members to bookmark WordPress posts in the app.
- Click Save Changes.
Add Bookmarks to the App Menu
Once Bookmarking is enabled, add the Bookmarks screen to your app navigation.
- Navigate to BuddyBoss App > Menus.
- Select the Tab Bar or More Menu, depending on where you want Bookmarks to appear.
- Under Core App, select Bookmarks.
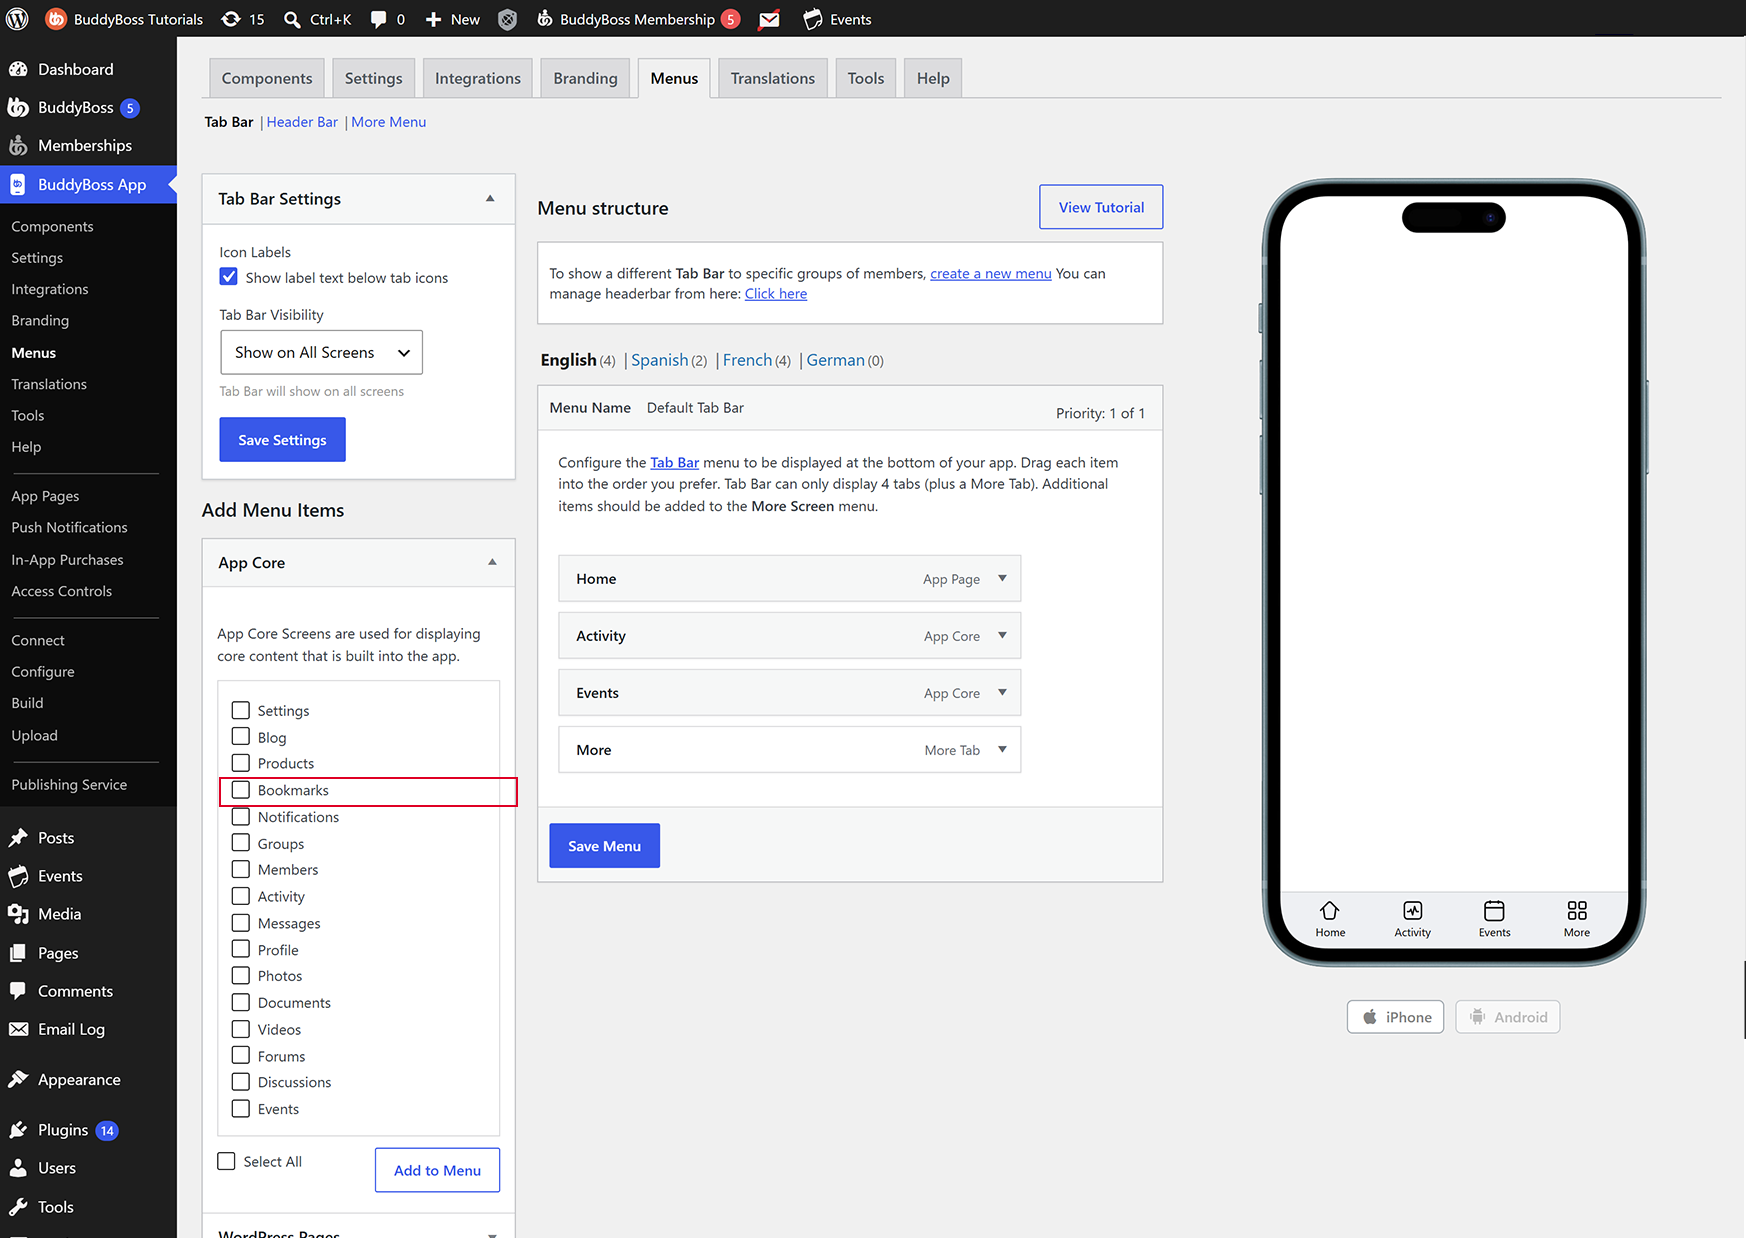
- Click Add to Menu.
- Drag and drop the menu item to your preferred position.
- Click Save Menu.
Members can now access their saved posts from the Bookmarks option in your app menu.
How Members Bookmark Posts
When Bookmarking is enabled, a Bookmark icon appears on supported WordPress posts in the app.
Members can tap the Bookmark icon from the blog post listing or from an individual post. When a post is successfully bookmarked, the icon changes from an outlined icon to a filled icon.
The saved post then appears on the Bookmarks screen.
Remove a Bookmarked Post
Members can remove posts they no longer want to keep bookmarked.
They can tap the Bookmark icon again from the individual post or remove the bookmark from the Bookmarks screen. The icon changes back from filled to outlined when the bookmark is removed.
Note: The Bookmarking feature described here supports WordPress posts in the BuddyBoss App.