Introduction
The MediaMark allows you to automatically add watermarks to images uploaded through MediaPress. You can apply either a text or image watermark to help protect your media, reinforce your branding, or identify the source of uploaded content. Once configured, every new image uploaded through MediaPress will automatically include the selected watermark.
Installing the plugin
To install MediaMark:
- Download the MediaMark add-on for MediaPress from your BuddyDev account page.
- Extract the downloaded mediamark.zip file to the WordPress plugins folder yourhostname/wordpress/wp-content/plugins OR
Go to your WordPress Dashboard > Plugins > Add New. Click the Upload Plugin button. Browse to the download file location, select the mediamark.zip & install the plugin. - Click the Activate Plugin button to activate the MediaMark plugin on your website. OR
To activate the plugin on your website site go to WordPress Dashboard > Plugins and then click the Activate button for MediaMark.
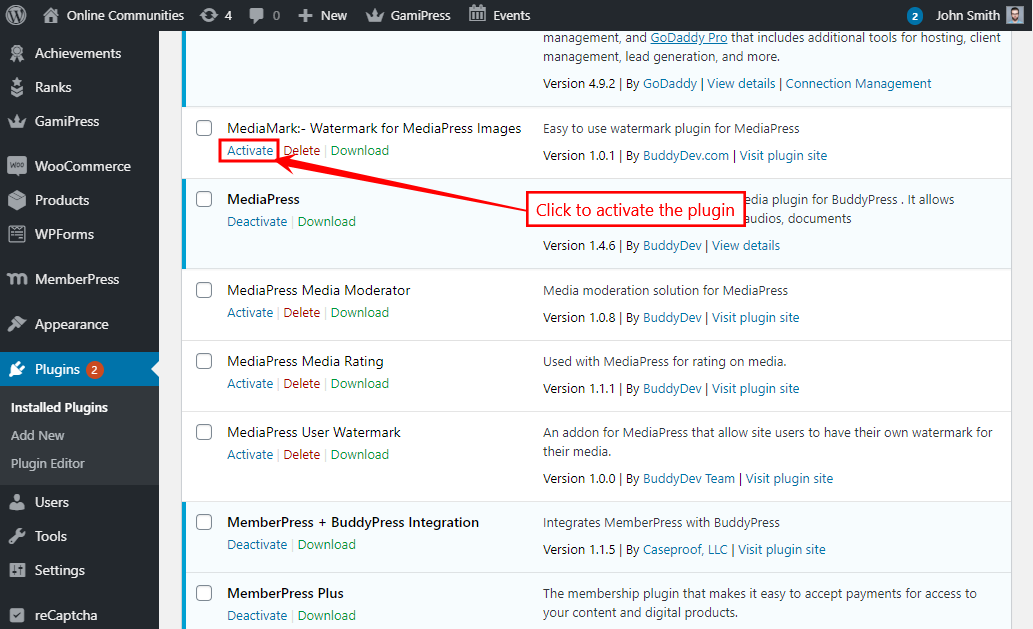
The MediaMark works and requires the BuddyBoss Platform and MediaPress plugin installed and activated on your website.
Setting up the plugin
To set up the plugin:
- Go to WordPress Dashboard > MediaPress > Settings > MediaMark.
- Select the Text Watermark or Image Watermark option from the Type of Watermark drop-down.
- Make the modifications to the other settings as required and then click the Save Changes button.
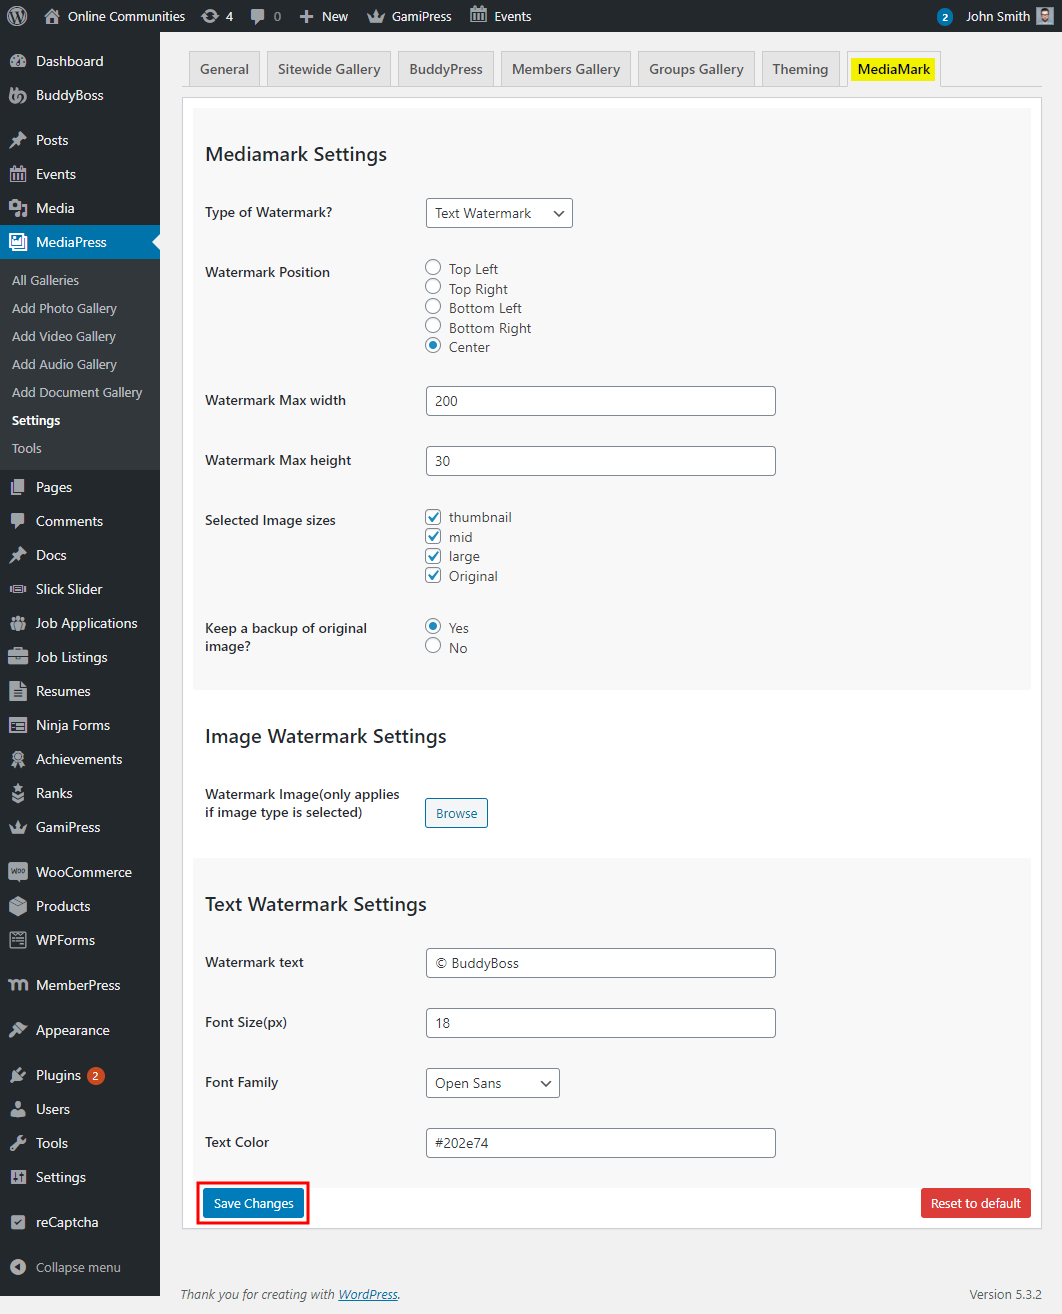
- All new media uploaded by a user will contain the selected watermark.