
Introduction
Before you can generate Android builds and sync your in-app purchases from your Google Developer account to your BuddyBoss App, you need to configure three key areas: your Application ID, your KeyStore certificate, and register your Application ID with Google Play. This guide walks you through each step in your WordPress admin and the Google Developer Console.
Tutorial Video
Configuring Your Application ID
Your Application ID uniquely identifies your app on Google Play. It must:
- Consist of at least two dot-separated segments (e.g., com.fruit.oranges).
- Start each segment with a letter.
- Contain only alphanumeric characters and underscores.
- Be unused by any other app.
For a test build, append .test (e.g., com.fruit.oranges.test).
- In WordPress, go to BuddyBoss App > Configure > Android Settings.
- Under App Configuration, enter your chosen Application ID.
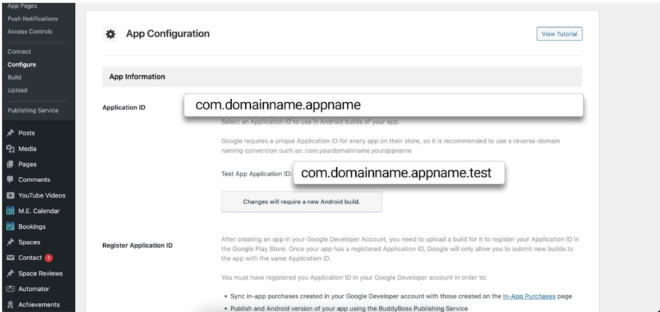
- Click Save Changes.
Important: To reserve your Application ID and prevent conflicts, register an app in Google Play Console using a build with that ID (see “Registering Your Application ID” below). Also, register the same ID in Firebase (refer to our Firebase tutorial).
Generating and Importing Your KeyStore Certificate
Generating a KeyStore
- In WordPress, navigate to BuddyBoss App > Tools > Generate KeyStore.
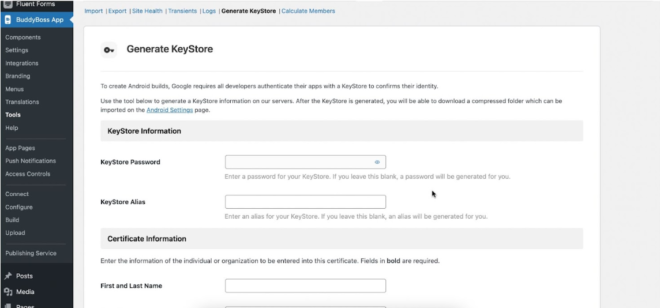
- Enter a KeyStore Password and KeyStore Alias (or leave blank to auto-generate).
- Fill in Certificate Information (First & Last Name required; add Organization if applicable).
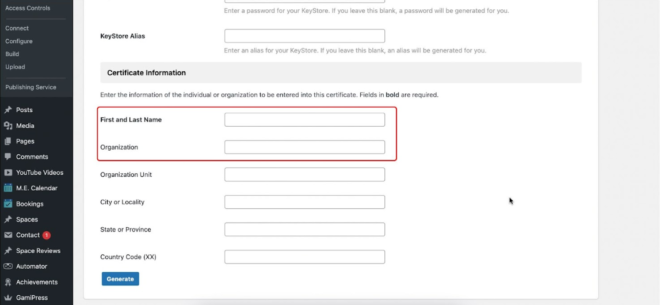
- Click Generate.
- Check the confirmation box and click Download to save the ZIP containing your KeyStore.
- Back up this ZIP securely—lost KeyStores cannot be replaced, and you’ll need it for all future updates.
Importing Your KeyStore
- In WordPress, go to BuddyBoss App > Configure > Android Settings.
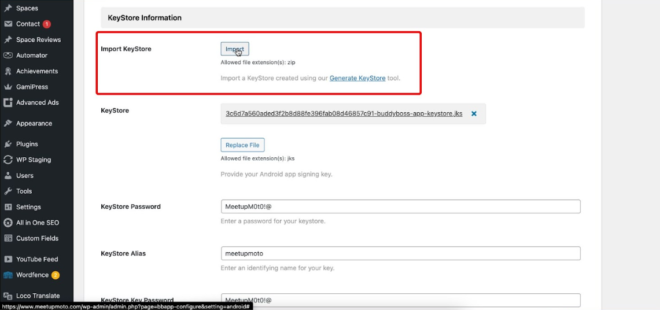
- Under KeyStore Information, click Import.
- Select the ZIP folder you downloaded.
- Click Save Changes.
Registering Your Application ID with Google Play
Registering your Application ID in Google Play Console prevents others from claiming it. You do this by uploading any release build with that ID.
Prerequisite: You’ve generated a Release App build in BuddyBoss App > Build.
- Log in to the Google Play Console with your developer account.
- Go to All apps, select your app, then under Release choose Production.
- Click Create new release.
- In App Bundles, click Upload and select the AAB file built with your Application ID.
- Click Save to register the ID.
Note: Once registered, all future builds must use this exact Application ID.