













WordPress already powers a huge share of the web, blogs, business sites, online stores, portfolios, all built on it. What’s changed recently is what site owners want to do once that site exists. A blog with a loyal readership, a store with repeat customers, a coaching business with an email list, all of these eventually hit the same realization: the audience is there, but there’s nowhere for them to talk to each other, or to you, beyond a comment section or a one-way newsletter.
That’s the gap community fills. Not a new website, not a rebuild, just a layer added on top of what already exists, giving your existing audience a reason to come back and to connect with each other, not just with your content.
The good news is that adding this doesn’t require starting over. If you already have a WordPress site with real traffic, real customers, or a real audience, you’re closer to having a community than it might feel like. What follows is how to figure out if now is the right time, what to actually look for in a community platform, and the exact setup steps once you’ve decided.
Is Your Site Ready for a Community?
Not every site benefits from adding one, and it’s worth being honest about this before spending any setup time. A few signals worth checking for:
People are already trying to connect around your content. If commenters reply to each other, not just to you, if your social posts get people tagging friends or asking each other questions, that’s an existing appetite for interaction your site currently has no proper place for.
You have repeat visitors or repeat customers, not just one-time traffic. Community works because people come back. If your traffic is mostly first-time visitors who never return, a community won’t manufacture that pattern, it needs an existing reason for people to be there more than once.
You’re already fielding the same questions repeatedly. Customer support tickets, comment sections full of the same question asked different ways, DMs asking things other customers have also asked, this is a sign a shared space would genuinely reduce your workload, not just add a feature.
You have something to sell alongside it, or already do. Community pairs naturally with courses, memberships, or products. If you’re already selling something, adding community around it tends to increase how long people stick around and how much they engage with what you sell.
If none of these describe your site yet, that’s useful information too. Building an audience and building a community are different projects, and trying to force the second before you have the first usually produces an empty room nobody wants to be first to post in.
What to Look for in a Community Platform
Once you’ve decided community is worth adding, not every platform or plugin gives you the same thing. Here’s what actually matters, regardless of which option you end up choosing.
Member profiles. People need an identity beyond a comment name, something that shows who they are and what they’ve contributed. Without this, there’s no reason for anyone to invest in the quality of what they post.
An activity feed. A single place where new posts, replies, and updates surface, so members don’t have to hunt through the site to find what’s new. This is what turns occasional visits into a habit.
Groups or spaces. The ability to segment discussion, by topic, by membership tier, by course cohort, rather than forcing every conversation into one undifferentiated space.
Real notifications. Members who post and never hear back don’t post again. A platform needs to reliably tell someone when their thread gets a reply, by email, on-site, or both.
Forums or structured discussion, not just a feed. A real-time feed is good for quick updates, but searchable, threaded discussion is what accumulates value over time. The two serve different purposes, and a platform that only offers one is missing half the picture.
Integration with what you already sell. If you run a store, a membership plugin, or a course, the community layer should connect to that automatically, gating access, syncing members, rather than requiring manual work every time someone joins or cancels.
Mobile access. However people already interact with your site, if that’s mostly on a phone, the community experience needs to hold up there too, not just look fine on desktop.
Moderation and access controls. The ability to set who can post where, and handle spam or bad behavior, before it becomes a problem rather than after.
Checking a specific platform against this list, rather than just picking whatever comes up first in a search, is what determines whether the community actually gets used six months from now.
The Plugin That Covers All of This
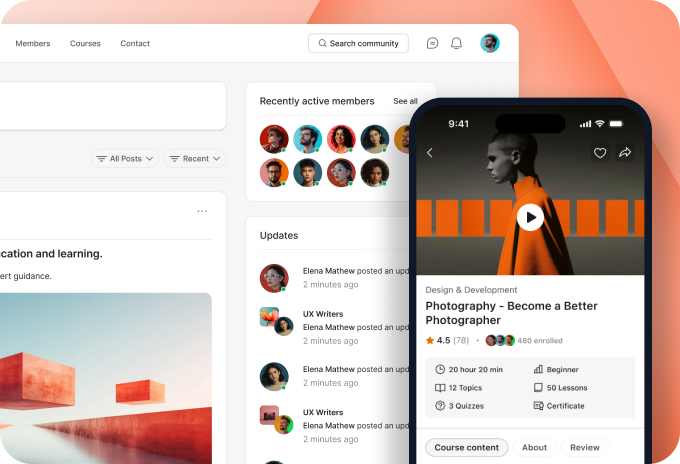
Every item on that checklist is a real requirement, and evaluating platforms against it one by one takes real time. This guide walks through BuddyBoss because it covers the full list in a single plugin: member profiles, an activity feed, groups, real notifications, forums, and native memberships and courses, installed directly on the WordPress site you already have, rather than assembled from several separate tools.
If you land on a different plugin after checking it against that list, the checklist above is still the right one to hold it to. Everything from here, though, is written for BuddyBoss’s actual setup screens.
Before You Install Anything
Four things to check first, since skipping them is where most setups run into trouble on an existing site specifically.
Back up your site. Beyond whatever automated backup your host runs, take a manual backup right before you start. You’re adding a plugin to a site with existing content, not starting fresh, so this is the one step worth never skipping.
Check your permalink structure. Go to Settings > Permalinks and confirm it’s set to Post name. BuddyBoss Platform’s components depend on this setting to function correctly, and older sites are sometimes still running the default “Plain” structure from years ago. Thirty seconds now avoids a confusing debugging session later.
Confirm your hosting can handle it. A community adds real-time activity, more concurrent users, and more database queries than a typical blog. Basic shared hosting can slow down noticeably as activity increases. If you’re on shared hosting and expect meaningful engagement, upgrade before launch, not after members start complaining.
Test on a staging site first. This matters specifically because you have an existing, live site, not a blank install. Most managed hosts include one-click staging: WP Engine (Sites > Add Staging), SiteGround (Site Tools > WordPress > Staging), and Bluehost (Staging > Create Staging Site) all support this natively. If your host doesn’t, the WP Staging plugin clones your site into a subfolder for testing. Set up community features there first, confirm nothing breaks, then deploy to production.
You Don’t Have to Change Your Theme
This is the part people worry about most, and it’s less disruptive than it sounds. BuddyBoss Platform is theme-independent: it works with any theme that supports standard WordPress templates and page builders, and it’s been specifically tested for full compatibility with Elementor. If your existing site already uses Elementor, or a standard WordPress theme, you can add community features without touching your current design at all.
If you do want the fully native BuddyBoss experience eventually, header, member menus, and templates all built for community, that’s the BuddyBoss Theme, installed separately alongside a BuddyBoss Child Theme so your customizations survive future updates. But it’s optional, not a prerequisite.
Installing the Platform
- Go to Plugins > Add New > Upload Plugin in your WordPress dashboard.
- Upload the BuddyBoss Platform
.zipfile, downloaded from your BuddyBoss account’s Downloads section. - Click Install Now, then Activate.
If you’ve previously installed BuddyPress or bbPress for basic profiles or a forum, you don’t need to keep them running alongside this. BuddyBoss Platform is built as a fork of both and replaces them entirely, so anything built for BuddyPress or bbPress continues to work without a separate install.
If the Upload Plugin button doesn’t appear, it’s almost always one of two things: your WordPress user doesn’t have administrator privileges, or your WordPress installation is out of date. Check both before assuming something’s wrong with the plugin itself.
Turning On What You Actually Need
Go to BuddyBoss > Components and activate only what your community actually needs to start. Common starting point: Activity (the main feed) and Groups. Add Forum Discussions once you have enough content or an active-enough audience to justify a forum, an empty forum looks worse than no forum at all.
If you do turn on forums, the forum configuration guide covers every setting, and if you want forums scoped to specific groups rather than one site-wide space, the group forum discussions guide walks through connecting the two.
Connecting What You Already Sell
If you already run WooCommerce, a membership plugin, or an LMS like LearnDash, none of that needs to be removed. BuddyBoss integrates with what’s already there rather than replacing it, so paying customers can get community access automatically without you managing it manually.
If you specifically run WooCommerce and want the store itself tied into membership tiers, that’s involved enough to deserve its own walkthrough, covered in how to build a membership community store with WooCommerce.
If you’re starting fresh rather than connecting an existing plugin, it’s worth knowing this is genuinely new territory for BuddyBoss: as of August 2026, memberships and courses are built into the platform natively for the first time, rather than requiring a separate LMS or membership plugin paired alongside it. That’s a real shift from how BuddyBoss worked historically. Plans start at $99/year, with 0% platform transaction fees on the Launch and Scale tiers, covering community, courses, and memberships as one purchase instead of three separate ones.
Set Notifications Before You Invite Anyone
This is the step people skip and regret. Members who post and get no reply, and no notification that someone eventually did reply, don’t post a second time. Confirm reply notifications are on by default before you open anything up to real members.
What This Actually Looks Like
For a WordPress site with an existing, returning audience, this is a plugin install, a permalink check, and a components menu, not a rebuild. Start with Activity and Groups. Add Forums once you have the content to support one. The theme you already have almost certainly doesn’t need to change.
Once your community is running, a natural next step is extending it to a branded mobile app, so members can access what you’ve built from their phone under your own name rather than a generic browser bookmark.
