
The BuddyBoss App allows you to showcase your WordPress blog content directly within the mobile app. By adding the Blog page to your app’s navigation, members can easily browse published posts, while the WordPress Block Editor lets you create engaging content that displays seamlessly across both your website and the BuddyBoss App. This guide explains how to Add a Blog Page and Posts to the BuddyBoss App.
Adding the Blog Page to the Menu Bar
To ensure users can access your blog posts easily, add the Blog page to the Tab Bar or More Screen.
How to Add the Blog Page to Your Menu
- Navigate to WordPress Dashboard > BuddyBoss App > Menus.
- Under the BuddyBoss App section, find Blog and check the box next to it.
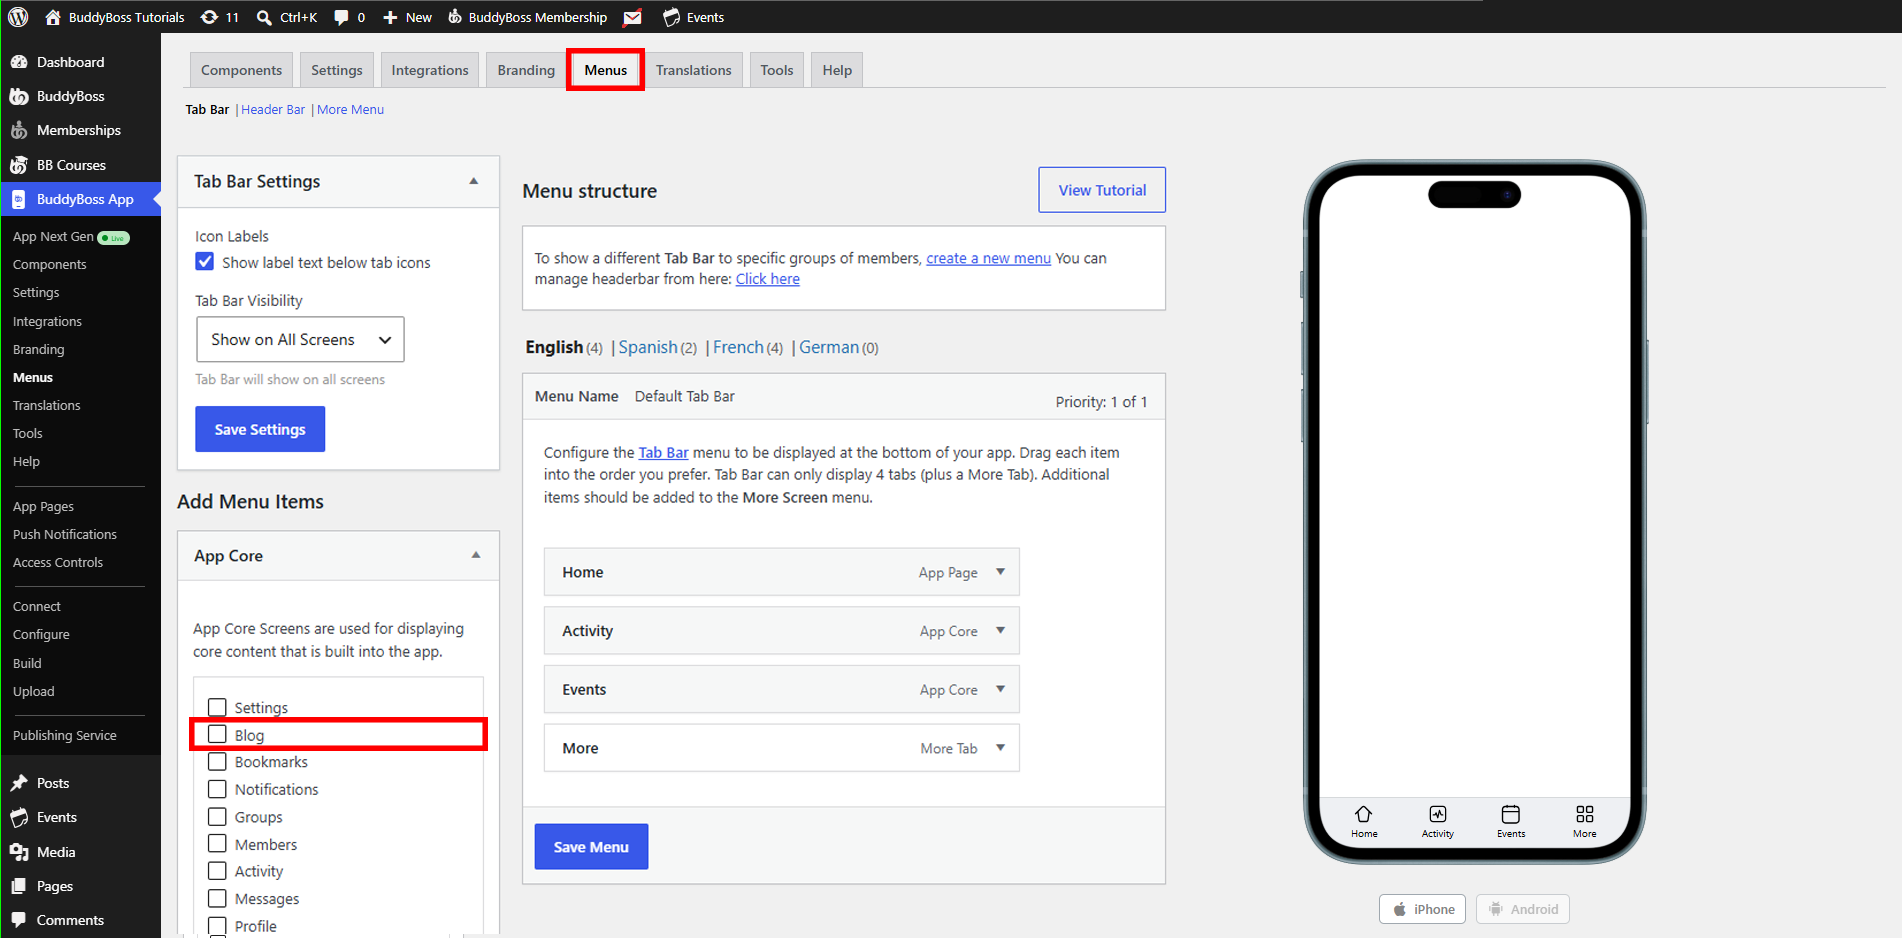
- Click Add to Menu.
- Drag and drop the menu item to rearrange its position if needed.
- Click Save Menu to apply your changes.
Your blog page is now accessible within the BuddyBoss App.
Creating a Blog Post
- Navigate to WordPress Dashboard > Posts > Add Post.
- Enter your Blog Title and content.
- Add a Featured Image to enhance the post’s visibility.
- Use Gutenberg Blocks to format your content.
Optimize Blog Posts for the BuddyBoss App
The BuddyBoss App supports many WordPress blocks. If your blog post includes blocks that are not supported in the app, the editor displays a notification at the top of the page.
To provide the best mobile experience:
- Review the unsupported block notification.
- Open the App Editor.
- Create alternative content using supported blocks for the BuddyBoss App.
- Save and publish your changes.
The BuddyBoss App will display the optimized mobile content while your website continues to display the original WordPress content.
Note: Using the App Editor ensures that blog posts containing unsupported WordPress blocks are displayed correctly in the BuddyBoss App while preserving the full layout on your website.