












Picture Black Friday morning. Your email just went out, the first buyer lands on your checkout, and it works. Their course opens. Your coffee is still hot.
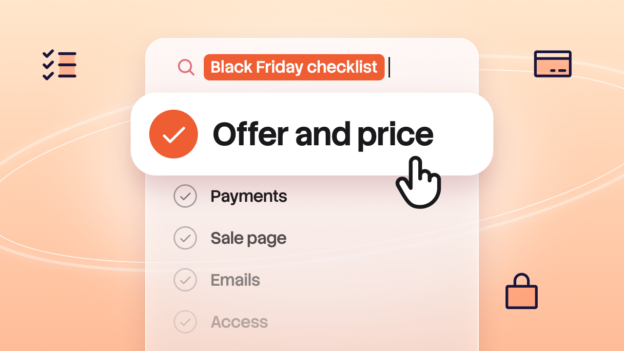
That is the day this checklist is built for. Work through five areas, pricing, payments, your sale page, emails and access, and Black Friday becomes the fun part. We use BuddyBoss Memberships and Courses as the example, and the steps fit any membership site.
Black Friday lands on Nov 27 and Cyber Monday on Nov 30, so you have time. Grab a coffee and let’s go.
1. Pick Your Offer and Price
First, decide what you are actually offering. Not the settings, the offer. Pick the discount, who can claim it and the day it ends. Future you will say thanks.
- Choose one clear offer, such as a sale price on an annual membership.
- Create it as its own membership: go to Memberships, click Add New Membership and enter the price under Membership Terms.
- Choose a Billing Type of One-Time or Recurrent. A price of 0.00 makes the membership free.
- Choose Lifetime or Expire under Access, so you know how long each buyer keeps access.
One thing to settle now: a recurring membership bills again, so decide what renewals will cost and check that price before you publish. Surprises are for birthdays. The membership setup guide walks through each field.
2. Connect and Test Payments
Nothing flattens a sale like a checkout that says no. Stripe is the gateway BuddyBoss lists for memberships, and it supports cards, Apple Pay, Google Wallet and recurring subscriptions. Stripe’s own guides to Apple Pay and Google Pay explain how each wallet works.
- Go to Memberships > Settings and open the Payments tab.
- Click Add Payment Method, choose Stripe, then click Connect with Stripe.
- Choose whether to show the payment label, icon and description at checkout.
- Buy your own sale membership once and confirm you get access.
Do this a week before the sale, not on the morning of. Your stress levels will thank you. The payment methods guide covers each step.
3. Dress Up Your Sale Page
Your price box is your shop window. It is the first thing buyers see, so make it look like you meant it. The Price Box tab controls how a membership appears on the listing and registration pages, and it has a live preview, so you can tinker until it looks right.
- Write a Title and Heading Text that name the offer in plain words.
- Add a Benefits checklist with three to five points.
- Turn on Highlighted for the sale membership so it stands out in the crowd.
- Set the Button Text and Button Position.
- Set a Custom Thank You Page in the Registration tab so new members land somewhere useful.
- Turn on Show on Registration Page in the Advanced tab if new signups should see the offer.
Set Pricing Display to Auto, and the page shows the price you set under Membership Terms. One less number to keep in sync.
4. Write Your Emails Now
Write your emails before the sale and schedule them. Black Friday you will have plenty to do. Use the email tool you already have.
A simple sequence is enough:
- A teaser a few days before launch.
- The launch email on day one.
- A reminder in the middle of the sale.
- A last-day email.
Each email needs one offer, one button and one end date. Send the launch email to your whole list, and send current members a short note so they know what they already have.
5. Lock the Right Doors
New buyers should reach what they paid for, and nothing else. Think of your access settings as a very good doorman.
- On any page, find Access Protection in the page editor and choose which memberships can open it.
- A membership can also restrict courses, course categories, course tags and profile pages.
- For a course, only members of the membership you choose can view or enroll in it.
- Turn on Protect BuddyBoss Platform Profile Pages if profiles should be hidden from logged-out visitors. Remove any Custom URI rules that protect /members/ first.
- On the Advanced tab, link a BuddyBoss Group to the membership if members get a group.
Then play customer. Sign up with a fresh account, buy, and confirm you can open the course and cannot open anything else. If you run a branded app, check the same thing there, because courses and memberships deliver inside it. The page restriction guide shows the Access Protection steps.
Three Mistakes to Avoid
- Locking out logged-out visitors by accident. Protect BuddyBoss Platform Profile Pages blocks logged-out visitors from individual member profiles. If your sale page links to profiles, check it while logged out.
- Forgetting the renewal price. A Recurrent membership bills again, so decide what renewals cost before you publish the sale membership.
- Skipping the thank-you page. You can set a Custom Thank You Page, so use it to point new buyers to their course.
The Final Check Before You Launch
- The sale membership is published with the right price and billing type.
- Stripe is connected and your test purchase worked.
- The Price Box and Thank You page are set.
- Every email is written and scheduled with the end date in it.
- Access works for a brand new account.
Tick every box and you are ready. Go celebrate with something nice.
Run Your Own Sale
You have the checklist. Now put it to work on your own site and run your own sale.
BuddyBoss puts your community, memberships and courses in one place, on a WordPress site you own. If you have not built your community yet, here is how to add one to your WordPress site.
Now comes the biggest surprise from BuddyBoss this year. This Black Friday, BuddyBoss is running its only sale of the year, with up to 65% off. Surprises are for birthdays, but this one is the exception. See the plans and pick the one that fits.
