
The BuddyBoss App Access Rules allow you to control which members can access specific content and areas of your mobile app. You can restrict access to all logged-in members or members belonging to specific Access Groups, giving you greater control over how content is delivered to different audiences.
Access Rules can be configured for general app access, App Pages, WordPress Pages, Posts, and LearnDash Courses, including course categories and tags.
Prerequisite
Ensure Access Controls is enabled in your BuddyBoss App before migrating your Require Purchase settings.
To activate Access Controls:
- Go to your WordPress Dashboard > BuddyBoss App > Components.
- Locate Access Controls.
- Click Activate.
Once activated, you can create Access Groups and configure the access restrictions needed to replace your previous Require Purchase settings.
Configuring General Access
Go to BuddyBoss App > Access Controls > General.
- Check Restrict Access to require login. With this, only specified groups may enter the app.
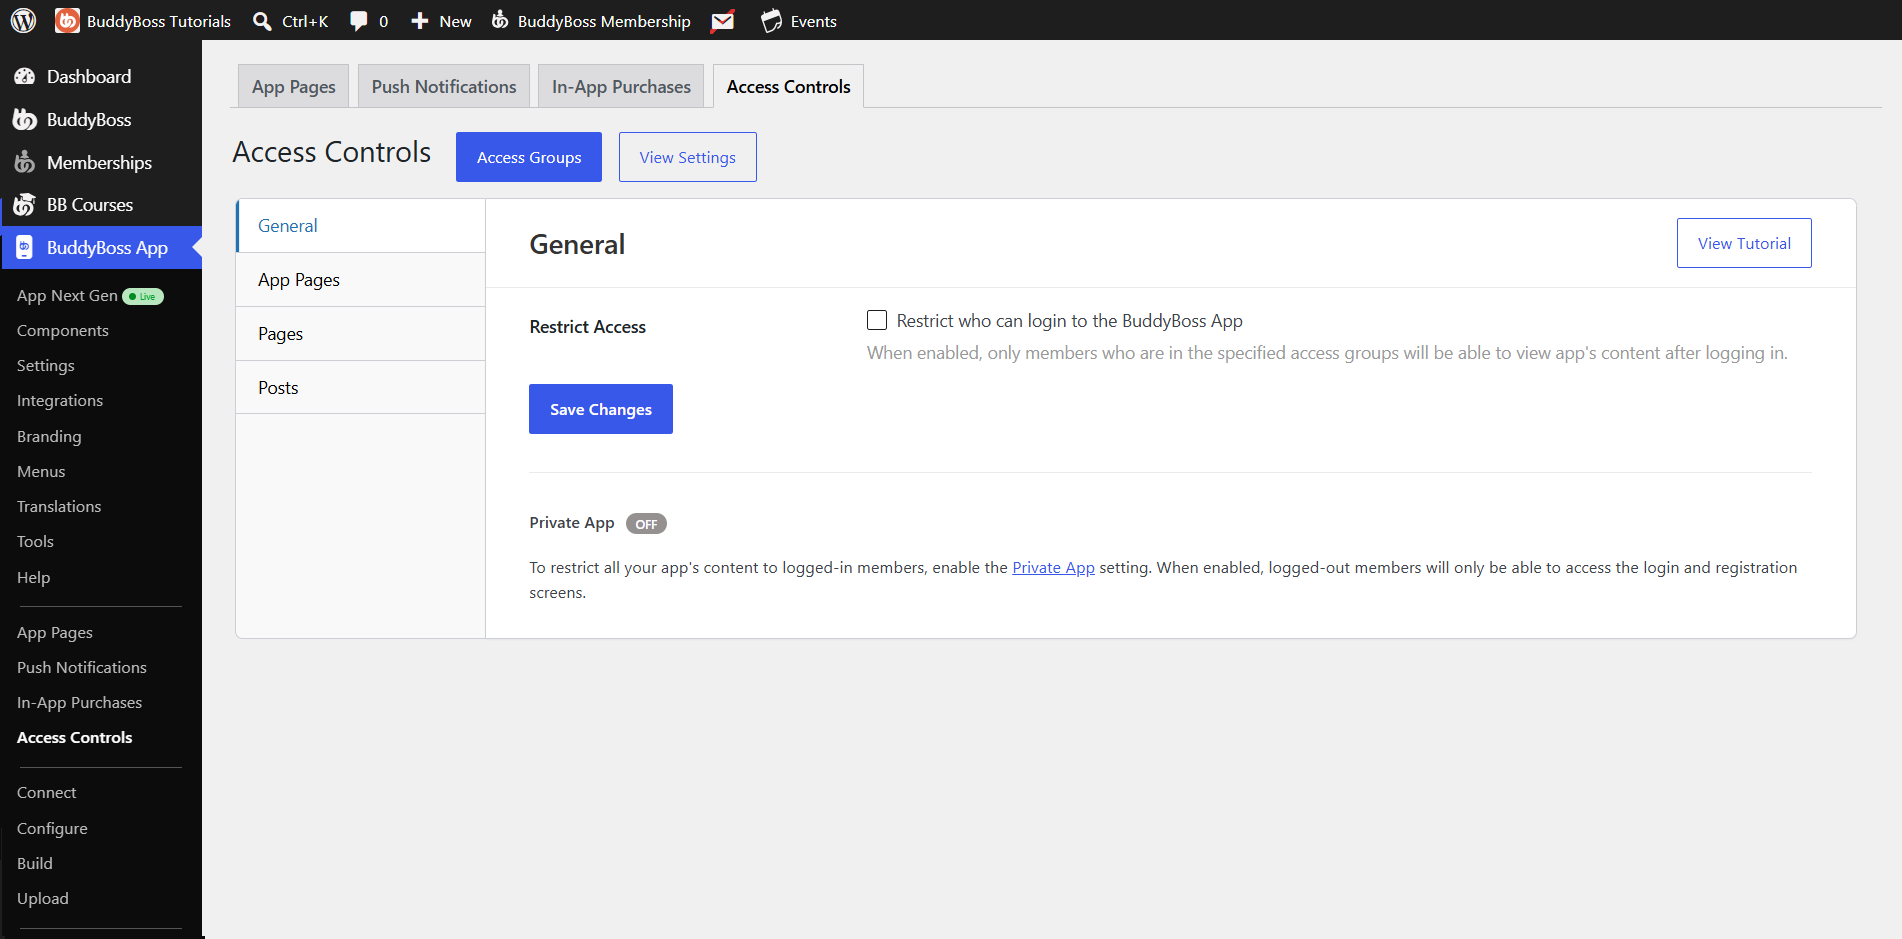
- Select one or more Access Groups (e.g., “Gold Members”).
- Choose a Restricted Action:
- Return to Login
- Show Product Screen
- Show App Page
- Click Save Changes.
Note: To lock out all non-logged-in users by default, enable Private App under BuddyBoss App > Settings > General > Privacy.
Restricting App Pages, WordPress Pages & Blog Posts
Switch to the App Pages, Pages, or Posts tab.
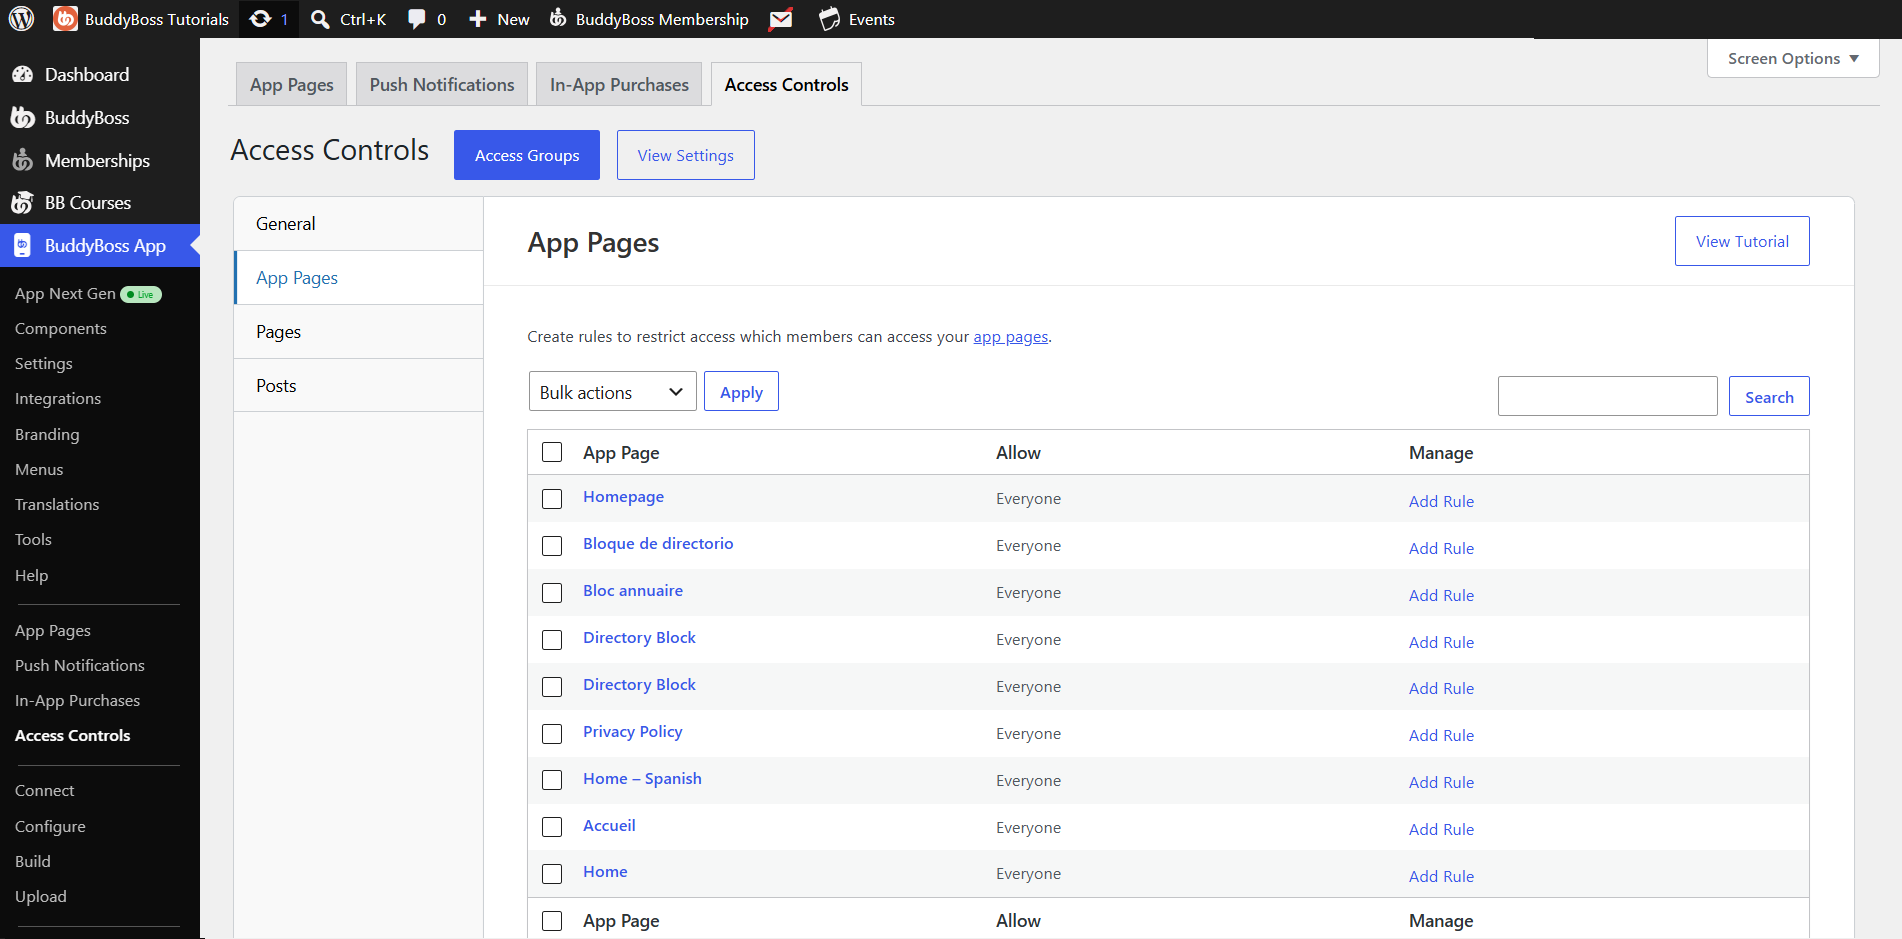
- Click + Add Rule next to the item you wish to protect.
- From the dropdown, select restriction type:
- All logged-in members
- Members in specific Access Groups
- If using groups, select the group(s).
- Choose Default or Custom restricted message:
Note: Custom lets you override title, copy, button action, and enable a content teaser.
- Click Save.
Note: Logged-out users always see the login modal first when trying to access protected content.
Restricting LearnDash Courses
Specific Courses
- Go to Courses > Courses.
- Click + Add Rule for the target course.
- Select restriction (logged-in or by Access Group).
- Click Save.
Categories & Tags
Switch to Courses > Categories & Tags.
- Add rule for any course Category, Tag, or custom taxonomy.
- Define access conditions and click Save.
All Courses Default
Open Courses > Default Settings.
- Check Restrict All Courses.
- Select restriction type and Access Group.
- Choose to hide or show restricted courses in directories and blocks.
- Click Save Changes.