
Introduction
The Member Blogging add-on allows your community members to create and publish blog posts directly from the front end of your BuddyBoss website. Learn how to install and activate BuddyBoss Member Blogging. Once enabled, members can contribute content without requiring access to the WordPress dashboard. Members can also access and manage their blog posts directly from the Blogs tab in their BuddyBoss profile, making it easy to create, edit, and organize their content from the front end.
Tutorial Video
Prerequisites
Before installing Member Blogging, make sure:
- BuddyBoss Platform is installed and activated.
- You have BuddyBoss Web Platform Scale to download the BuddyBoss Member Blogging plugin.
- You have administrator access to your WordPress site.
Download the Member Blogging Plugin
Before installing the plugin on your website:
- Sign in to your BuddyBoss account.
- Go to My Account > Downloads.
- Locate the BuddyBoss Member Blogging plugin.
- Download the latest ZIP file to your computer.
Install the Member Blogging Plugin
- From your WordPress Dashboard, go to Plugins click Add Plugin.
- Upload the BuddyBoss Member Blogging zip file.
- Click Activate.
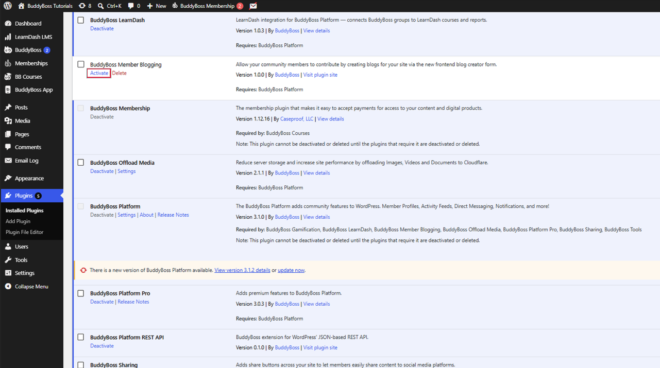
Enable Member Blogging
After activating the plugin:
- Go to BuddyBoss Dashboard > Settings
- Locate the Member Blogging under the add-ons section.
- Toggle the switch to Enable.
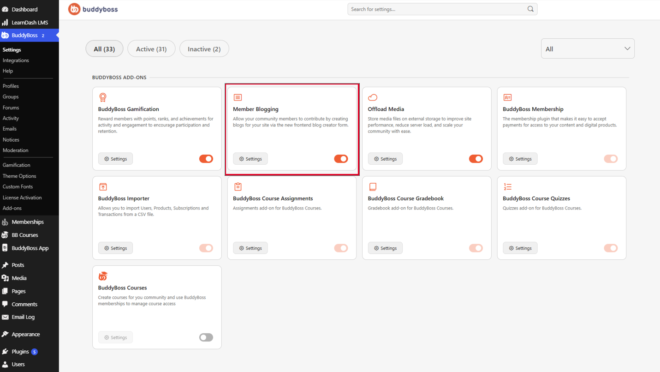
- Once enabled, the Settings button becomes available.
Verify the Installation
After enabling the add-on:
- The Member Blogging add-on should display as Enabled in BuddyBoss > Add-ons.
- Community members can create blog posts using the front-end blogging interface.
- Members can access and manage their blog posts from BuddyBoss Profile > Blogs in their profile navigation.
- Administrators can continue managing all blog posts through the WordPress dashboard.