
The BuddyBoss Course Tags help organize and classify your courses using descriptive keywords. Unlike categories, tags provide more specific labels that make it easier for learners to discover related courses. You can also restrict access to course tags by assigning one or more BuddyBoss Membership plans.
Access BuddyBoss Course Tags
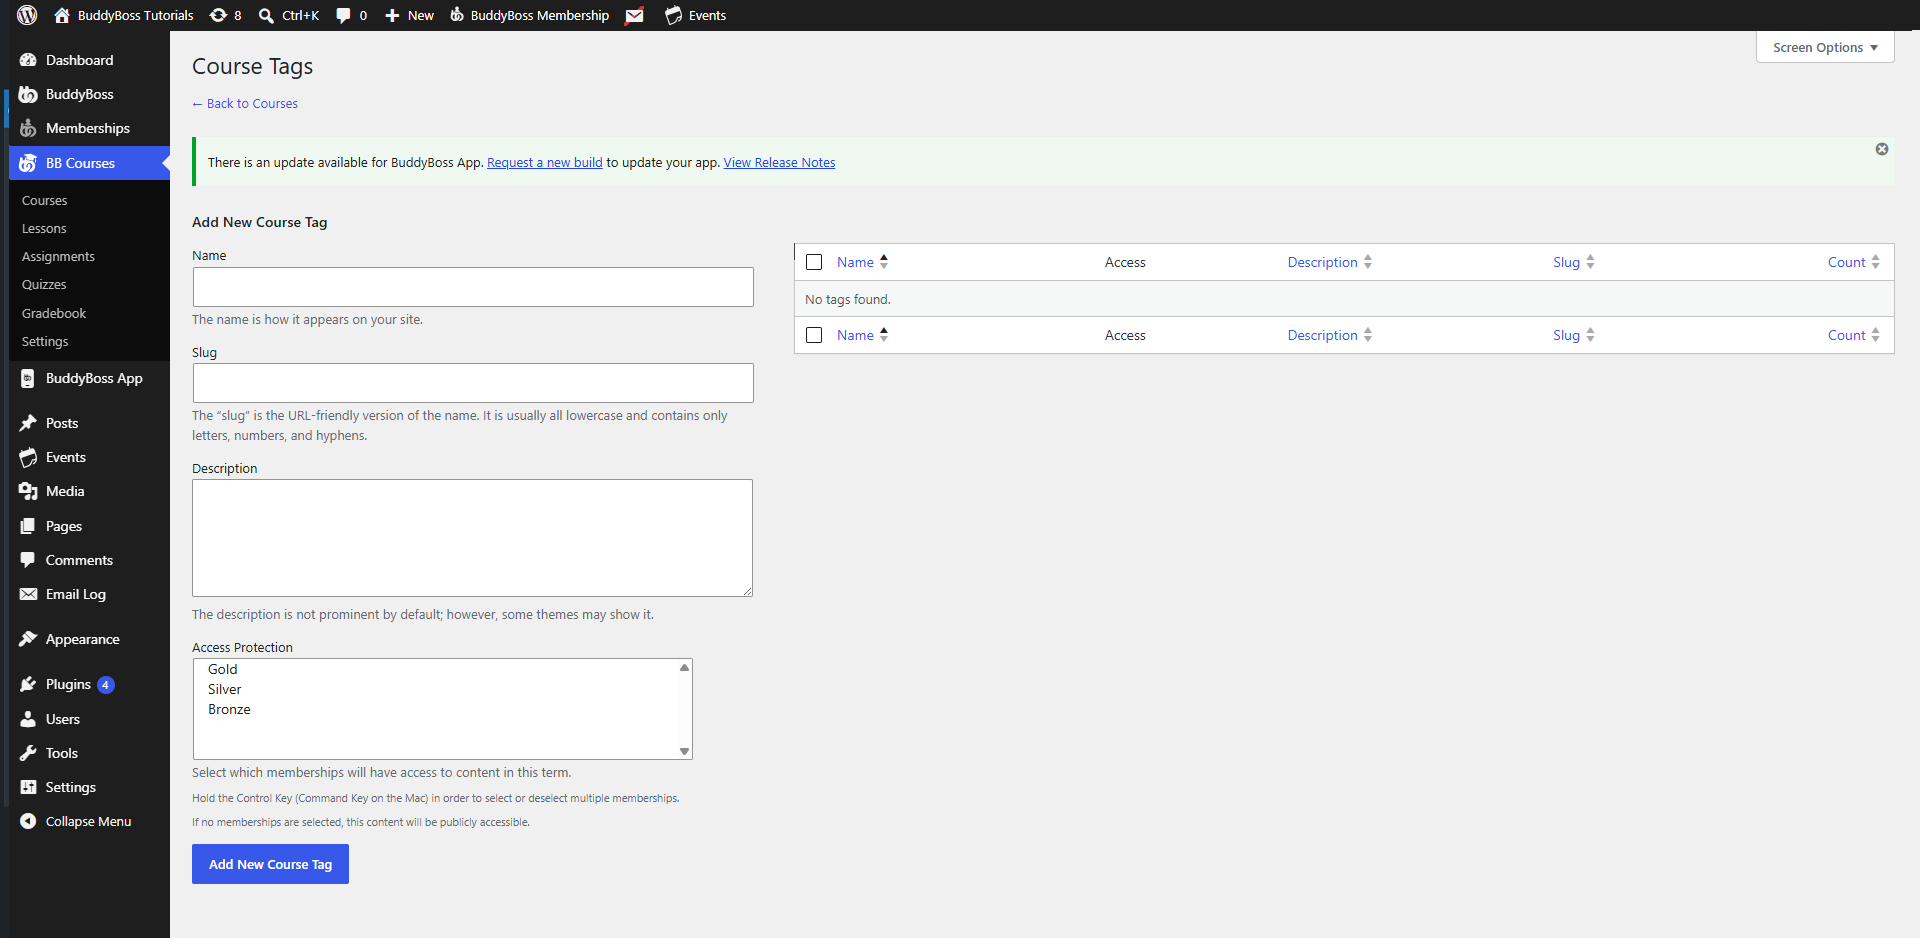
To access the course tags:
- Log in to your WordPress Admin Dashboard.
- Go to BB Courses > Courses.
- Click Tags.
Create a Course Tag
To add a new course tag:
- Enter a Name for the tag. This is the name displayed on your website.
- (Optional) Enter a Slug. The slug is the URL-friendly version of the tag name and typically contains only lowercase letters, numbers, and hyphens.
- (Optional) Add a Description for the tag.
- (Optional) Select one or more membership plans under Access Protection to restrict access to content associated with the tag.
- Click Add New Course Tag.
Note: If no memberships are selected under Access Protection, the tag and any associated content will be publicly accessible.
Access Protection
The Access Protection setting determines which membership plans can access content assigned to the course tag.
- Select one or more BuddyBoss Membership plans to restrict access.
- Hold the Ctrl key (Command on Mac) to select multiple memberships.
- Members must have one of the selected memberships to access content associated with the tag.
Manage Existing Course Tags
The Course Tags table displays all existing tags and includes the following information:
- Name – The tag name.
- Access – Displays which membership plans can access content assigned to the tag.
- Description – The tag description.
- Slug – The URL-friendly identifier used in the tag URL.
- Count – The number of courses currently using the tag.
From this table, you can edit, delete, or manage existing course tags as needed.