
The BuddyBoss Membership Subscriptions section allows administrators to view, create, and manage all membership subscriptions on their website. From this page, you can monitor recurring and non-recurring subscriptions, view subscription details, track payment information, and manually create subscriptions when needed.
This guide explains how to manage subscriptions and create a new subscription in BuddyBoss Membership.
View Subscriptions
To view all subscriptions:
- Log in to your WordPress Admin Dashboard.
- Go to Memberships > Subscriptions.
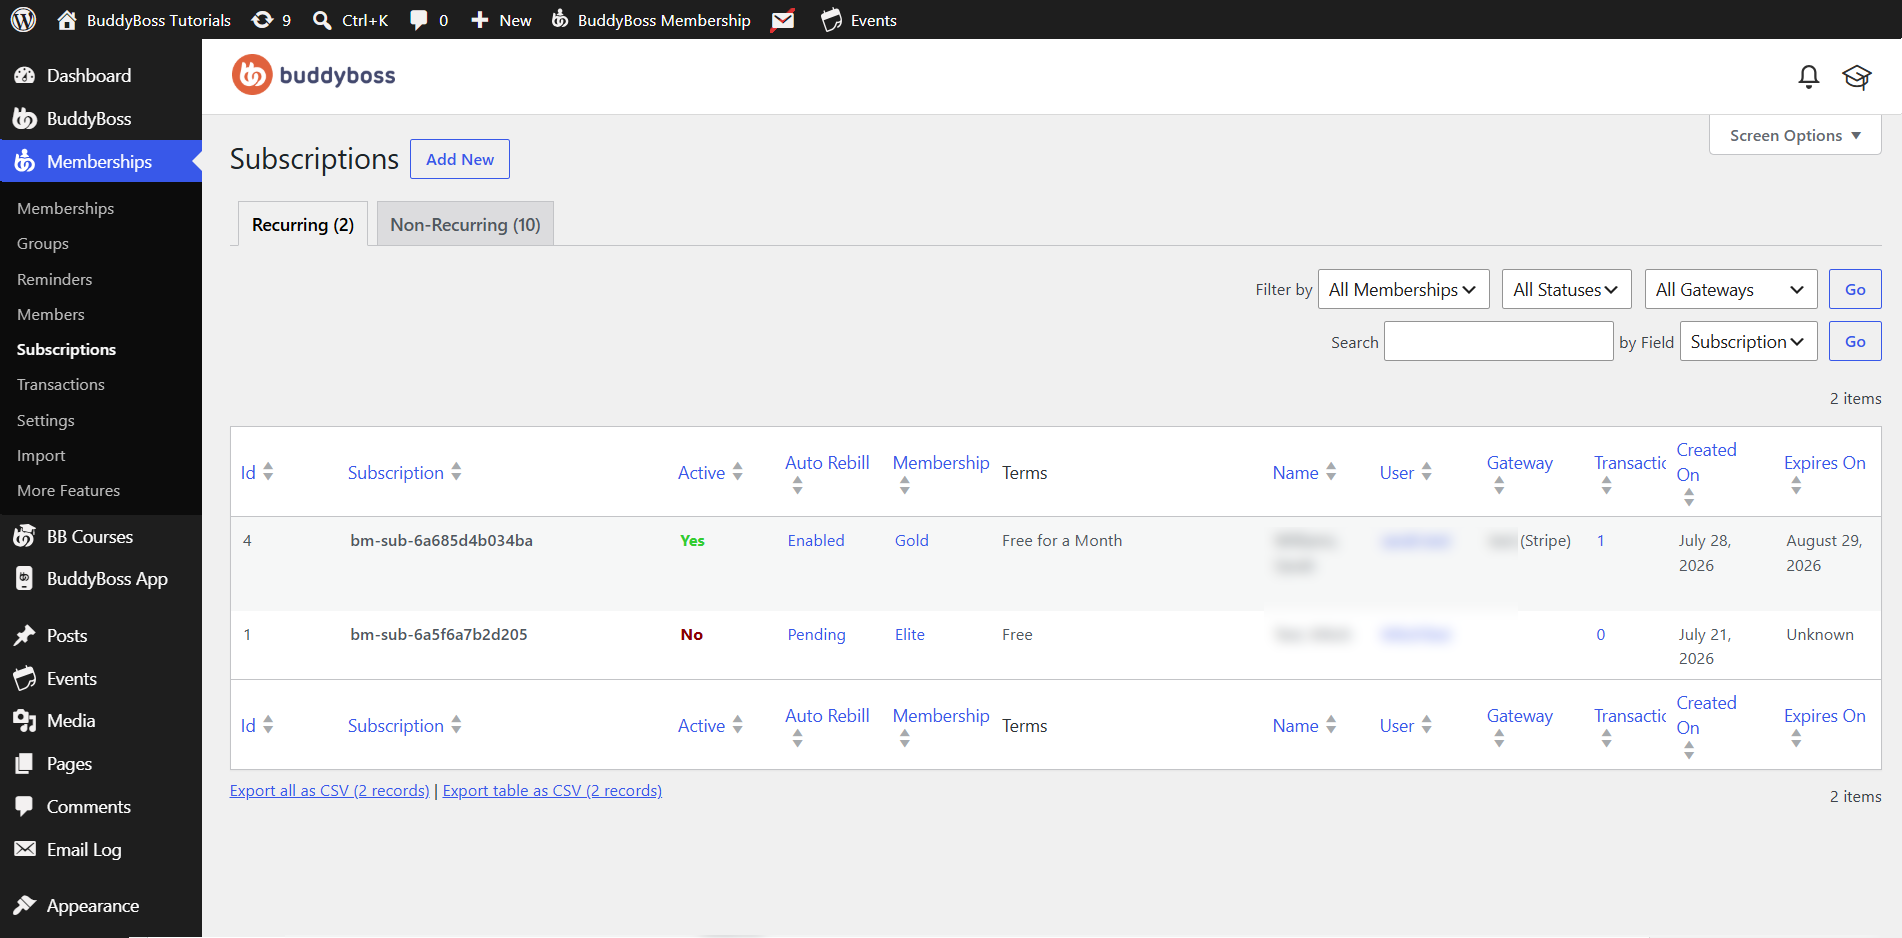
The subscription list displays key information for each subscription, including:
- Subscription Number
- Active status
- Auto Rebill status
- Assigned Membership
- Membership Terms
- Member Name
- Associated User
- Payment Gateway
- Number of Transactions
- Created Date
- Expiration Date
Subscriptions are separated into two tabs:
- Recurring – Displays subscriptions that automatically renew.
- Non-Recurring – Displays subscriptions that do not renew automatically.
You can also use the available filters and search tools to quickly locate subscriptions by membership, status, gateway, or subscription number.
Create a New Subscription
To manually create a subscription:
- Go to Memberships > Subscriptions.
- Click Add New.
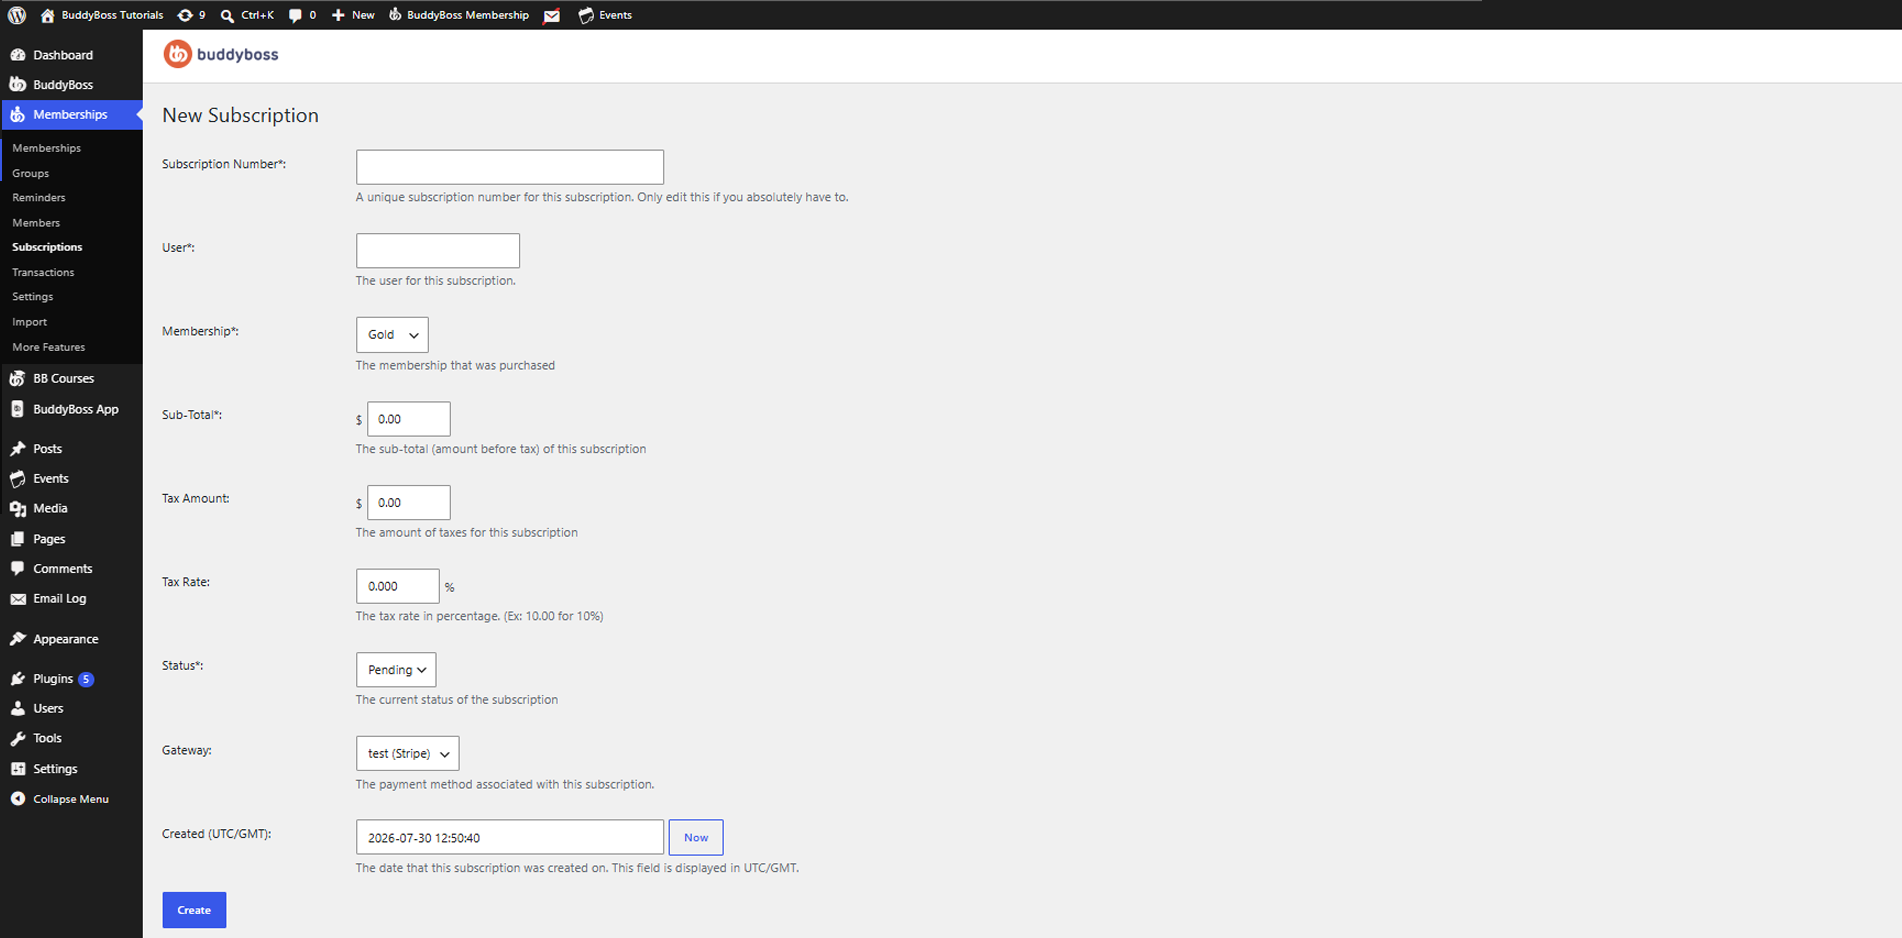
Complete the following fields.
Subscription Number – A unique identifier is automatically generated for each subscription. In most cases, you should leave this value unchanged unless you need to match an external subscription reference.
User – Select the WordPress user who will own the subscription. The selected user must already exist on your website.
Membership – Choose the membership to assign to the subscription.
Subtotal – Enter the subtotal amount before taxes. For free memberships, leave the value as 0.00.
Tax Amount – Enter the total tax amount for the subscription, if applicable.
Tax Rate – Specify the tax percentage. If taxes are not applicable, leave the value at 0.000.
For example:
- 10.00 represents a 10% tax rate.
Status – The Status field determines the current state of the subscription and how it behaves.
Select one of the following statuses:
- Enabled – The subscription is active and the member has access to the assigned membership. If the subscription is recurring, it will continue to renew according to its billing schedule.
- Pending – The subscription has been created but is awaiting activation. This status is typically used while waiting for payment confirmation or before the subscription becomes active.
- Paused – The subscription is temporarily suspended. Automatic renewals are paused until the subscription is re-enabled. Depending on your site’s configuration, member access may also be affected during this period.
- Stopped – The subscription has been permanently canceled or terminated. It will no longer renew automatically, and the member will not receive future subscription renewals unless a new subscription is created or the existing one is reactivated.
Choose the status that best reflects the current lifecycle of the subscription before saving or creating it.
Gateway – Select the payment gateway associated with the subscription.
For manually created subscriptions, you can leave this blank or select the appropriate gateway if applicable.
Created Date – Specify when the subscription was created.
You can:
- Enter a custom date and time.
- Click Now to automatically use the current date and time.
Create the Subscription
After reviewing the information, click Create.
The subscription will be created and associated with the selected user and membership.
Manage Existing Subscriptions
To manage an existing subscription:
- Go to Memberships > Subscriptions.
- Locate the subscription in the list.
- Hover over the subscription to display the available actions.
Depending on the subscription, you may see options such as:
- Add Txn – Manually add a transaction to the subscription.
- View Txns – View all transactions associated with the subscription.
- Edit – Update the subscription details.
- Delete – Permanently remove the subscription.
Add a Manual Transaction
If you need to record a payment manually:
- Go to Memberships > Subscriptions.
- Hover over the subscription.
- Click Add Txn.
- Enter the transaction details.
- Save the transaction.
This is useful for recording offline payments or manually updating a member’s payment history.
View Subscription Transactions
To review a subscription’s payment history:
- Go to Memberships > Subscriptions.
- Hover over the desired subscription.
- Click View Txns.
This page displays all transactions associated with the subscription, allowing you to review payment history and transaction statuses.
Edit a Subscription
To modify an existing subscription:
- Go to Memberships > Subscriptions.
- Hover over the subscription.
- Click Edit.
- Update the desired subscription information.
- Save your changes.
Delete a Subscription
To permanently remove a subscription:
- Go to Memberships > Subscriptions.
- Hover over the subscription.
- Click Delete.
- Confirm the deletion.
Note: Deleting a subscription removes the subscription record but does not delete the associated WordPress user account. Review existing transactions and membership assignments before removing a subscription.