
The BuddyBoss Membership Transactions section allows administrators to view, search, filter, and manually create membership transactions. Transactions serve as the payment history for your memberships, recording purchases, renewals, refunds, and manual payments.
This guide explains how to manage transactions and create a new transaction in BuddyBoss Membership.
View Transactions
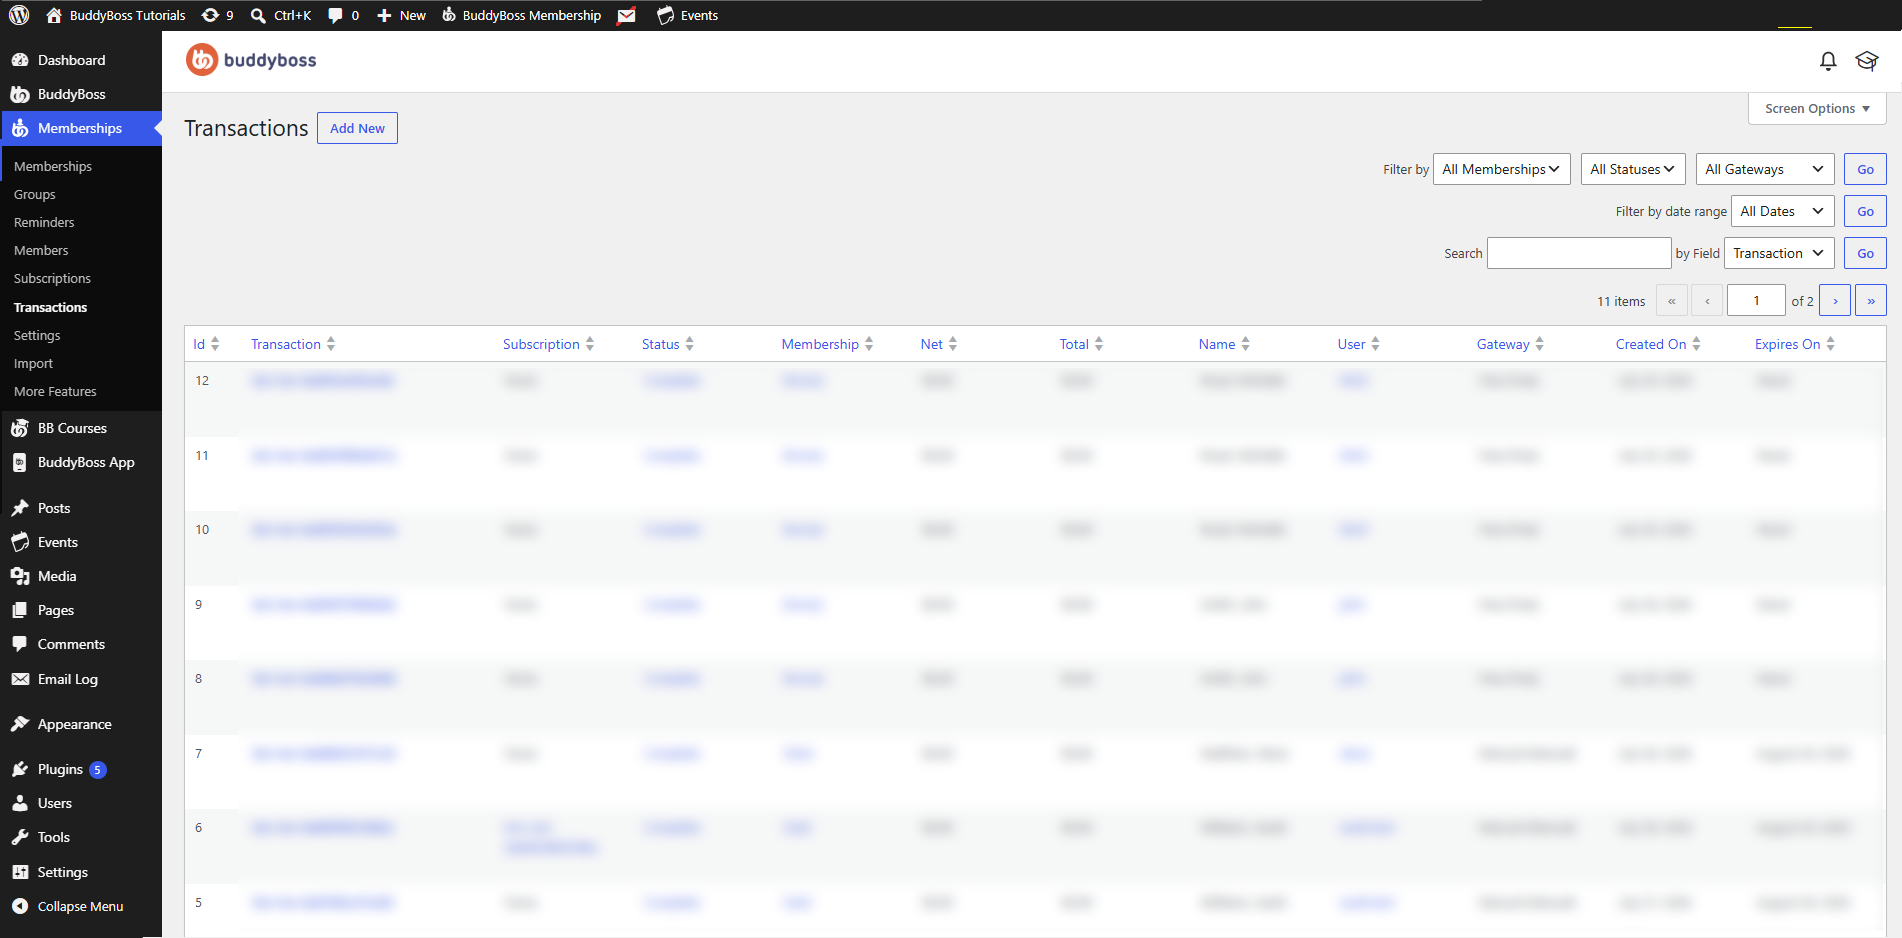
To view all transactions:
- Log in to your WordPress Admin Dashboard.
- Go to Memberships > Transactions.
Filter Transactions
You can narrow the transaction list using the available filters.
Membership Filter – Select a membership from the Filter by dropdown to display transactions for a specific membership.
Status Filter – Filter transactions by their current status.
Gateway Filter – Filter transactions by the payment gateway used to complete the transaction.
Available gateways depend on your website configuration and may include:
- Free
- Manual
- Additional payment gateways that are installed and enabled on your website.
Date Filter – Use the Filter by date range option to display transactions created within a specific time period.
Search Transactions
Use the search field to locate a specific transaction. You can search using different fields, including:
- Transaction Number
- Subscription Number
- Username
- User Email
- Transaction ID
- Any (Slow)
After selecting the search field, enter your search term and click Go.
Create a New Transaction
To manually create a transaction:
- Go to Memberships > Transactions.
- Click Add New.
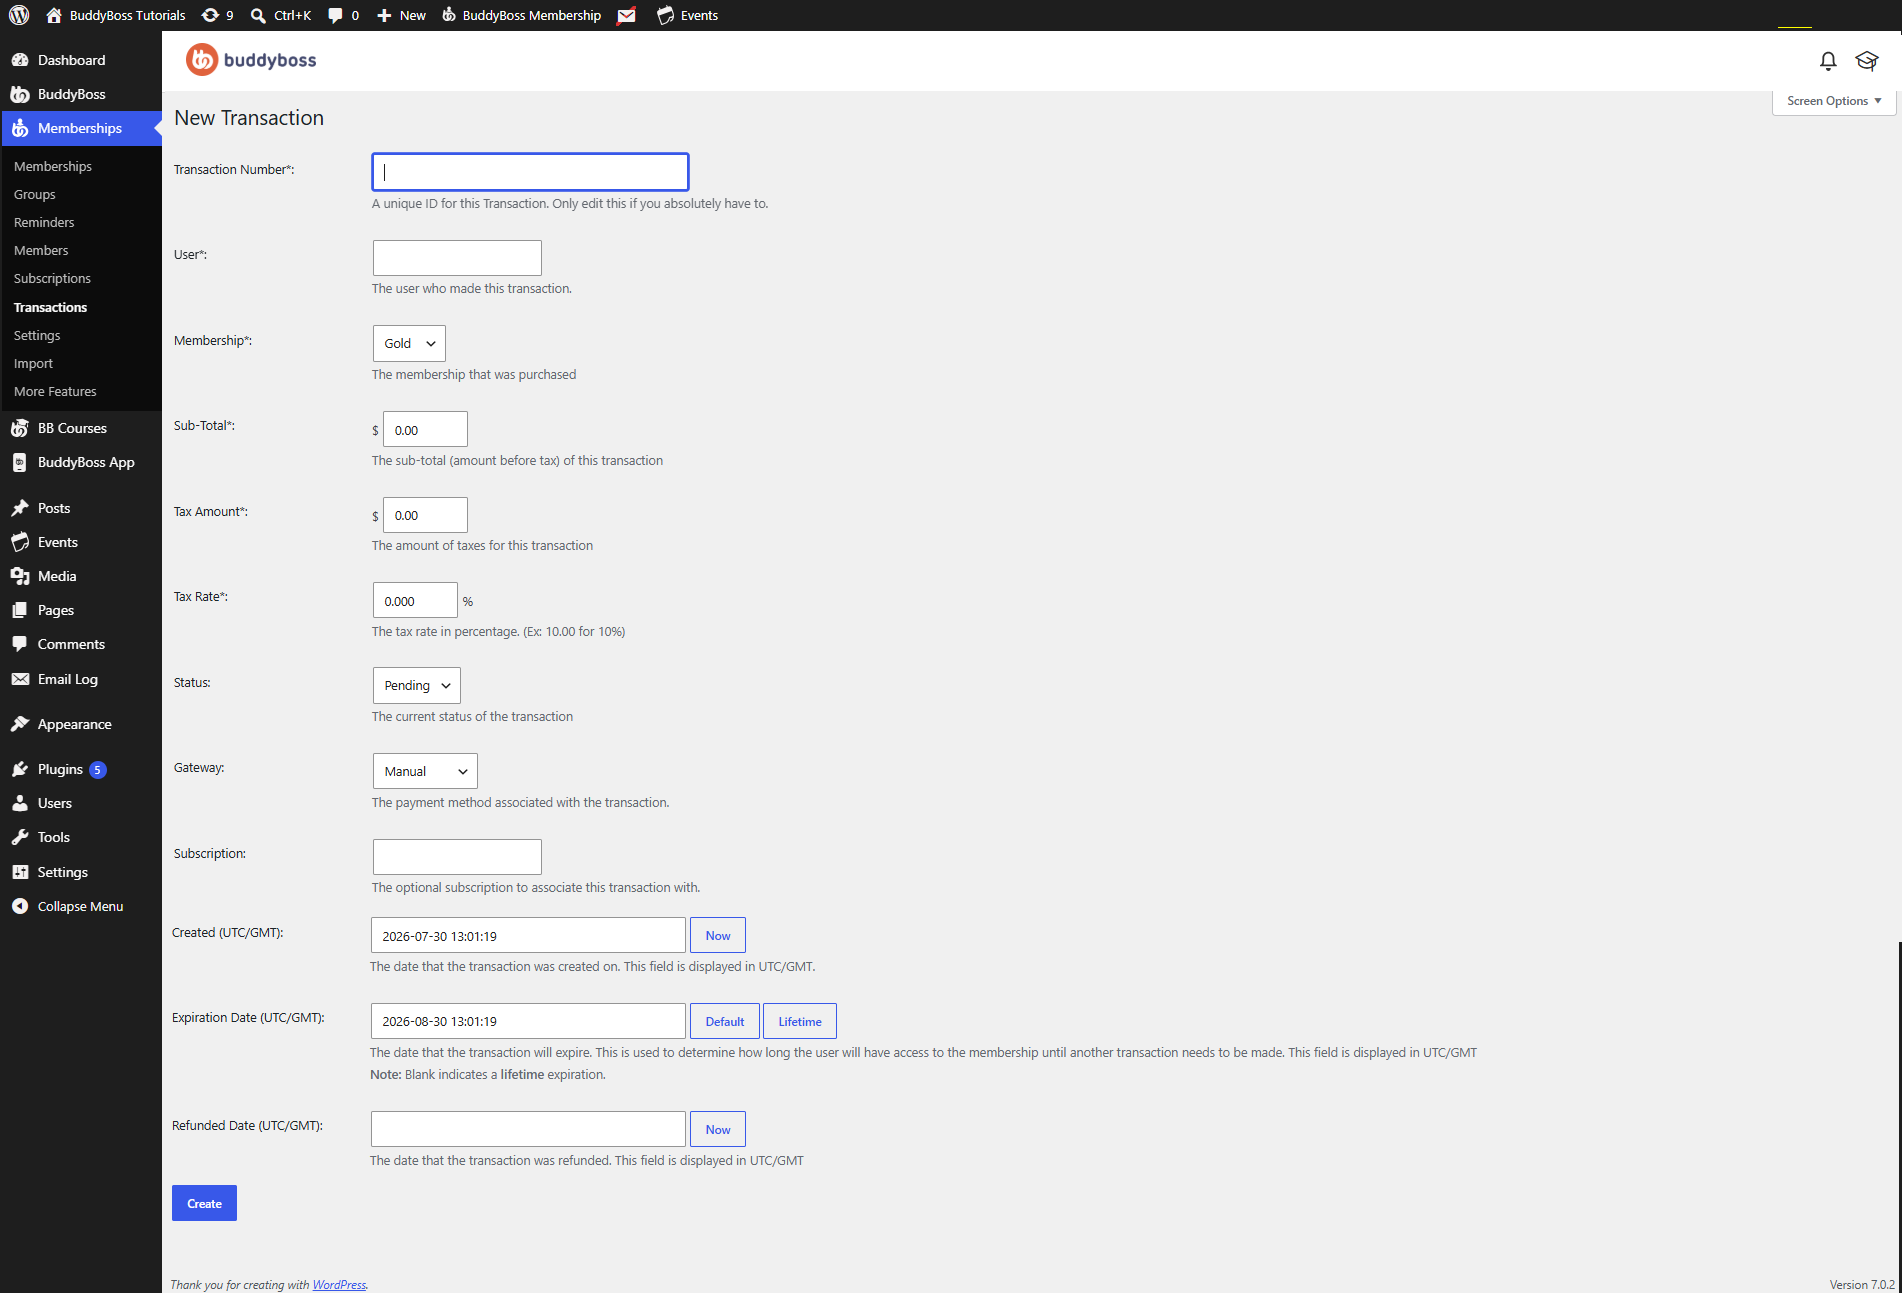
Complete the following information.
Transaction Number – A unique transaction number is automatically generated. Only modify this value if you need to match an external payment or accounting system.
User – Select the WordPress user associated with the transaction.
Membership – Choose the membership purchased through this transaction.
Subtotal – Enter the subtotal amount before taxes.For free memberships, leave the amount as 0.00.
Tax Amount – Enter the total tax amount for the transaction, if applicable.
Tax Rate – Specify the tax percentage. If taxes do not apply, leave the value at 0.000.
For example:
- 10.00 represents a 10% tax rate.
Status – Select the current transaction status.
Available statuses include:
- Complete – The payment has been successfully completed and membership access is granted.
- Pending – The payment has been created but is awaiting completion or confirmation.
- Refunded – The payment has been refunded to the member.
- Failed – The transaction could not be completed due to a payment failure or processing error. The member will not receive access unless a successful transaction is recorded.
Gateway – Select the payment method used for the transaction.
Subscription – Optionally, associate the transaction with an existing subscription. This is useful when recording payments for recurring memberships.
Created Date – Specify when the transaction was created.
You can:
- Enter a custom date and time.
- Click Now to use the current date and time.
Expiration Date – Specify when the transaction expires.
You can:
- Leave the field blank to create a lifetime transaction.
- Click Default to use the membership’s default expiration period.
- Click Lifetime to grant permanent access.
- Enter a custom expiration date.
This date determines how long the member retains access before another transaction is required.
Refunded Date – If the transaction has been refunded, specify when the refund occurred.
You can:
- Enter a custom date and time.
- Click Now to automatically use the current date and time.
Leave this field blank if the transaction has not been refunded.
Create the Transaction
After reviewing the transaction details, click Create.
The transaction will be saved and associated with the selected user, membership, and subscription (if specified).