
The option to restrict WordPress Posts with BuddyBoss Membership allows you to control which membership plans have access to specific post content. This is useful for creating members-only articles, announcements, resources, and other exclusive content on your website.
Once your memberships are created, you can use the Access Protection settings in the WordPress Post editor to select one or more memberships that should have access to the post.
Before You Start
Make sure you have already created at least one BuddyBoss Membership that you can use to protect your posts.
To quickly create a membership:
- Log in to your WordPress Admin Dashboard.
- Go to Memberships.
- Click Add New Membership.
- Enter a Membership Title.
- Configure the registration and membership options as needed.
- Under Membership Terms, configure the price, billing type, and access period.
- Click Publish.
Once the membership is created, it will become available in the Access Protection settings when configuring your WordPress Posts.
Open a WordPress Post
You can restrict an existing WordPress Post or configure access while creating a new one.
To edit an existing post:
- Go to WordPress Dashboard > Posts.
- Locate the post you want to protect.
- Click Edit.
To create a new post:
- Go to WordPress Dashboard > Posts > Add New Post.
- Enter the post title.
- Add your post content.
- Configure the featured image, categories, and other post settings as needed.
Locate the Access Protection Setting
The BuddyBoss Membership access settings are available within the Meta Boxes area of the WordPress Post editor.
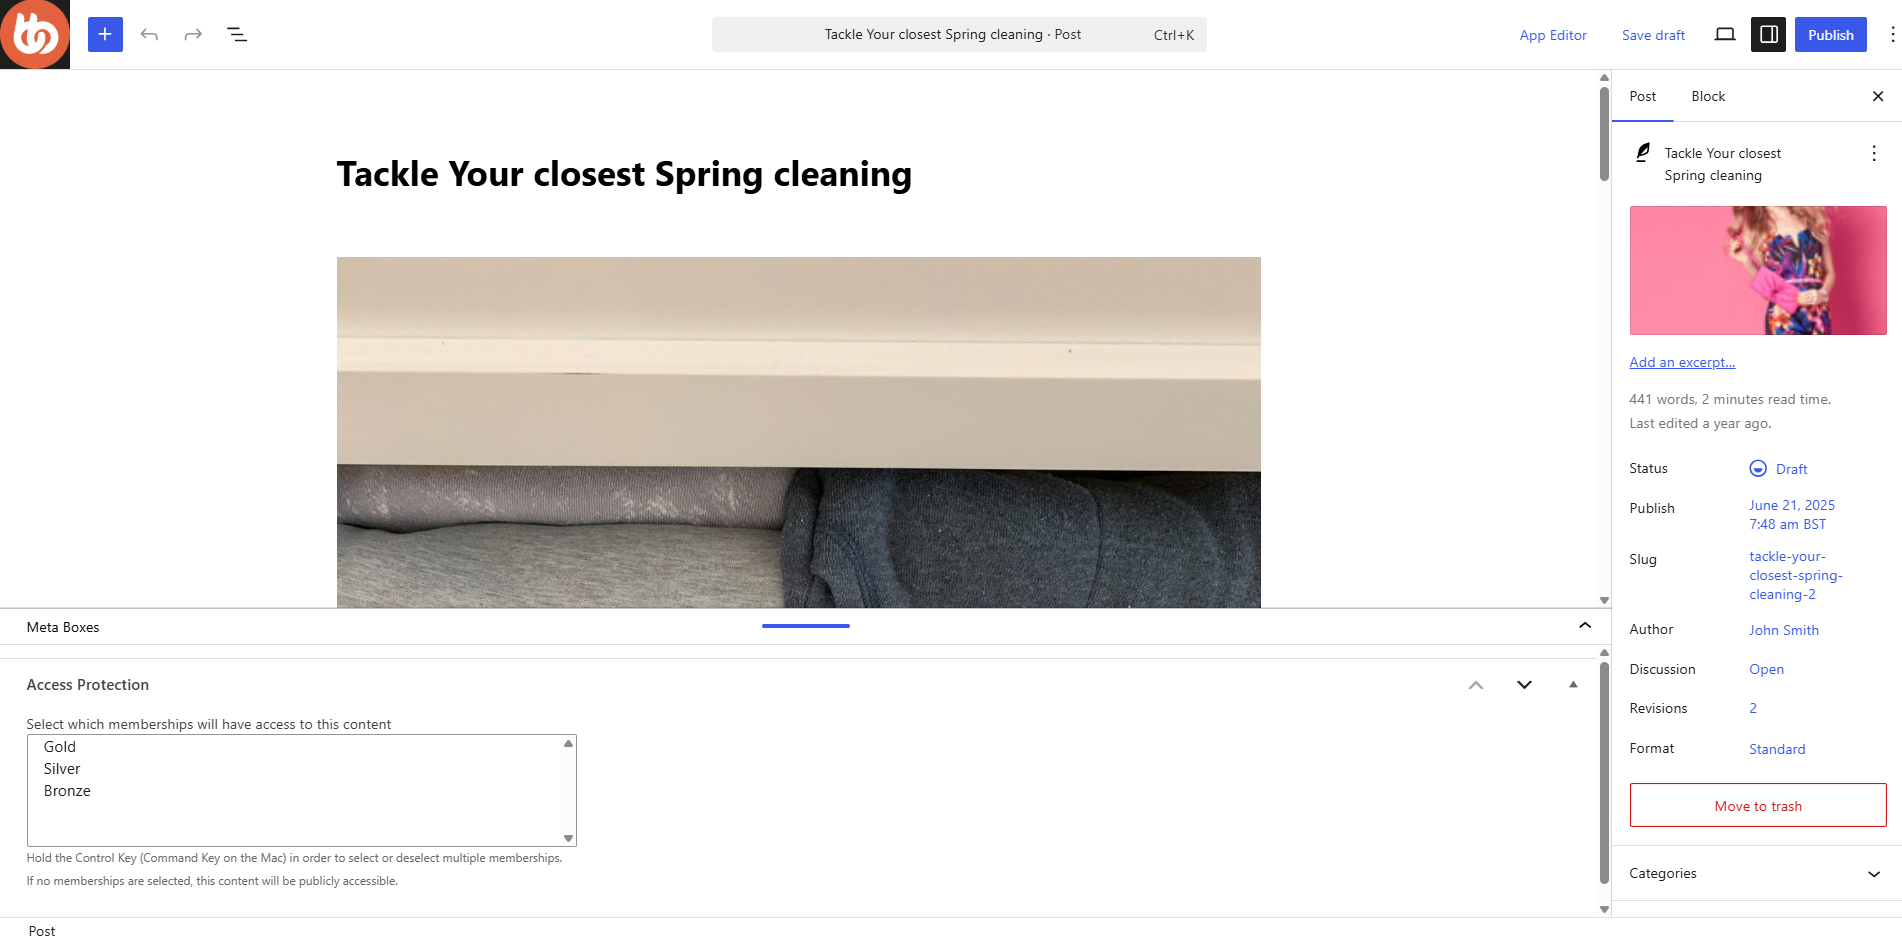
- Scroll toward the bottom of the Post editor.
- Locate Meta Boxes.
- Expand Meta Boxes if the section is collapsed.
- Locate the Access Protection section.
- Find Select which memberships will have access to this content.
The membership plans you have created will appear in the selection field. For example, your available memberships may include Gold, Silver, and Bronze.
Select Which Memberships Can Access the Post
Select the membership plan that should have access to the WordPress Post.
To provide access to more than one membership:
- Hold the Ctrl key on Windows or the Command key on Mac.
- Select each membership that should have access to the post.
- Continue holding the key if you need to select or deselect additional memberships.
For example, you can select Gold and Silver if members on either of those plans should be able to access the post.
Publish or Update the Post
Once you have configured the Access Protection settings:
- Review the memberships selected under Access Protection.
- Complete any remaining post settings.
- Click Publish if you are creating a new post.
- Click Save or Update if you are editing an existing post.
The WordPress Post will now use the access rules configured through BuddyBoss Membership.