












You can restrict BuddyBoss Courses with BuddyBoss Membership to control which membership plans can access specific courses on your website. This is useful for offering members-only courses, premium learning materials, exclusive training programs, and other educational content intended for specific membership levels.
Once your memberships are created, you can use the Access Protection settings in the BuddyBoss Course editor to select one or more memberships that should have access to a course.
Before You Start
Make sure you have already created at least one BuddyBoss Membership that you can assign to a course.
To quickly create a membership:
- Log in to your WordPress Admin Dashboard.
- Go to Memberships.
- Click Add New Membership.
- Enter a Membership Title and configure the membership options.
- Under Membership Terms, configure the price, billing type, and access period as needed.
- Click Publish.
Once your membership has been created, you can use it to protect your BuddyBoss Courses.
Choose How to Price Your Courses
You can configure your course pricing based on how you want members to purchase and access your courses.
Use One Product for Multiple Courses
If you want to sell multiple courses at the same price, billing and access type, you can create one product and link it to all the courses you want to include.
For example, if you want members to access all your courses for $50 per month, you can use one product with that pricing and link all the applicable courses to it.
This setup is useful when you want to offer a course bundle or provide access to multiple courses under a single subscription or payment.
Use Separate Products for Individual Courses
If you want to charge different prices, and set different billing and access types for individual courses, you will need to create a separate product for each course.
Each product defines its own pricing details, including:
- Price – The amount charged for the course.
- Billing Type – Determines whether the membership is billed as a One-Time payment or on a Recurrent basis.
- Access – Determines how long members can access the course, such as Lifetime or Expire.
For example, if you offer three courses at different product terms, you would create three separate products and link each product to its corresponding course.
This allows you to manage different pricing arrangements for each course.
Note: Each product and its corresponding access rules must be configured individually. If you have many courses, this means creating multiple products and access rules.
Open a BuddyBoss Course
You can apply membership protection to an existing course or configure it while creating a new one.
To edit an existing course:
- Go to WordPress Dashboard > BB Courses > Courses.
- Locate the course you want to protect.
- Hover over the course title and click Edit.
To create a new course:
- Go to WordPress Dashboard > BB Courses > Courses.
- Click Add New Course.
- Enter the course title and add your course content.
- Configure the course as needed.
Locate the Access Protection Settings
The membership access settings are available in the Meta Boxes area of the BuddyBoss Course editor.
- Scroll toward the bottom of the Course editor.
- Expand Meta Boxes if the section is collapsed.
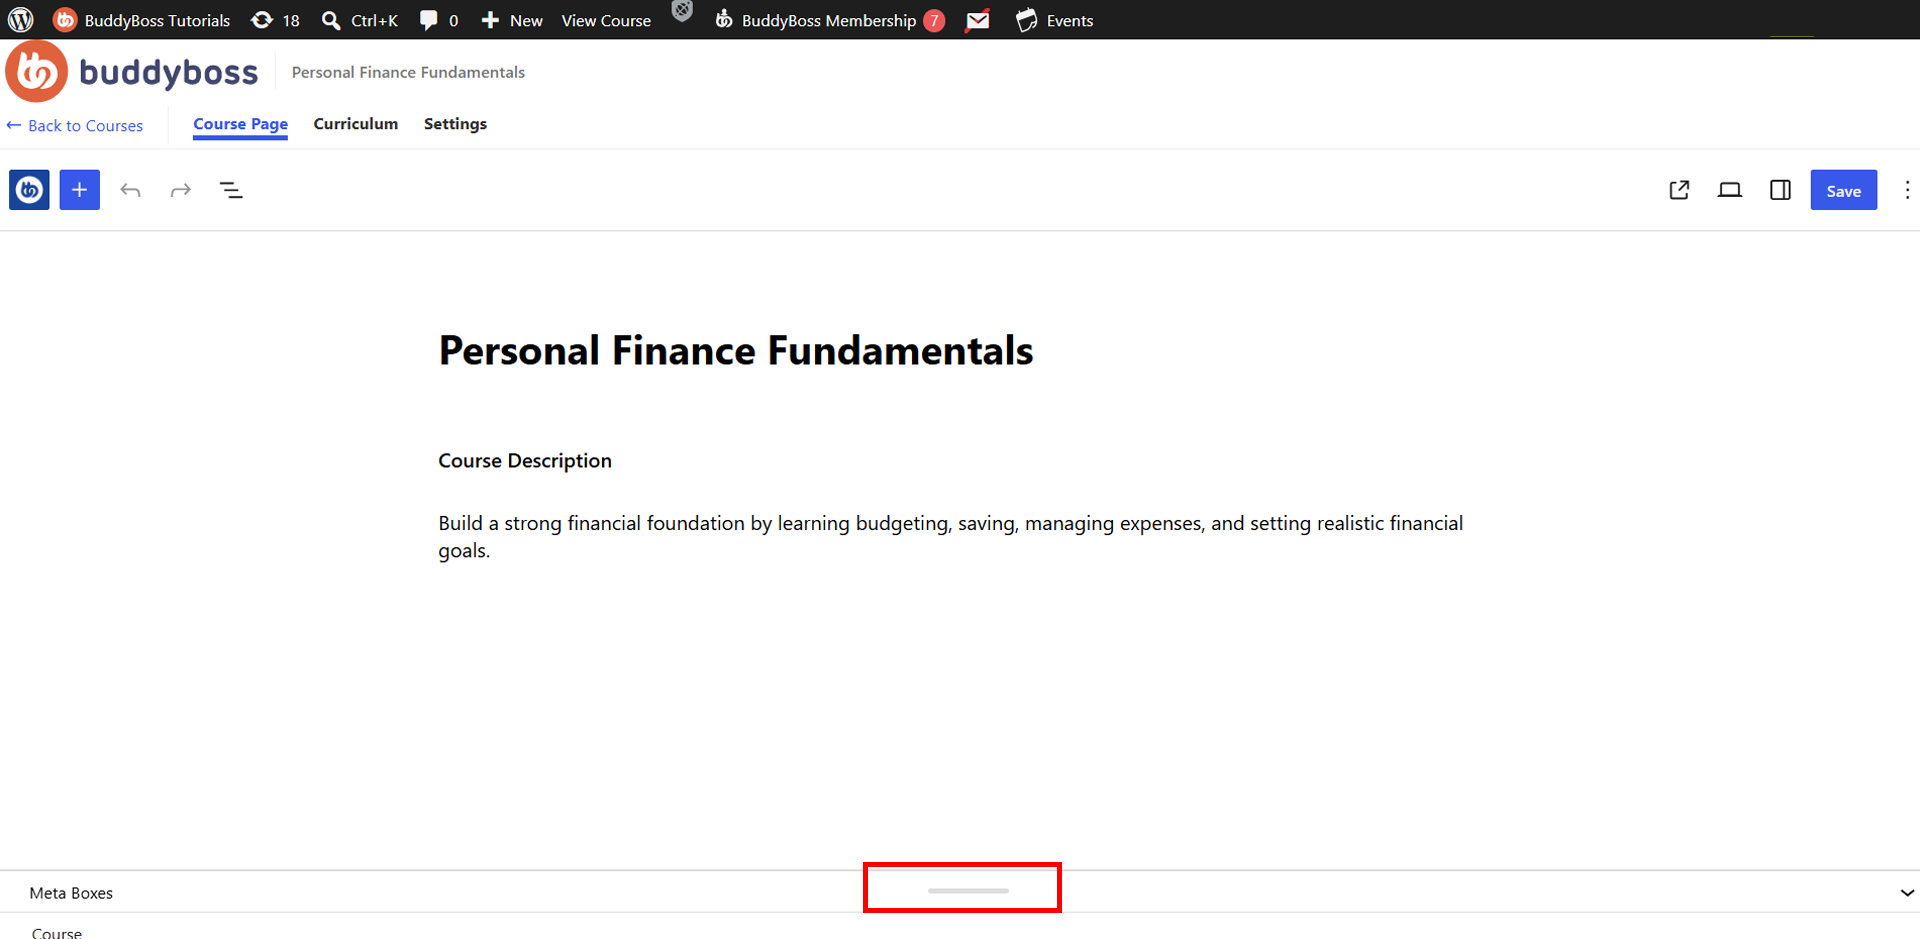
- Locate the Access Protection section.
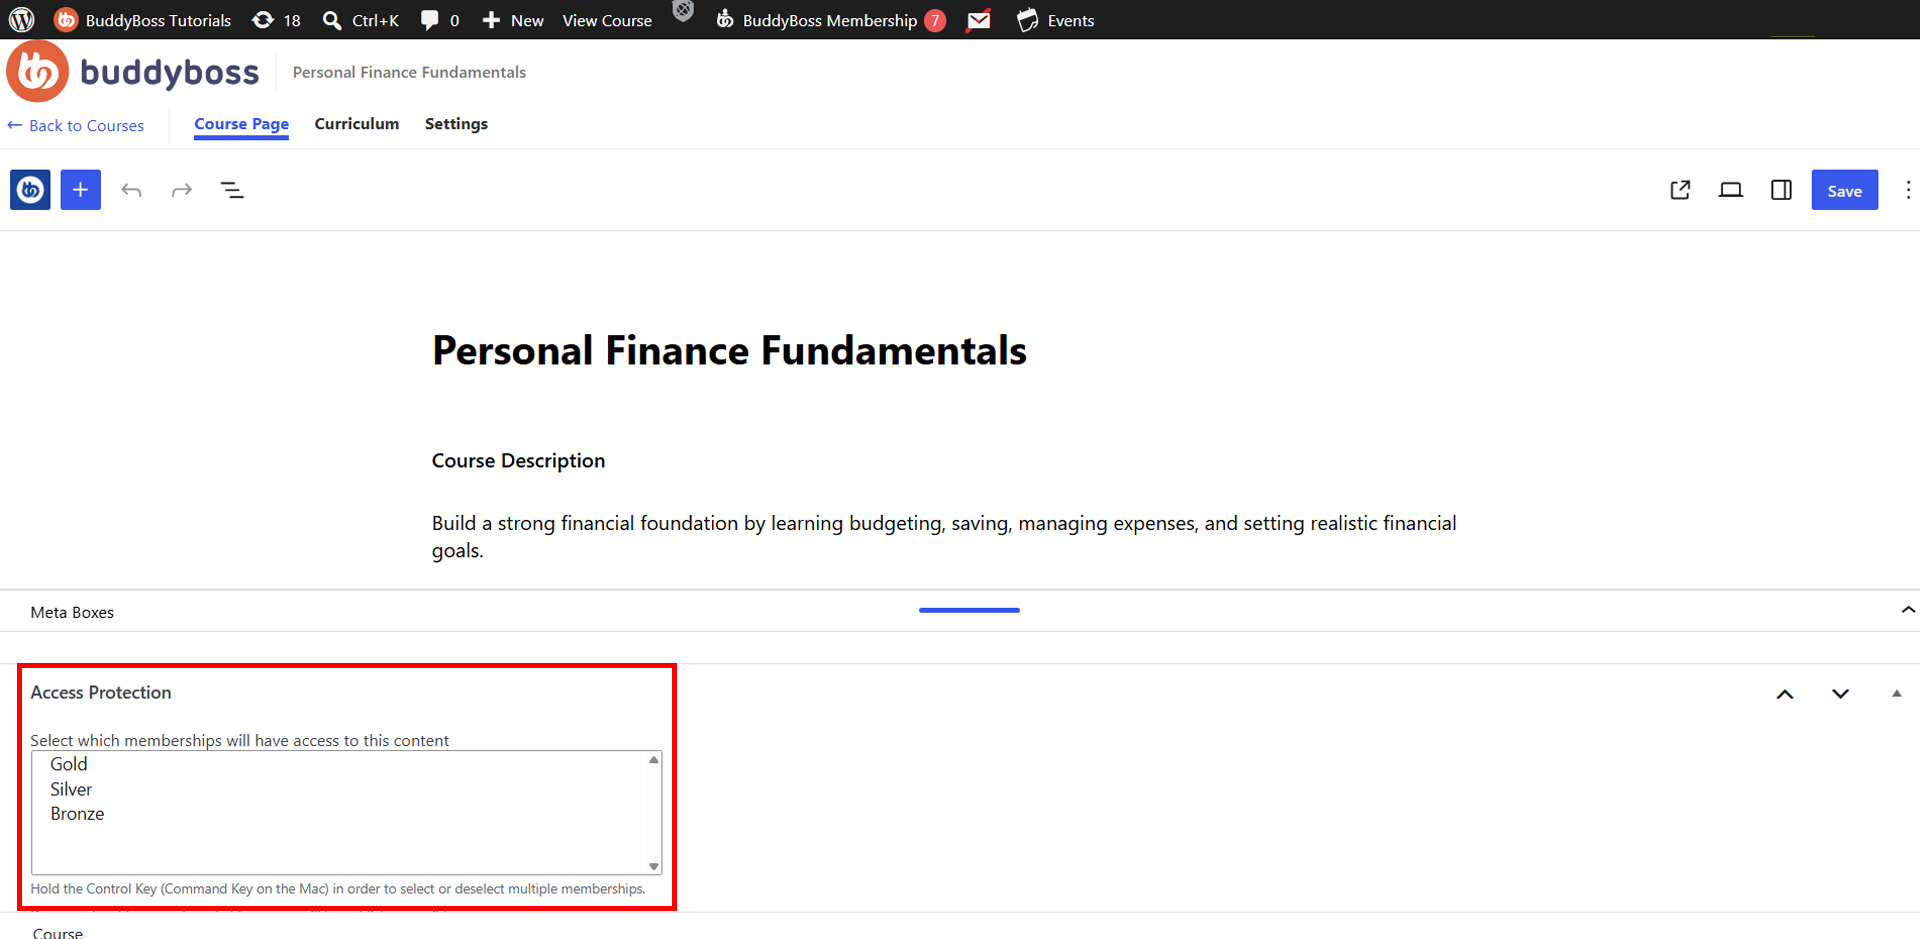
- Find the membership selection field under Select which memberships will have access to this content.
Your available BuddyBoss Membership plans will appear in this field.
Select Memberships for Access Protection
Select the membership that should have access to the course.
For example, if your website has Gold, Silver, and Bronze memberships, you can select the membership level that should be permitted to access the course.
To allow multiple memberships to access the same course, hold the Ctrl key on Windows or the Command key on Mac while selecting or deselecting multiple memberships.
Only members with one of the selected memberships will have access to the protected course.
Note: If no memberships are selected, the course will be publicly accessible.
Save the Course
Once you have configured Access Protection:
- Review the memberships selected under Access Protection.
- Click Save in the upper-right corner of the Course editor.
- Wait for the changes to be saved.
The BuddyBoss Course is now protected according to the BuddyBoss Membership access settings you selected.
Verify Course Access Settings
You can check the access settings from the Courses list in your WordPress Admin Dashboard.
- Go to WordPress Dashboard > BB Courses > Courses.
- Locate the course you updated.
- Check the Access column.
The column displays the course’s current access setting. Courses without membership restrictions appear as Public, while restricted courses display the membership plans that have access, such as Gold or Gold, Silver.
This allows you to quickly review which courses are publicly accessible and which are restricted to specific membership levels.