
The BuddyBoss Membership Pages Settings tab allows you to configure the pages used by BuddyBoss Membership and define how unauthorized visitors are handled when they attempt to access protected content.
Access BuddyBoss Membership Pages Settings
- Log in to your WordPress Admin Dashboard.
- Go to Memberships > Settings.
- Open the Pages tab.
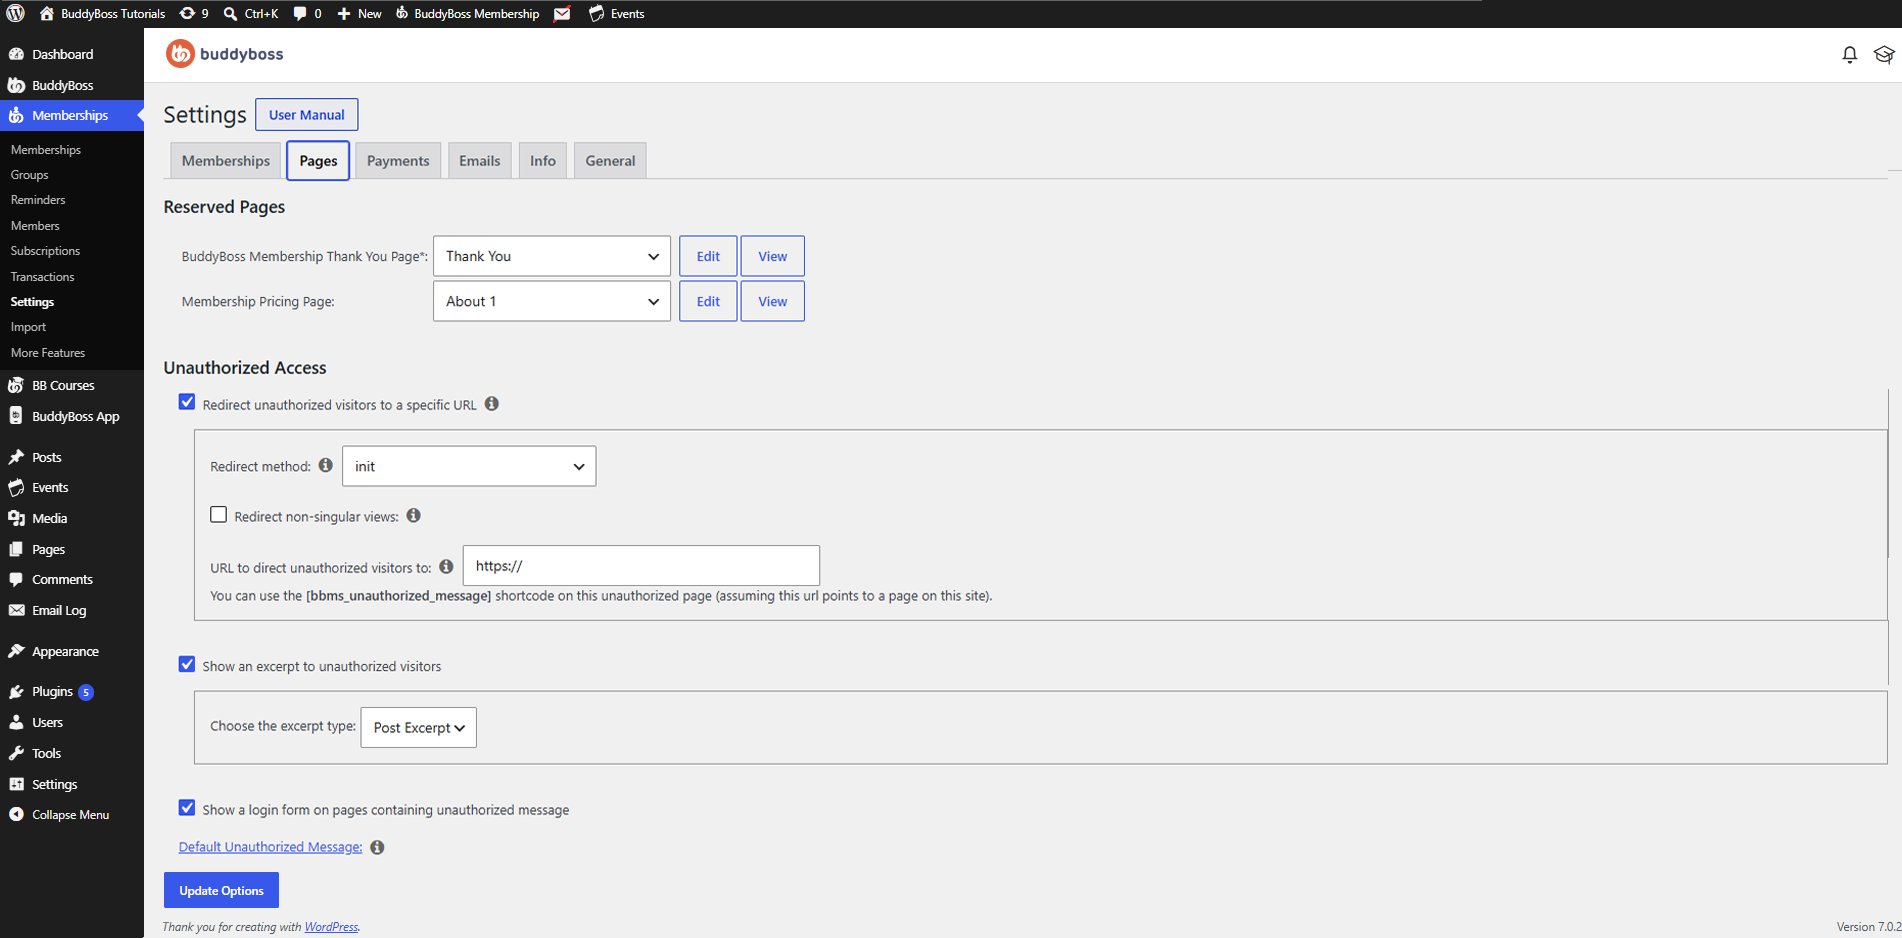
Reserved Pages
The Reserved Pages section lets you assign the pages used by the BuddyBoss Membership plugin.
BuddyBoss Membership Thank You Page – Choose the page members will see after successfully completing a membership registration or purchase.
Available options include:
- Auto Create New Page – BuddyBoss automatically creates a Thank You page.
- Select an existing page from the dropdown if you have already created your own page.
You can also use the following actions:
- Edit – Modify the selected page.
- View – Preview the page on your website.
Membership Pricing Page – Select the page that displays your available membership plans.
If you have not created one yet:
- Leave the dropdown set to None.
- Click Create Page.
You can also use the following actions:
- Edit – Modify the selected page.
- View – Preview the page on your website.
Unauthorized Access
The Unauthorized Access section controls what happens when visitors try to access content that requires a membership.
Redirect Unauthorized Visitors
Enable Redirect unauthorized visitors to a specific URL to automatically send users to another page instead of displaying restricted content.
Once enabled, additional options become available.
Redirect Method – Choose how visitors should be redirected.
- template_redirect (recommended) – Uses WordPress’s recommended redirect hook and provides the best compatibility with most themes and plugins. This is the recommended option for most websites.
- init – Performs the redirect earlier during the WordPress initialization process. This option may be useful for websites with custom themes or plugins that require an earlier redirect.
- send_headers – Performs the redirect when HTTP headers are being sent. This option can be used for advanced compatibility scenarios where other redirect methods are not suitable.
Note: Unless you have a specific compatibility requirement, it is recommended to use template_redirect. It provides the most reliable behavior for the majority of WordPress installations.
Redirect Non-Singular Views – Enable Redirect non-singular views if you also want archive pages, category pages, tag pages, or other listing pages containing protected content to redirect unauthorized visitors.
Redirect URL – Enter the URL where unauthorized visitors should be redirected.
Common destinations include:
- Membership Pricing page
- Login page
- Registration page
- Landing page
- Custom sales page
If the URL points to a page on your website, you can use the [bbms_unauthorized_message] shortcode to display the unauthorized message on that page.
Show an Excerpt
Enable Show an excerpt to unauthorized visitors if you want visitors to preview part of the protected content instead of hiding it completely.
When enabled, Available options include:
- More Tag – Displays the content that appears before the WordPress More tag (<!–more–>). This allows you to control exactly where the preview ends.
- Post Excerpt – Displays the WordPress post excerpt, if one has been created. This provides visitors with a summary of the content while encouraging them to become members for full access.
- Custom – Displays a preview based on a specified number of characters from the beginning of the content.
When Custom is selected, you can configure:
- Character Limit – Specify the number of characters to display before the protected content is hidden. For example, entering 100 displays the first 100 characters of the content to unauthorized visitors.
Display a Login Form
Enable Show a login form on pages containing unauthorized message to display a login form directly on restricted pages.
This allows existing members to quickly sign in without leaving the page.
Customize the Unauthorized Message
The Default Unauthorized Message editor allows you to customize the message displayed when users do not have permission to access protected content.
Using the WordPress editor, you can:
- Edit the default message.
- Format text using the editor toolbar.
- Insert images with Add Media.
- Add links, buttons, or other supported content.
The default message is:
You are unauthorized to view this page.
You can replace this with a custom message that better matches your website, such as directing visitors to log in or purchase a membership.
Save Your Changes
After configuring your page settings:
- Review your changes.
- Click Update Options.
Your Membership page settings and unauthorized access preferences will be applied immediately across your website.