
The BuddyBoss Membership Group allows you to organize multiple memberships into a single group, making it easier for users to compare and switch between available membership plans. Groups can also be used to create upgrade paths and display pricing options together on your website. This guide explains how to create a BuddyBoss Membership Group and configure its available options.
Create a New Membership Group
To create a new Membership Group:
- Log in to your WordPress Admin Dashboard.
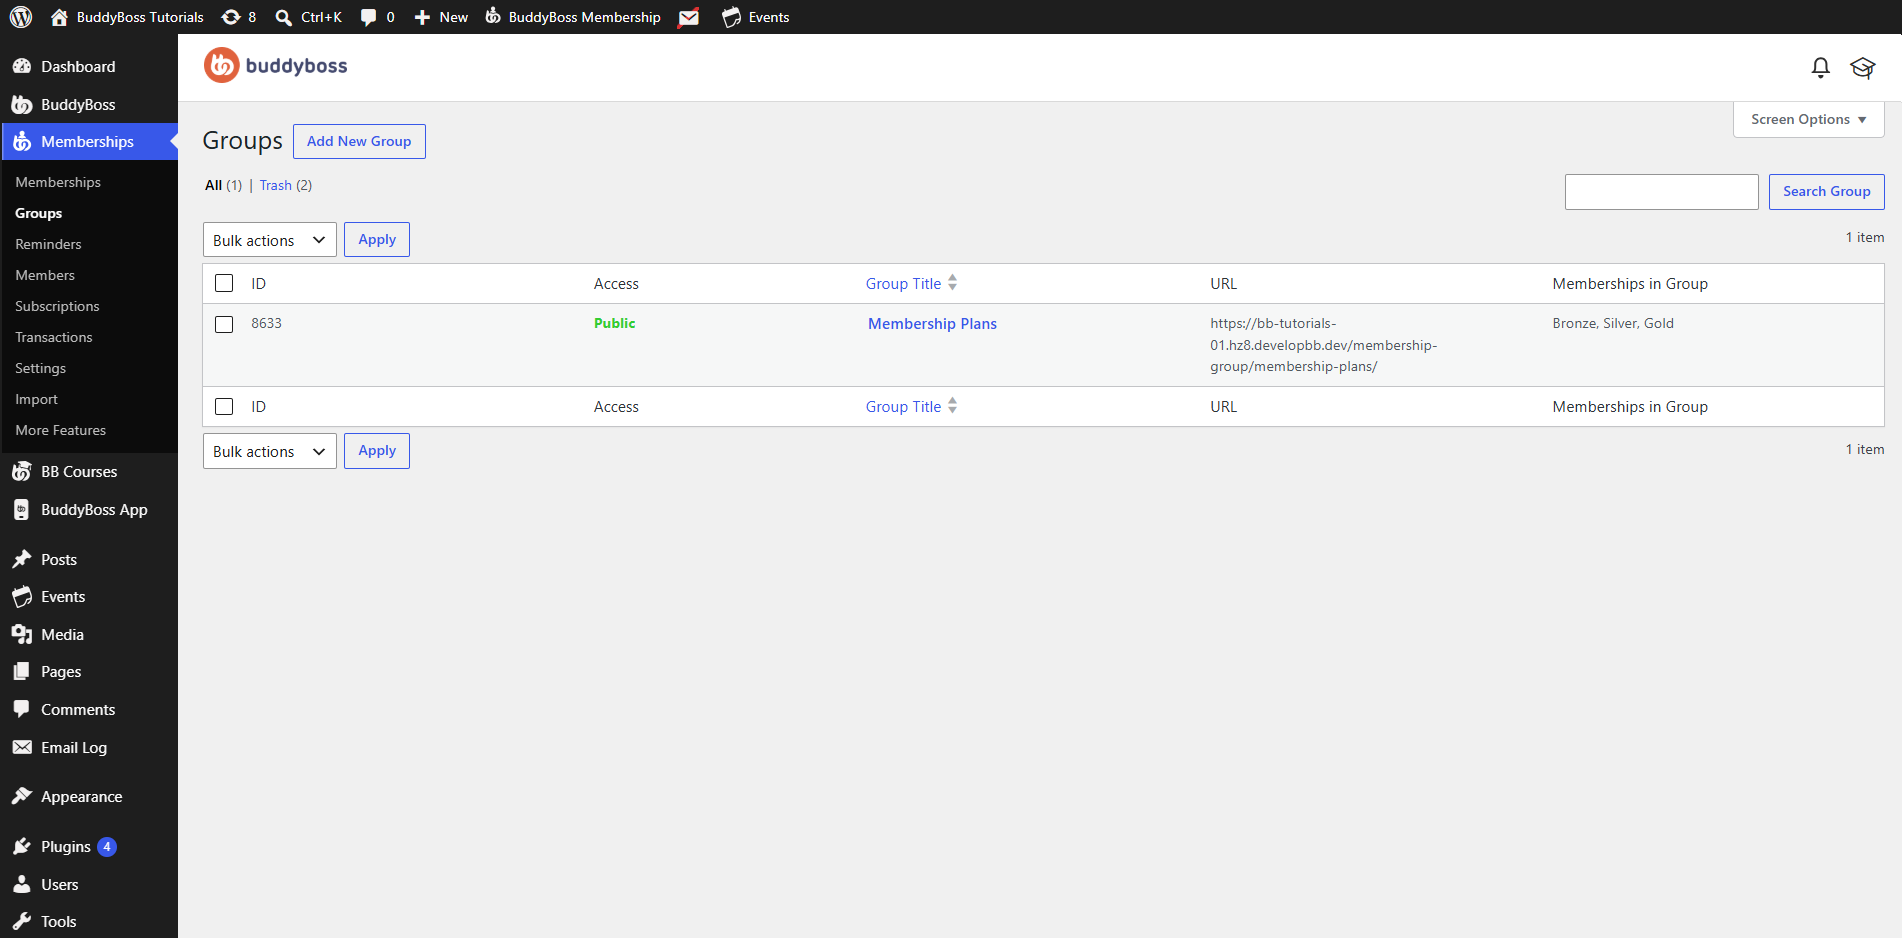
- Go to Memberships > Groups.
- Click Add New Group.
- Enter a title for the group.
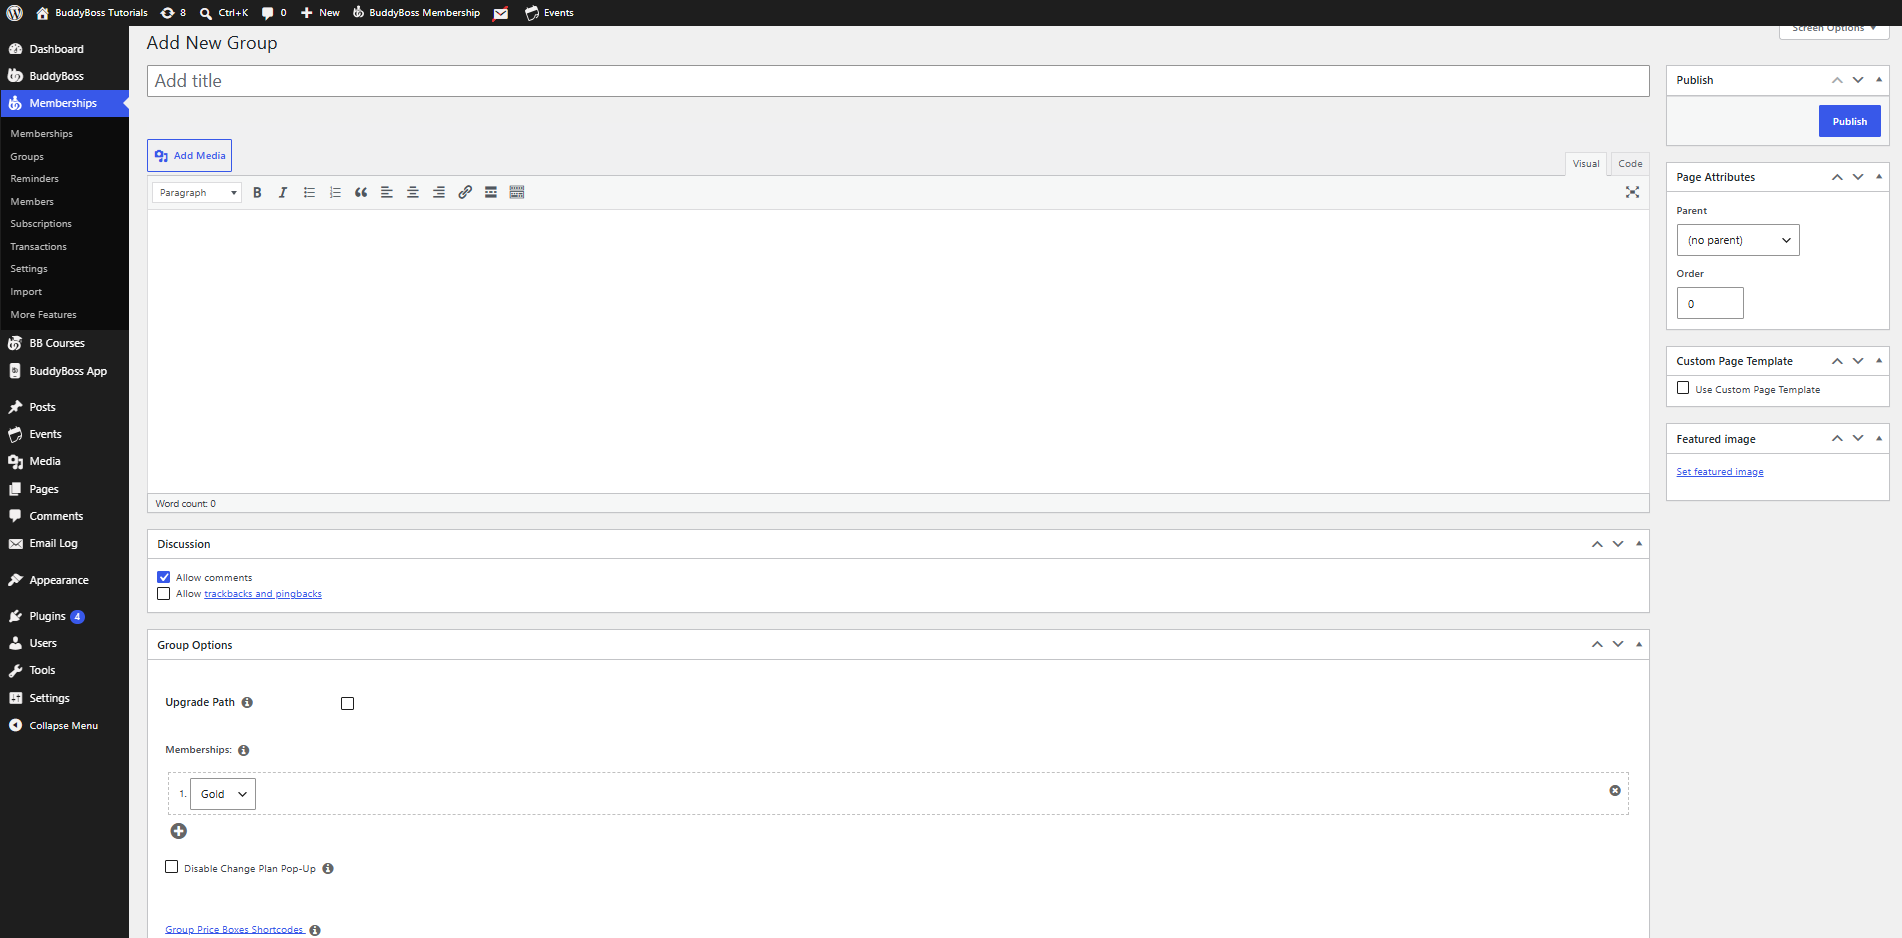
- Optionally, add a description using the content editor. This content can be used to explain the purpose of the group or provide additional information to users.
Discussion Settings
The Discussion panel controls whether visitors can interact with the Membership Group page.
Available options include:
- Allow comments – Allows visitors to leave comments on the page.
- Allow trackbacks and pingbacks – Enables notifications from other WordPress websites that link to the page.
For most membership websites, these options are typically disabled unless you want visitors to discuss the Membership Group page.
Configure Group Options
The Group Options panel allows you to organize multiple memberships into a membership group and configure how members can move between them.
Upgrade Path – Enable Upgrade Path if you want members to be subscribed to only one membership within the group at a time.
When enabled:
- Members can have only one active membership from the group.
- Memberships become part of an upgrade path, allowing members to move from one plan to another.
- Arrange the memberships in ascending order, with the highest-tier membership at the bottom and lower-tier memberships listed above it.
When disabled:
- Members can subscribe to multiple memberships within the same group simultaneously.
Memberships – Select the memberships that belong to the group.
To add memberships:
- Click the membership dropdown.
- Select an existing membership.
- Click the + button to add another membership.
- Repeat the process until all desired memberships have been added.
You can also remove a membership from the group by clicking the × icon beside it.
Disable Change Plan Pop-Up – Enable Disable Change Plan Pop-Up if you do not want users to see the confirmation dialog when changing from one membership plan to another.
Leaving this option disabled allows users to review their selection before changing plans.
Group Price Boxes Shortcode – The Group Price Boxes Shortcodes link provides the shortcode you can use to display the memberships in this group on a page or post.
This allows you to showcase multiple membership plans together as pricing boxes for visitors to compare.
Page Order
The Order field controls the display order of Membership Groups when they are listed on your website.
To change the order:
- Locate the Page Attributes panel.
- Enter a number in the Order field.
Membership Groups with lower numbers are typically displayed before those with higher numbers.
For example:
- 0 displays first.
- 1 displays after 0.
- 2 displays after 1.
This setting is useful when you have multiple Membership Groups and want to control the order in which they appear.
Custom Page Template
You can choose to display the Membership Group using a custom page layout.
To use a custom template:
- Locate the Custom Page Template panel.
- Enable Use Custom Page Template.
- Select one of the available templates from the dropdown list.
The available templates depend on your active BuddyBoss theme and any installed page templates.
Featured Image
A featured image provides a visual representation of your Membership Group and may appear on pricing pages, listings, or other areas of your website where featured images are supported.
To add a featured image:
- Locate the Featured Image panel.
- Click Set featured image.
- Upload a new image or choose one from the Media Library.
- Click Set featured image.
Using a featured image helps create a more visually engaging membership experience, especially when displaying Membership Groups on landing pages or promotional content.
Publish the Membership Group
After configuring the group:
- Review your settings.
- Click Publish.
The Membership Group is now available and can be used to organize memberships, create upgrade paths, and display grouped pricing options on your website.