
The BuddyBoss Membership Categories help you organize your membership plans into logical groups, making them easier to manage and locate within the WordPress dashboard. For websites with multiple membership offerings, categories provide a simple way to keep memberships organized. This guide explains how to manage Buddyboss Membership Categories
Create a New Membership Category
To create a new membership category:
- Log in to your WordPress Admin Dashboard.
- Go to Memberships.
- Click Categories at the top of the page.
On the Add New Category page, complete the following fields:
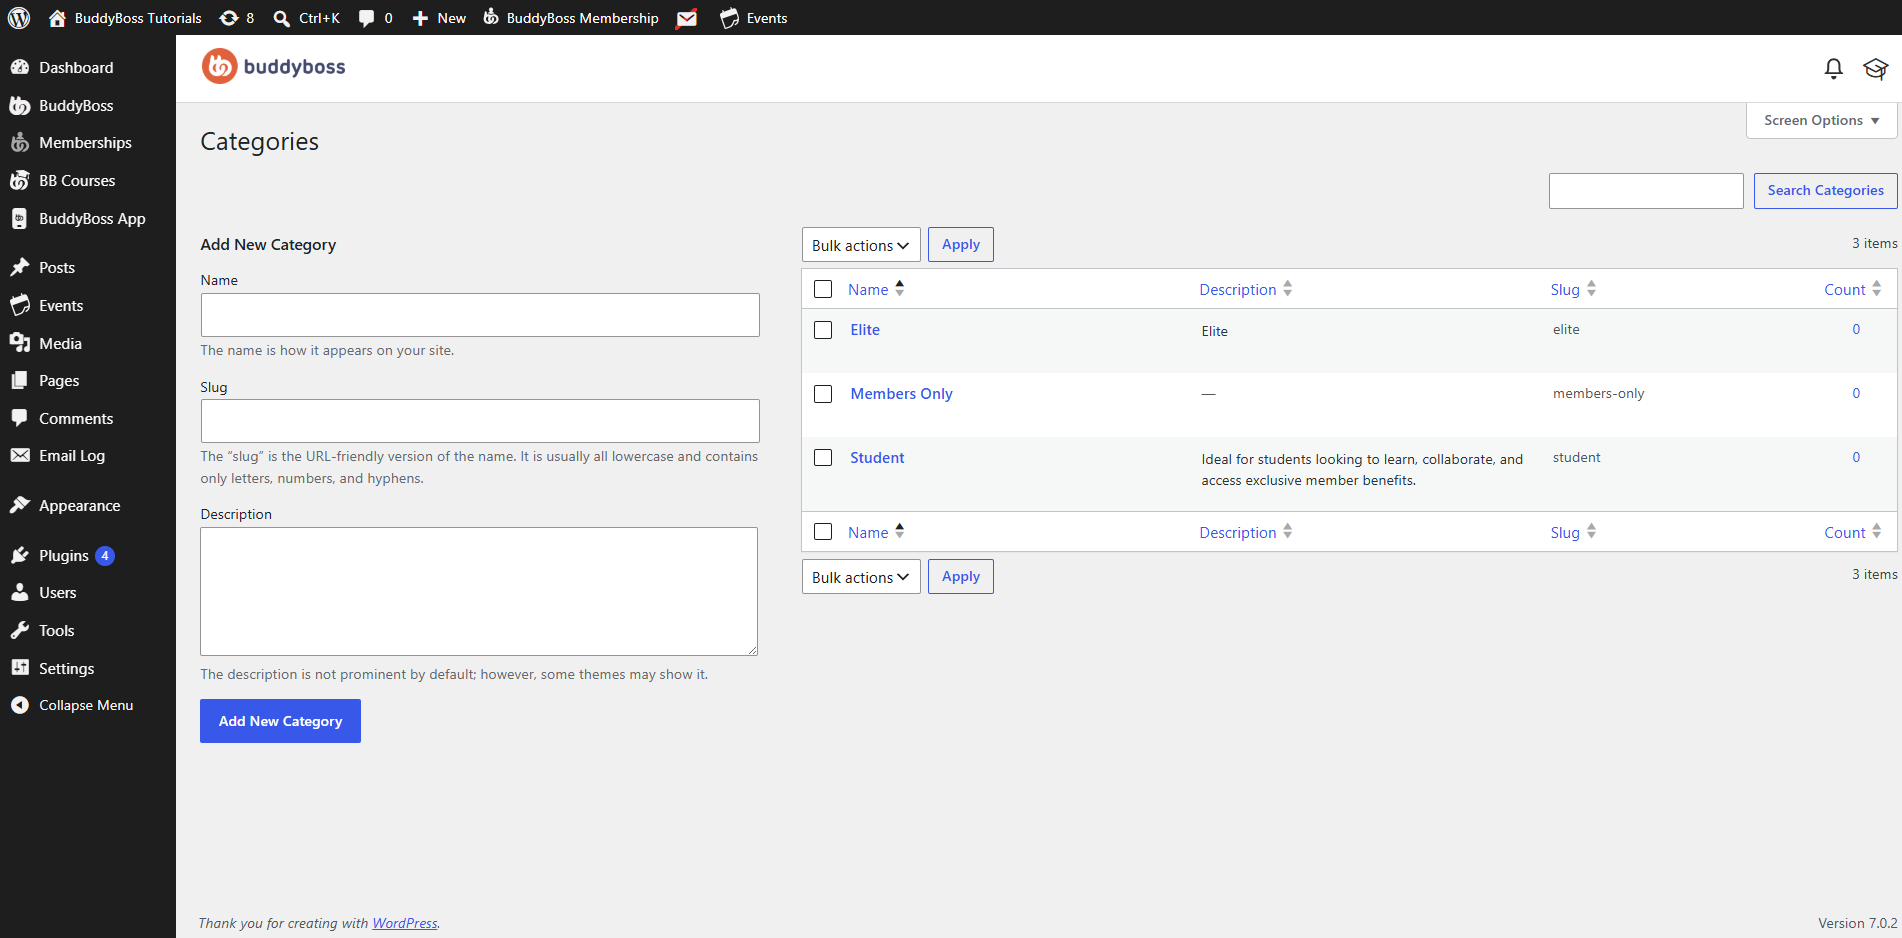
Name – Enter the name of the category. This is the name that will appear throughout your website and in the WordPress dashboard.
Slug – Enter a URL-friendly version of the category name. The slug is typically lowercase and may contain letters, numbers, and hyphens.
If left blank, WordPress automatically generates one based on the category name.
Description – Optionally, enter a description for the category. While descriptions are not displayed by default, some themes or custom templates may choose to display them.
- Click Add New Category.
The category will now appear in the category list and can be assigned to memberships.
Assign a Category to a Membership
After creating a category:
- Go to Memberships > Memberships.
- Create a new membership or edit an existing one.
- Locate the Categories panel.
- Select the category you want to assign.
- Update or publish the membership.
A membership can belong to one or multiple categories, depending on your site’s organization.
Manage Membership Categories
After creating categories, you can manage them from the Categories page.
Available actions include:
- Edit – Modify the category name, slug, or description.
- Quick Edit – Quickly update basic category information without opening the full editor.
- View – View memberships assigned to the category.
- Delete – Permanently remove the category.
Note: Deleting a category removes only the category itself. Any memberships assigned to that category will remain on your website.
Delete a Membership Category
To delete one or more categories:
Delete a Single Category
- Go to Memberships > Categories.
- Hover over the category you want to remove.
- Click Delete.
Delete Multiple Categories
- Select the checkbox next to each category you want to delete.
- Open the Bulk Actions dropdown.
- Select Delete.
- Click Apply.
The selected categories will be permanently removed.